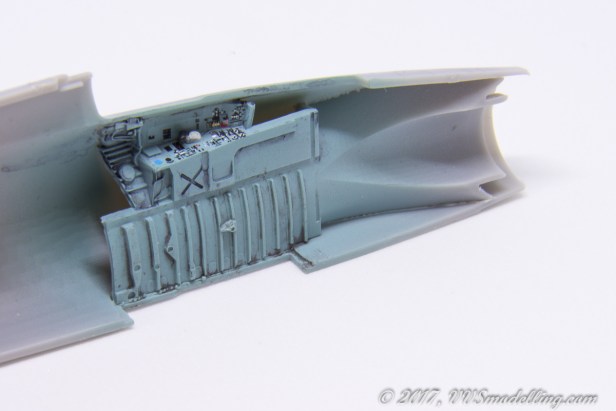
As I suspected adding a few colours and some weathering to the front wheel bay brought out all the details. You even get some decals for this area!
Another view of the front wheel well.
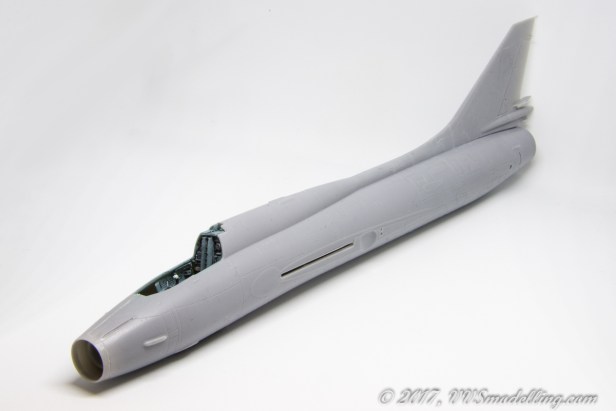
Combination of decals for the side panels and carefully painted details creates a very convincing cockpit right out of the box.
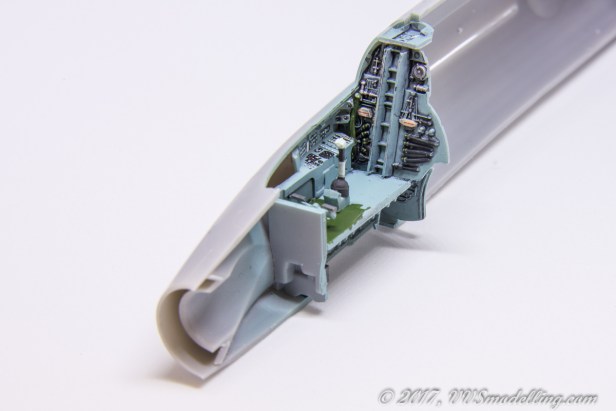
I am really sorry the beautiful details of the back wall will be mostly hidden by the ejection seat.
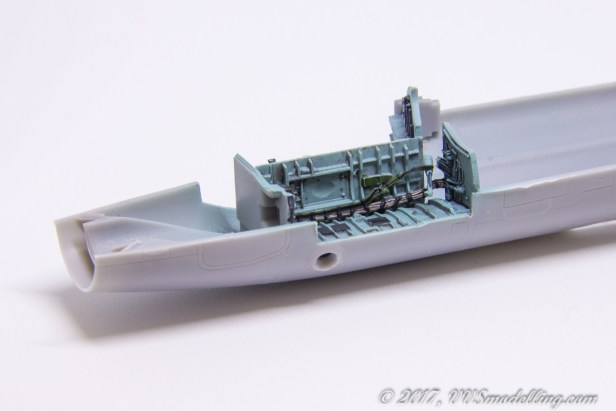
View of the left hand cockpit/wheel well. Modelsvit, unlike so many bigger producers, didn’t forget to include throttle lever.
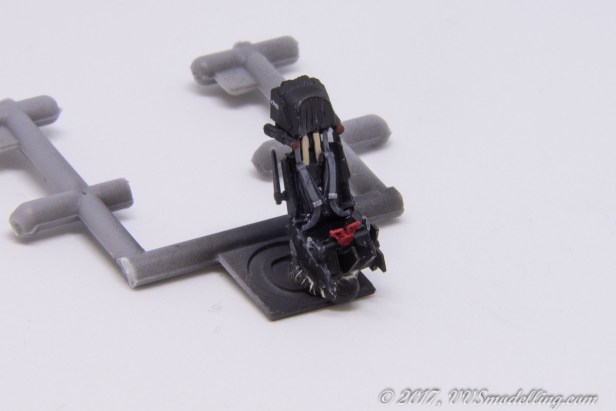
23-piece K-36D ejection seat. I am really sorry that they are painted black with black leather and details get hidden away.
Some drybrushing with Gray brought out details without exaggerating the effect.
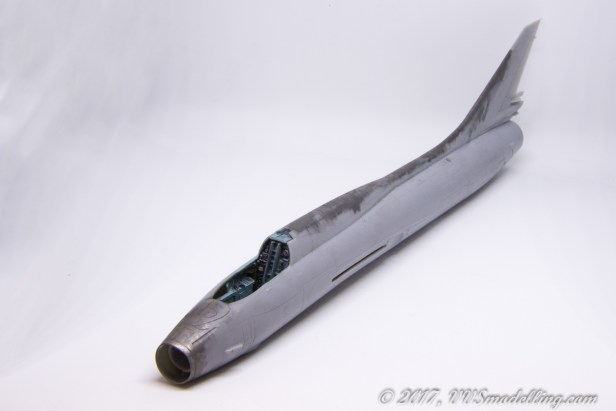
Fuselage went together rather fine – I only had some problems on the join line in front of the cockpit. It is possible that was of my own doing though.
Main wheel well sidewalls have two functions – apart from the obvious details and the depth of the well, they also serve as spacers for the swing wing.
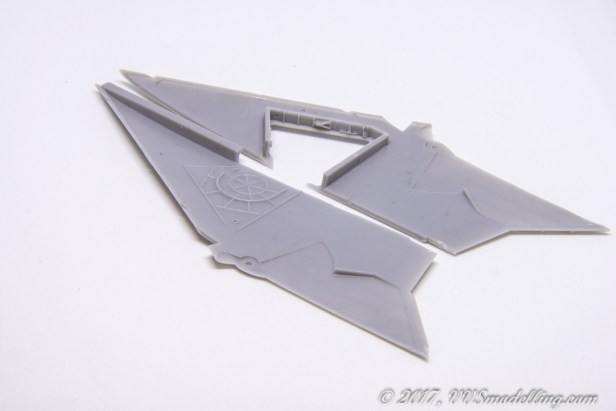
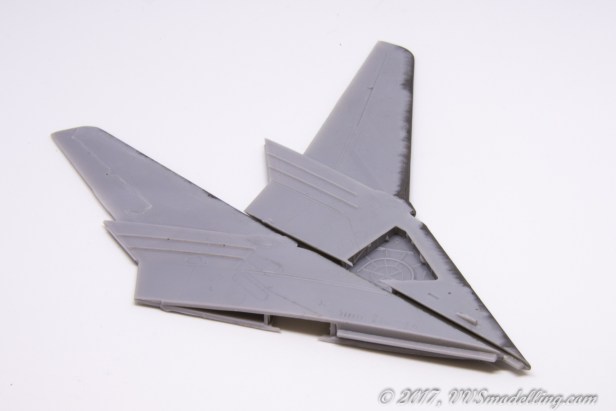
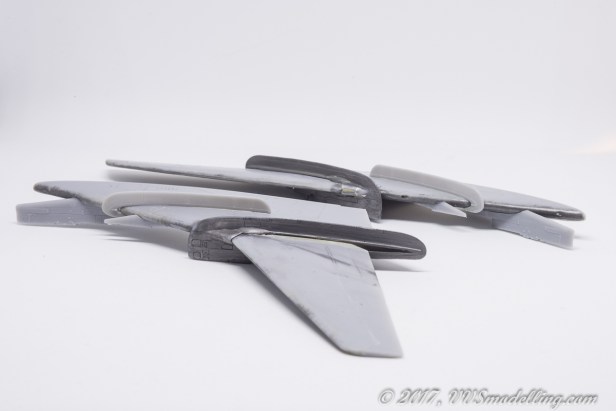
Wings themselves are made of two halves; they are a bit too thick, but easily sanded down to achieve a perfect fit.
Unfortunately I experienced a little bit of setback during this build. When sanding the intake ring for a better transition to the fuselage, I accidently sanded throguh the rather thin plastic and created a bite on the upper side. I somehow managed to fix this by using Milliput Superfine putty. Using metallic paint dry-brushed over the seams, reveals any seams that still might fixing.
Wings completed without any hassle and dryfit to the fuselage shows a perfect fit!
The main problem I had during the construction so far is the big wing fence near the wing pivot. It’s made of one piece with an aperture to slide the whole wing assembly through. And while the fit is great in the frontal area, there was quite a nasty gap on both top and bottom side along the way towards the trailing edge.
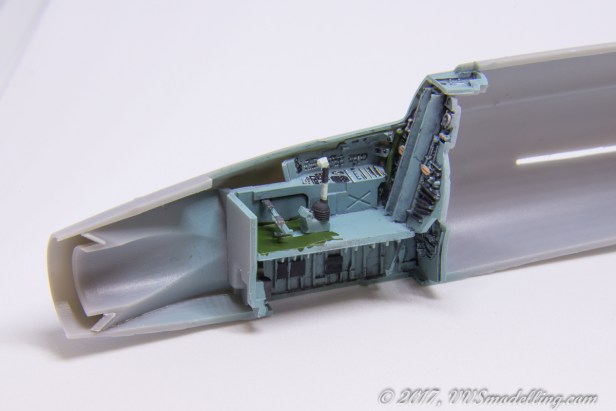
Windshield is up, instrument panel with sighting glass and gun camera installed.
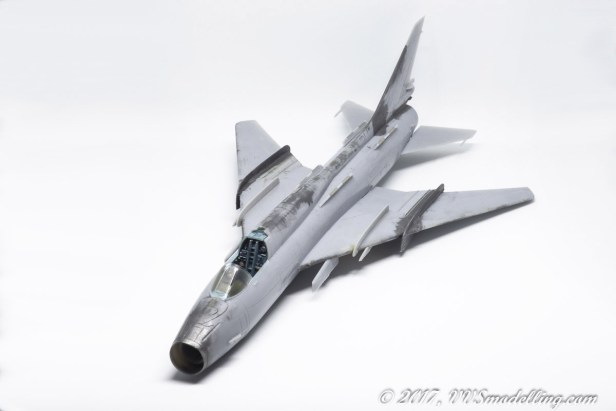
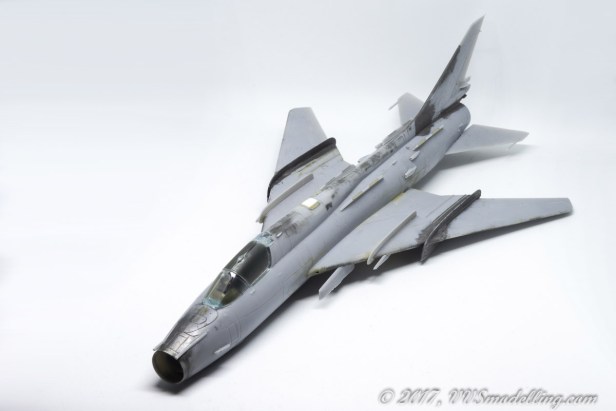
Finally the wings attached and it looks like a Fitter at last!
A bunch of little details added to the airframe. All the little intakes on the sides of the fuselage were drilled out. If you are asking what’s with the metallic paint – I drybrush it on to see the state of join lines and puttied areas.
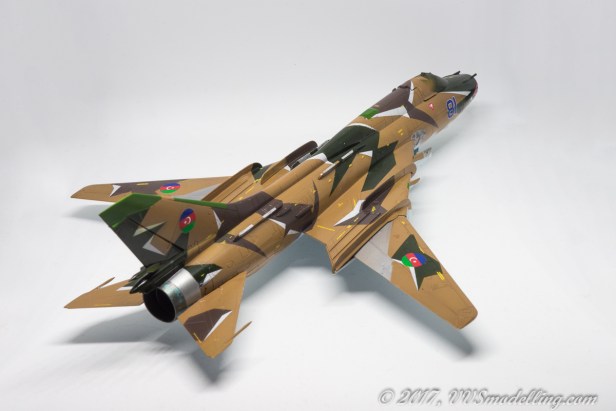
Although I’ve only seen Azerbaijani Fitters equipped with drop tanks, I don’t see any reason, why they wouldn’t carry classic Soviet weapons – I’ll be equipping it with two underwing drop tanks, two S-24 rockets and four FAB-500 M62 bombs.
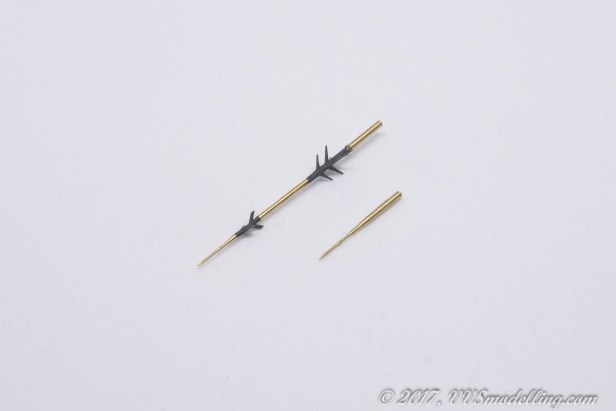
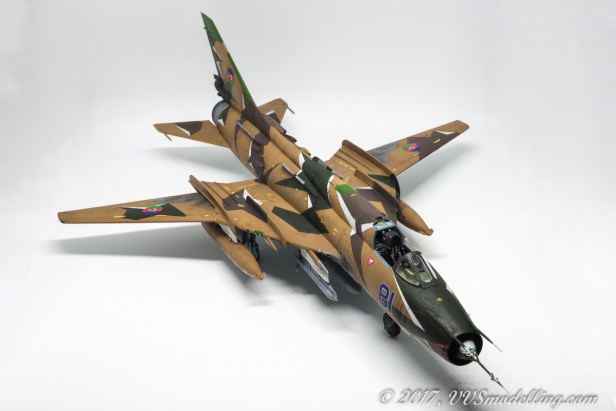
The only aftermarket item used on this bird will be a set of Master pitot tubes. Delicate little things that proved a bit challenging (diameters didn’t match perfectly) and I still have to fix the longer one a bit, but they look really awesome and 3D printed vanes are so thin yet flexible and a little mishandling won’t break them.
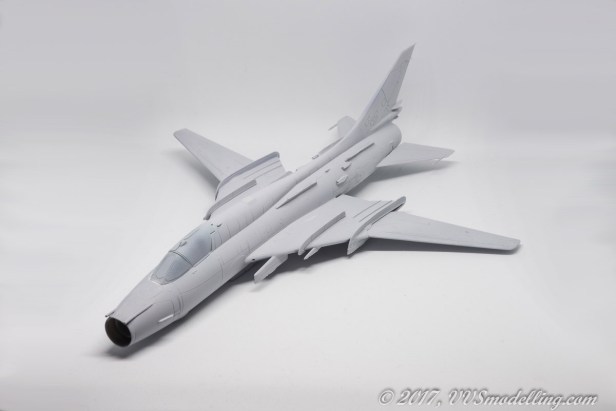
Nice coat of primer makes a whole bunch of difference to the overall looks. Some little touchups were needed but nothing serious.
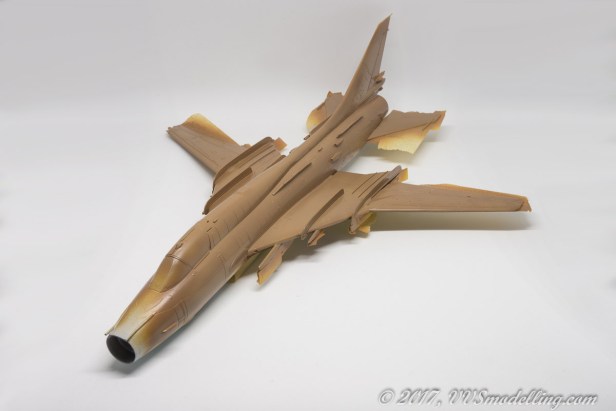
First top colour. I had some problems determining the right paint to use, as all the photos of this rare birds I found have really bad photo reproduction resulting in colours appearing different from one photo to another.
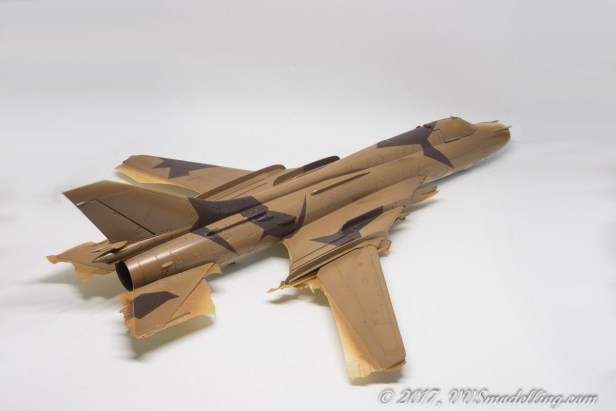
And first part of splinter camo pattern is applied. No major problems, apart from some slight overspray, but that will be easy to remedy.
Green splinters added.
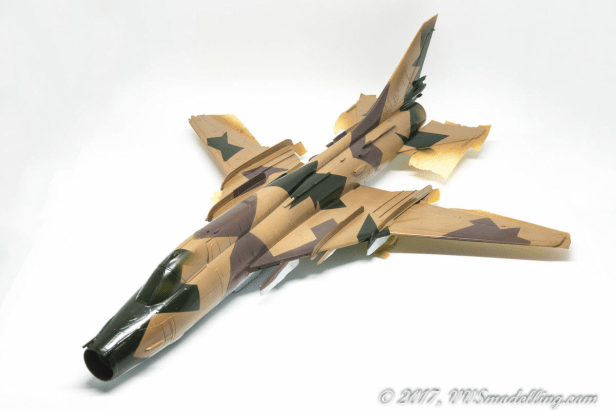
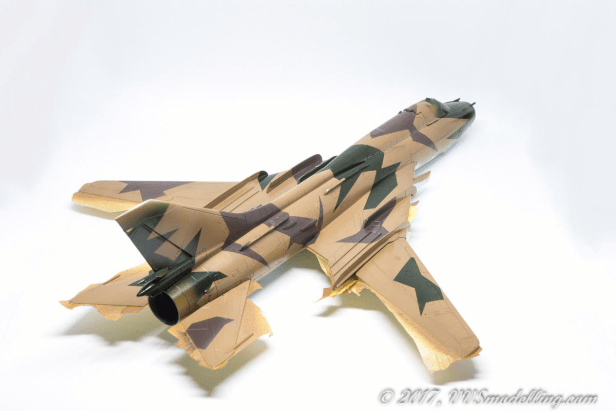
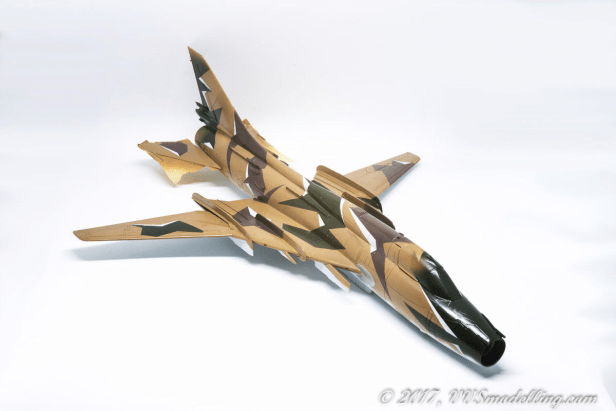
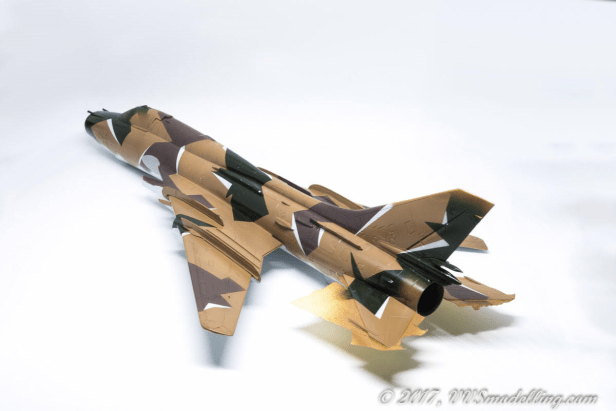
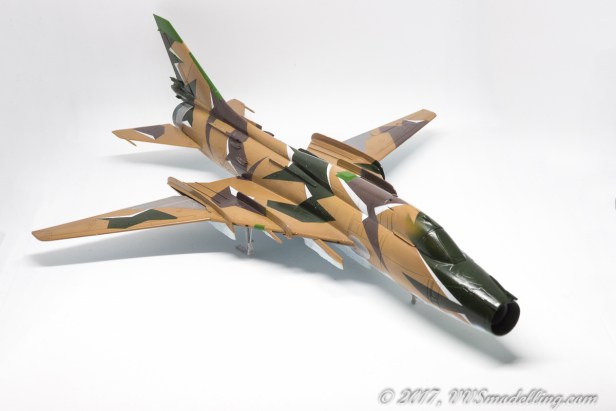
Camouflage finished!
Painting the details now – green dielectrics, exhausts and aluminum on the wing-sweep area.
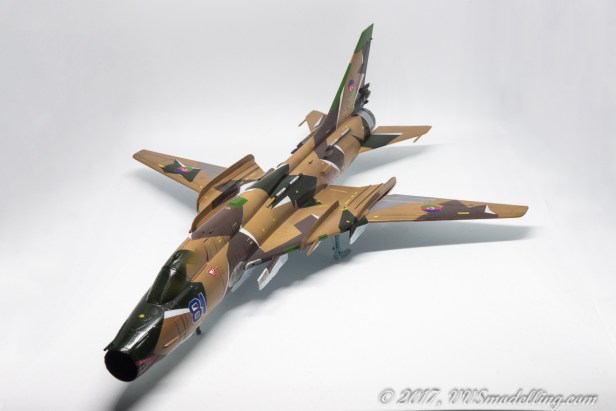
Mix of Modelsvit stencils and Linden Hill Azeri decals was used. Although LH decals are a bit on the thick side, they caused no silvering and settled down nicely with some setting solution.
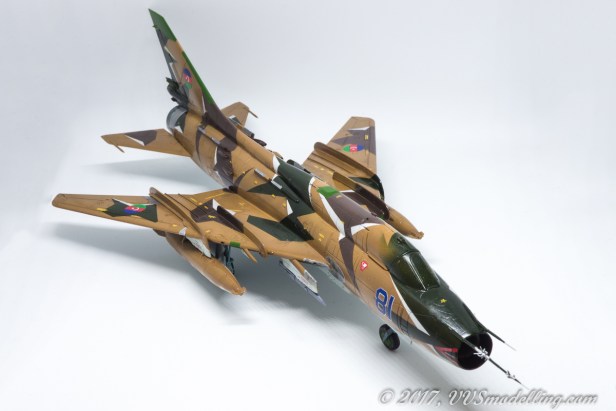
Some details were added like different antennas, pitot tubes, fuel tanks etc.

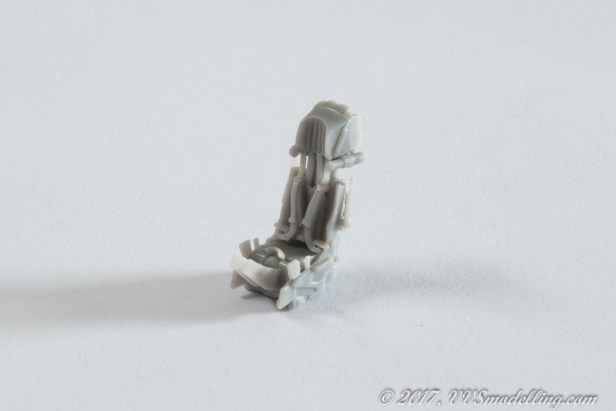
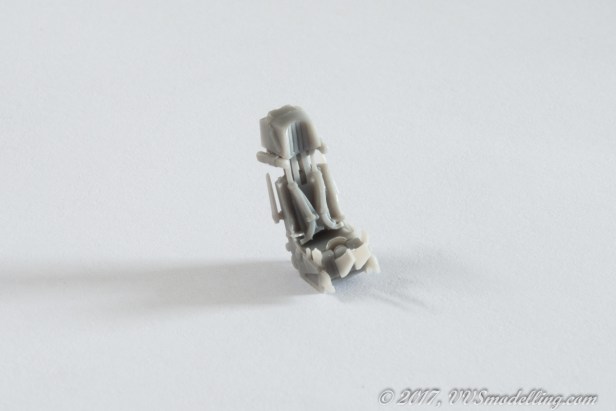 Ejection seat consists of, believe it or not, 23 parts! What you see here is 22 parts as I left of the commendably thin ejection seat lever to add at the end. All in all a model inside a model I could say and the level of detail is just great. The only problem are instructions as they are not very clear with the location of some of the tinier parts.
 Nicely molded exhaust turbine
 The exhaust pipe is of correct length and made out of 3 parts. It is a bit tricky to assemble, but for some time lost during the assembly, you get some really nice interior details and the dreadful seam lines that usually plague the exhaust halves, won’t be seen here.
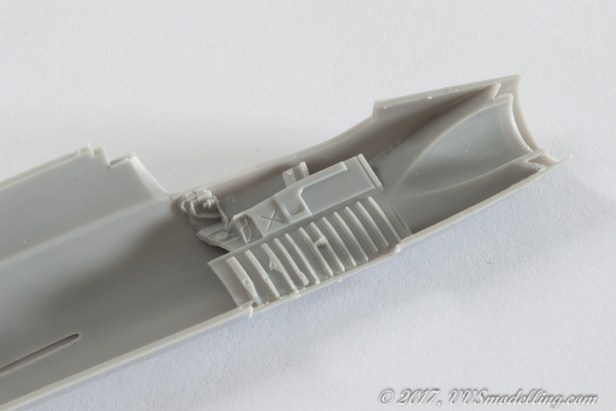 Cockpit and front wheel well details is awesome as well – larger companies should be learning from a small short-run company like Modelsvit.
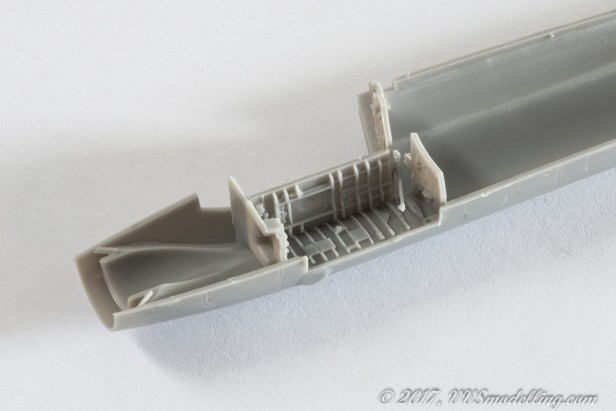 I’ve bypassed the instructions a bit here – instead of building the cockpit/front wheel well assembly first and then gluing everything into the fuselage halves, I found it easier to just glue the cockpit halves into each respective fuselage half and build on from there. And guess what, the fit is perfect!
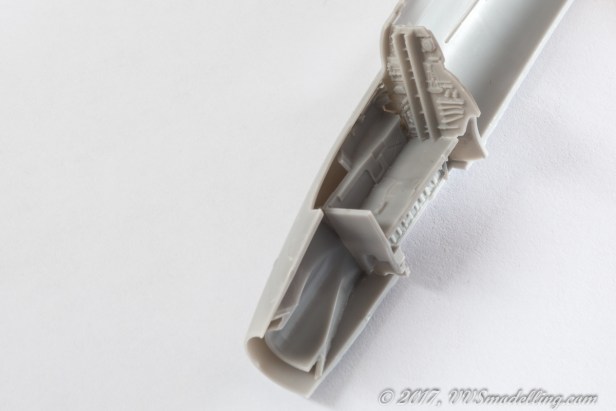 Just look at the back wall details. Much better than with KittyHawk kit in larger scale. You get two different instrument panels – one with flat surface if you choose decal and one with all the little details if you fancy painting all the little details. I guess I’ll go with the later option and if I fail miserably, I still have a back up.
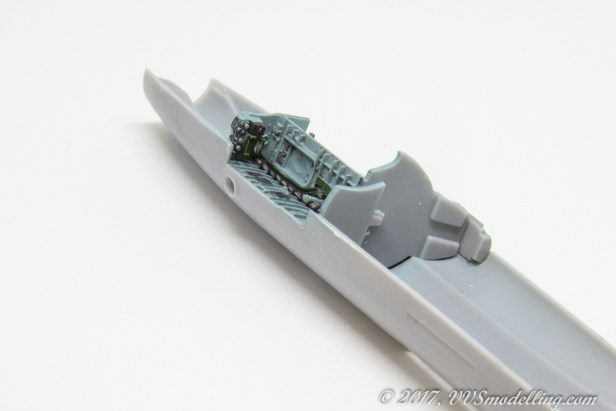


Sad it’s only in 1/72, it looks like a really nice kit for a small producer… all done in your usually fine style!
Thank you, Ed! At least KittyHawk and HobbyBoss are filling the void now in 1:48.