
Progress shots
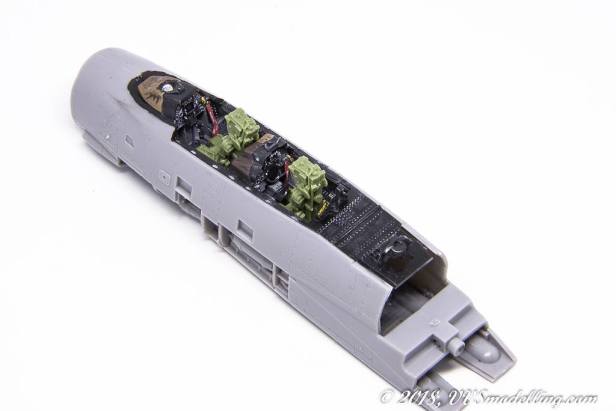
 For a so much praised kit, I was surprised to find a huge number of pin marks in visible parts. While I’m not sure, these will actually be seen, burried deep in engine intakes.
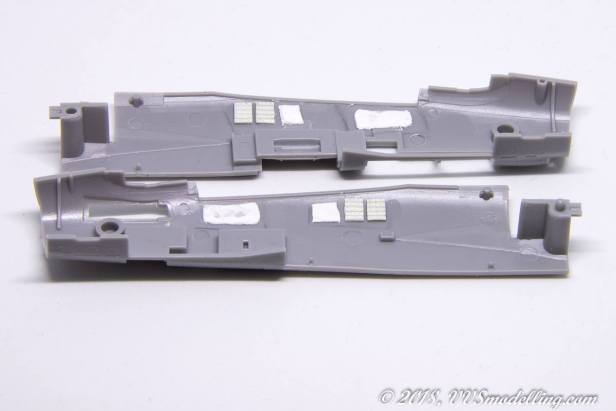 Cockpit sidewalls are bare in the kit. It’s true, only the most curious eyes will look that deep in the cockpit, but I just had to add some canvas wiring covers and the prominent circuit breaker boards in the RIO’s pit.
 Using just some careful painting, the cockpit is looking more and more alive. No aftermarket parts are available for this kit, so I have to work with what I’ve got.


Cockpit mostly finished
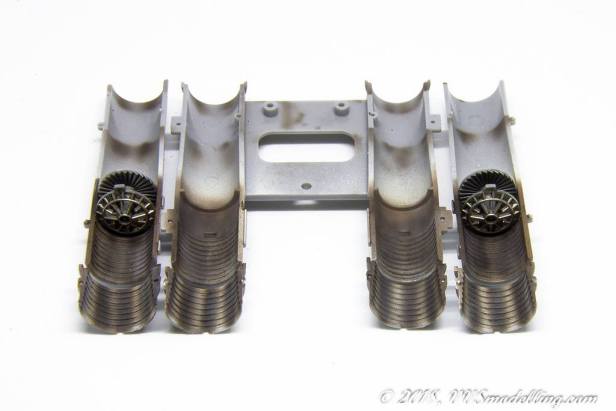
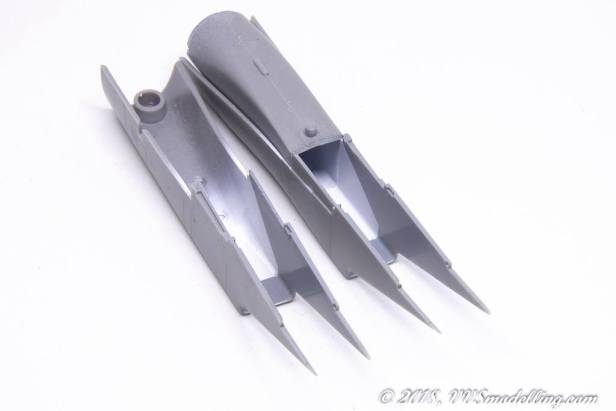 Intakes painted up; one showing the one piece affair and the other one with rear part insert.
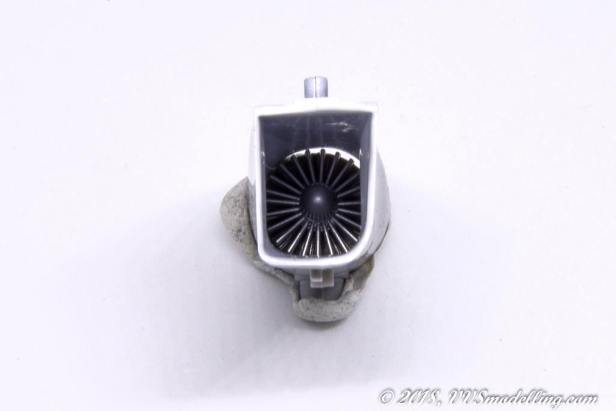 Front view of the intake insert. Stator at the front with a cone was painted Aluminum while the rear one with darker Magnesium, giving a nice sense of depth. Notice the reflections in the intake.
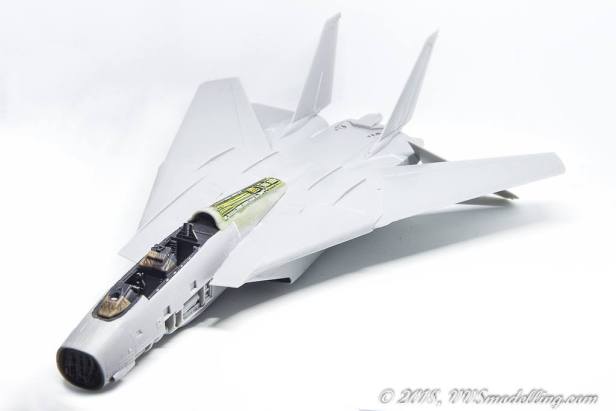
 Cockpit was finally fitted in the fuselage halves and instrument panel shrouds installed. Turtle back behind the rear seat was bare of details so I added a horizontal beam and rivets per reference photos.
 NeOmega seats arrived yesterday and they proved to be of identical dimensions as FineMolds ones but of course much better detailed. RIO’s IP shroud received circular cooling vents at the sides and the wire that runs from the top handle to the side.
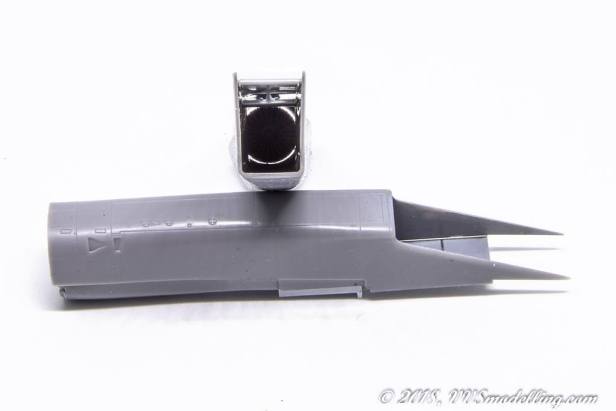
 Instructions mistake! Do this only if you’re planning on closing the canopy!
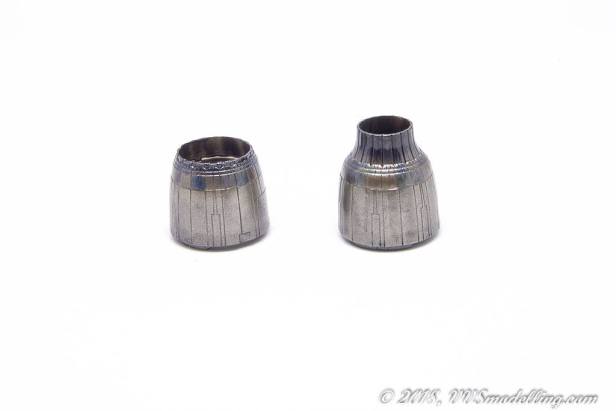
 Painting the exhausts… First white then progressively darker thin layers of brownish colours and some dark brown, black and grey pigments at the end.
 Jet intakes finished – the lower rear ramp at the top of the intake is clearly visible including the actuator that opens it.
 Interesting design of the rear fuselage – you have to attach the rear fuselage sides to the jet exhaust piping.
 The whole assembly is then attached to the upper fuselage half.
 The join runs by the panel line and is virtually invisible. The only area needing some filler will be right of the airbrake – nothing a swipe of PPP couldn’t solve in few seconds.
 Attaching the lower fuselage was a breeze – fit is just perfect and we finally have something resembling a Tomcat fuselage.
 View of the lower fuselage – again no filler needed!
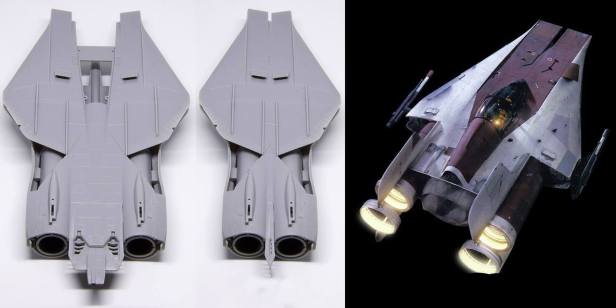 Oh and for those who didn’t know – take a look at Tomcat’s fuselage, bring those intakes closer together and voila! A-wing fighter from Star Wars E:VI Return of the Jedi!
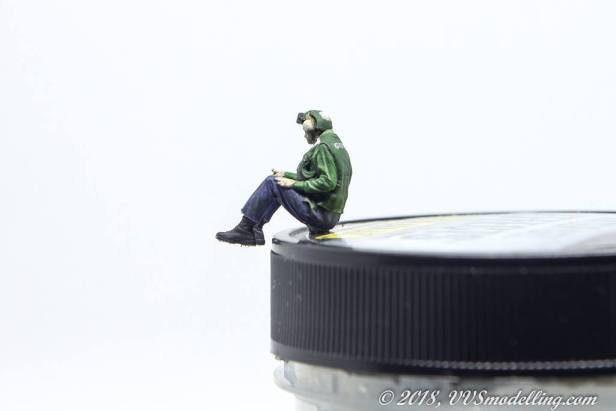

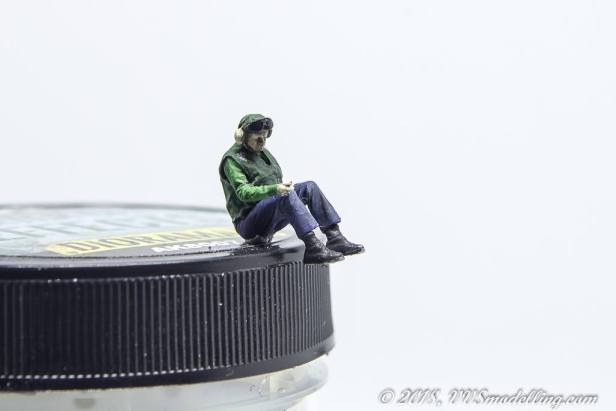 Excellent Reedoak figure painted with Mr.Paint acyrilic paint for figures. I am no figure painter, but I really like the result!
 All the edges and ribs were riveted first then painted.
 Slowly coming together.
 Dryfitted the wings and tailerons and attached the fins – Tomcat, baby!
 Was playing with different shades of metallic colours, picking out single petals, and attacking those with washes. I’ll further putt a matt coat on them as they’re too shiny now and probably add a little more staining.
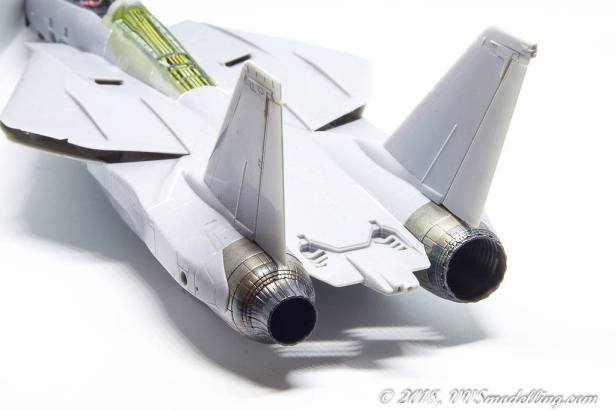 And dryfit of the nozzles – They look really nice attached to the fuselage. Had to bypass instructions a bit so I can remove and install them later in the build.
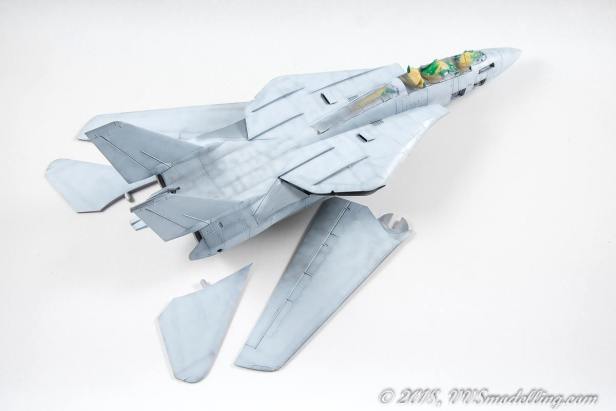
 After a coat of AMMO One Shot primer I’ve put a marbled coat of Lt. Ghost Grey on.
 Marbling was first done coarser and will be made finer later.

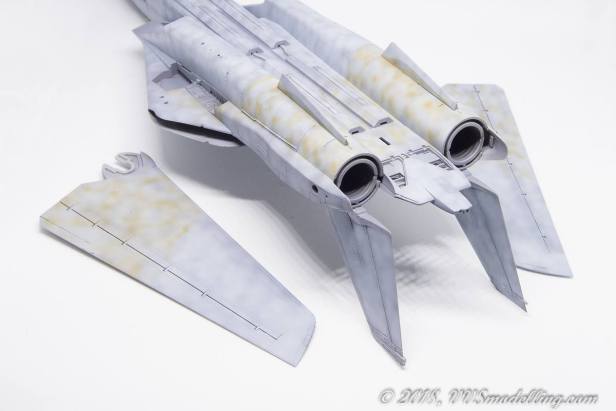 Before final painitng I added brown marbling on the areas of higher wear and tear.
 And the final subtle effect. But the painting is not done yet.
 Did further weathering of the overpainted panels and added grime and dirt on the most often used panels.

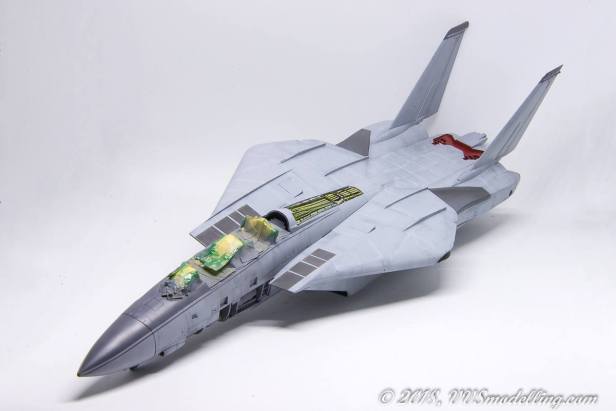 Added antiglare panel, over-intake walkways and painted the canvas bags and airbrake interior.
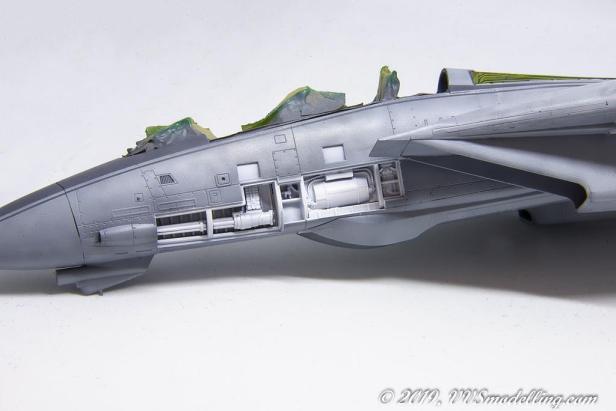 The interior compartments were give a coat of White paint.
 Afterwards the details were painted and a wash was applied to enhance the shadows.
 The right hand side was given the same treatment.
 With all the details painted and wings and pylons attached, it’s time to gloss it up and finally start the decalling process!
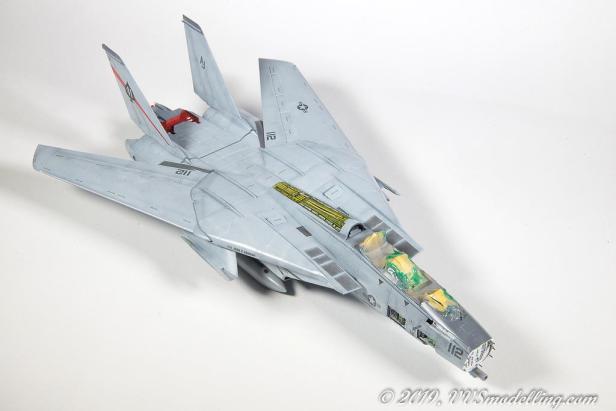

 Decals applied – mix of Airfix, Microscale and Fujimi.
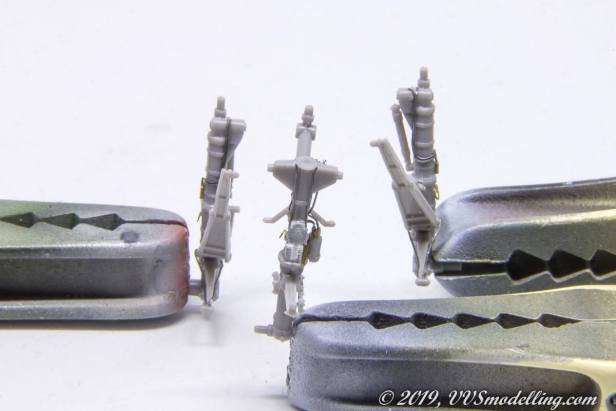 Landing gear was improved by the use of Albion Alloys brass tubing and Plusmodel lead wire.
 Landing gear painted up and weathered.


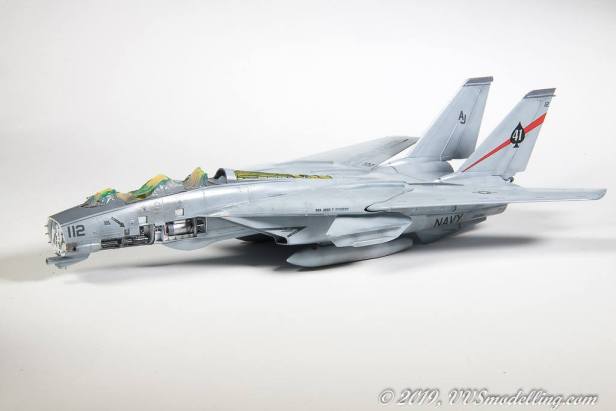
 Tomcat after light washes.

 Final look after specific panels were further weathered and certain panel lines over painted.
 On her legs now!
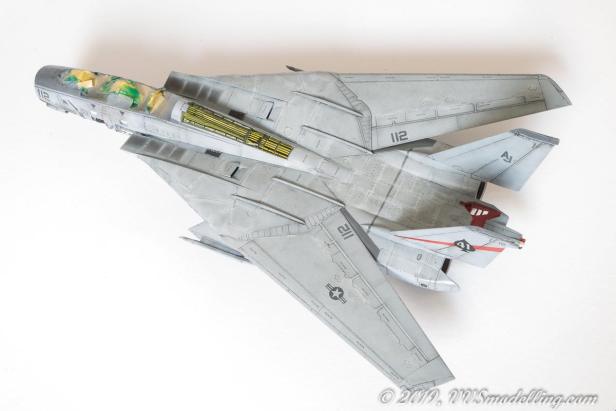
 Horizontal stabs, engine exhausts, weapon pylons, landing gear, airbrakes,… were added and she’s slowly coming together.

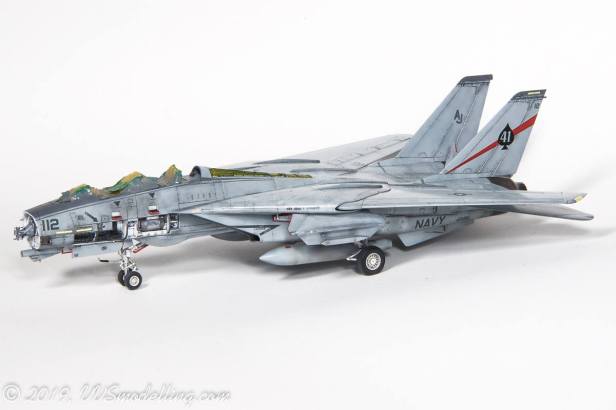
 A bunch of bits and pieces attached, matt coated and unmasked… The end is in sight at last!

Excellent work! I’ve heard a lot of great things about this kit.
it is indeed probably the best 1:72 kit I have ever built
What paints did you use. What were the washes and how did you apply them? Thanks
Hi! If you check the finished article in the gallery, you will find a list of all the paints that I’ve used. https://vvsmodelling.com/2019/05/14/grumman-f-14a-tomcat-vf-41-black-aces/
As for the washes – I prefer doing my own mixes using Abt502 oil paints thinned with VMS Universal weathering carrier (but any enamel thinner will do).