Progress shots
 Riveting and rescribing in progress.
 Extra detailing of jet intakes and front wheel well.
 Additional wiring and bottles in the right main gear well.
 While Zvezda made nice over-exhaust plates on their 9.13 kit, they somehow missed this area when designing the SMT and made those plates without any details. While not perfect, simple scribing and rectangual pieces of Tamiya tape make quite a difference.
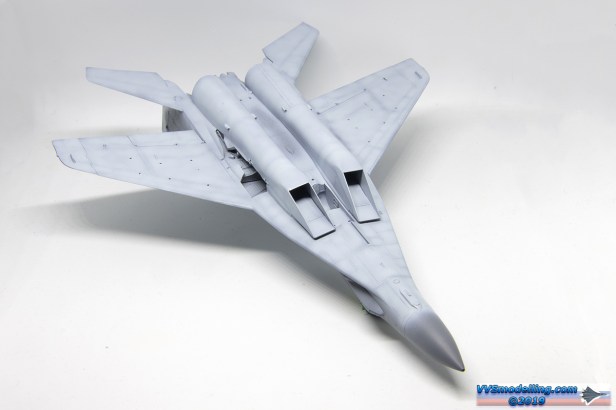
 One of the reasons why I’d pick Zvezda over Trumpeter MiG-29 any day in 1:72 scale. Trumpeter completely simplified the shape of engine bulges; too narrow and without that inital curve that makes them look really beefy on real aircraft.
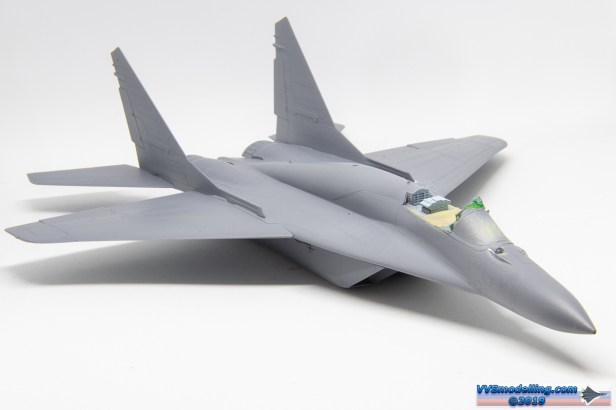
 Really like this stage of model building when you put sub-assemblies together and the model takes shape of the aircraft you’re building.
 While I like using Eduard’s photoetched parts, I really hate the fact that most often than not, their cockpits are painted in wrong colours and the flat surfaces appear really grainy. So what I did was cut thin strips of Tamiya masking tape and masked the panels and sprayed everything else with correct cockpit colour. No fear of mismatched PE-plastic colours.
 Cockpit installed and windshield attached. The assembly was pretty straightforward but I did manage to make a boo-boo out of a HUD. I’ve tried folding the PE part just with my tweezers but I didn’t get nice 90deg angles and the end result was terrible. So I leveled the PE part again and used the PE bending tool (don’t know why I didn’t use it in the first place?!?) and fixed that s*it!
 I intend to use Master brass pitot tube – you can see how much better it looks than its plastic counterpart. However the attachment point is much narrower diameter than the kit part, so I’ve had to attach the plastic one first, and filled the seam with CA glue. I’ll have to cut the tube off and sand the radom cone to shape, to accomodate the replacement brass part.
 The result of over engine panels under a coat of primer – not perfect or 100% accurate, but still much better than just leaving them plain.
 Just before installing the tail fins to the model, I noticed on my reference photos, that the aircraft I am building, has strengthening plates installed. creating a simple template, I made those out of Tamiya masking tape.
 I’ve recently became a really big fan of One Shot primer by Ammo (also known as Stynylrez and Ultimate Primer).
 Instead of using black basing, I have used the primer’s dark grey colour as a base to show through the light grey of the underside.
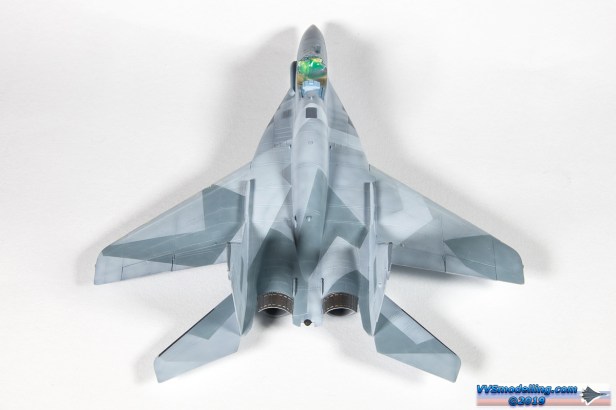
 Tracing the approximate lines of the splinter pattern, the upper light grey was applied. Also note the chipping on the left wing’s leading edge.


Done with major painting!

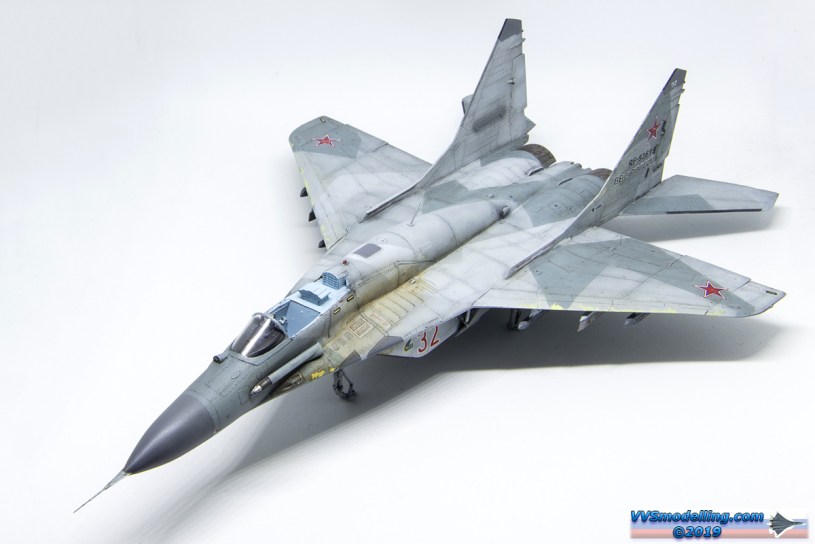
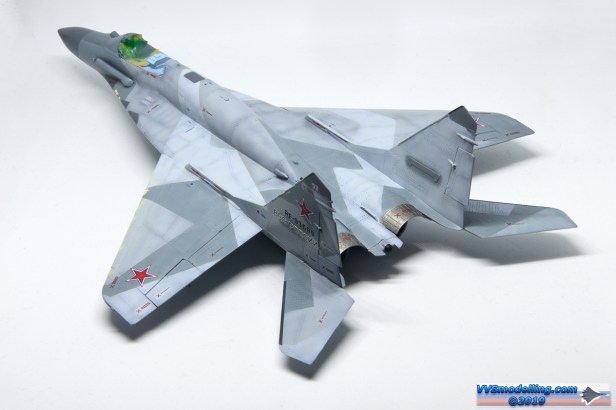 Decals have been applied. I am using Begemot decals and I am having two issues with these. First is that some red stenciling, especially those with red X symbols are printed slightly too bold and thus became too noticable. The second issue is the clear carrier film. I am getting a strange effect on some stencil decals, that slightly resembles silvering, but it’s not. Actually the colour behind the decals looks slightley brighter than the surrounding. Never happened to me before but it is what it is. I’ll fade the decals anyway so I hope in the end, it won’t be too noticable.

 Amigo Models exhausts were used in this build and they were painted in various shades of Mr.Paint metallic paints. I am quite satisfied with the result; current look is a bit vivid but after the wash, I am quite certain, the heat stained effect will be properly restricted.

Final look of exhaust cans after some weathering.

True Details K-36 ejection seat


 Further weathering with oil paints.

Hi there, excellent build on your Zvezda MiG-29. I note that you also like that one shot primer which is good stuff. Here in the UK looks like it’s very hard to find any UMP or Stynylrez left anywhere! What I wanted to ask was how do you adhere that Tamiya masking tape to the model to stop it from peeling off?
Thank you, Martin! Actually I did experience a little bit of lifting off after masking, but not on every build that I’ve used this primer on and when it did, it was just a few small spots that were easy to remedy. I guess a good surface preparation is essential. Since it’s acryllic primer, it doesn’t bite into the plastic as well as lacquer based ones and is thus more prone towards peeling.