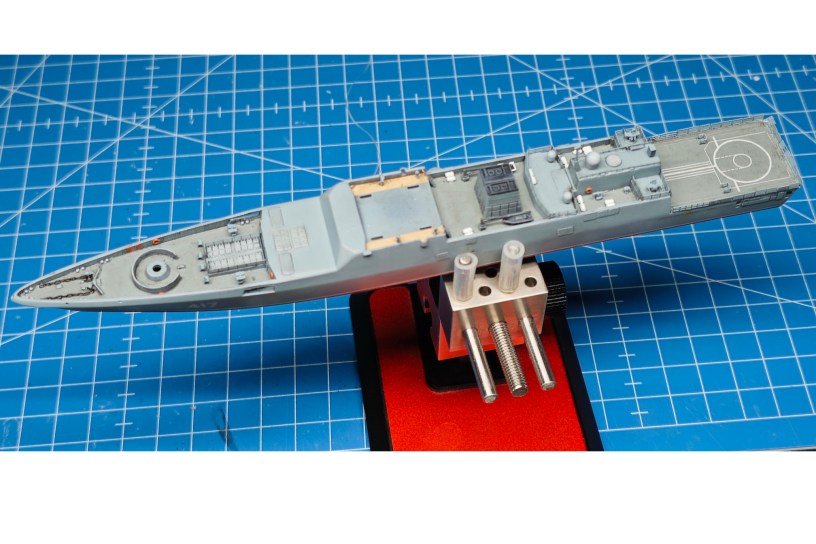

It’s been a while since I’ve finished my last ship so a little bit of PE struggle was there, but I somehow managed to finish most of the work on the hull. I just hope I won’t knock them off too many times during the construction
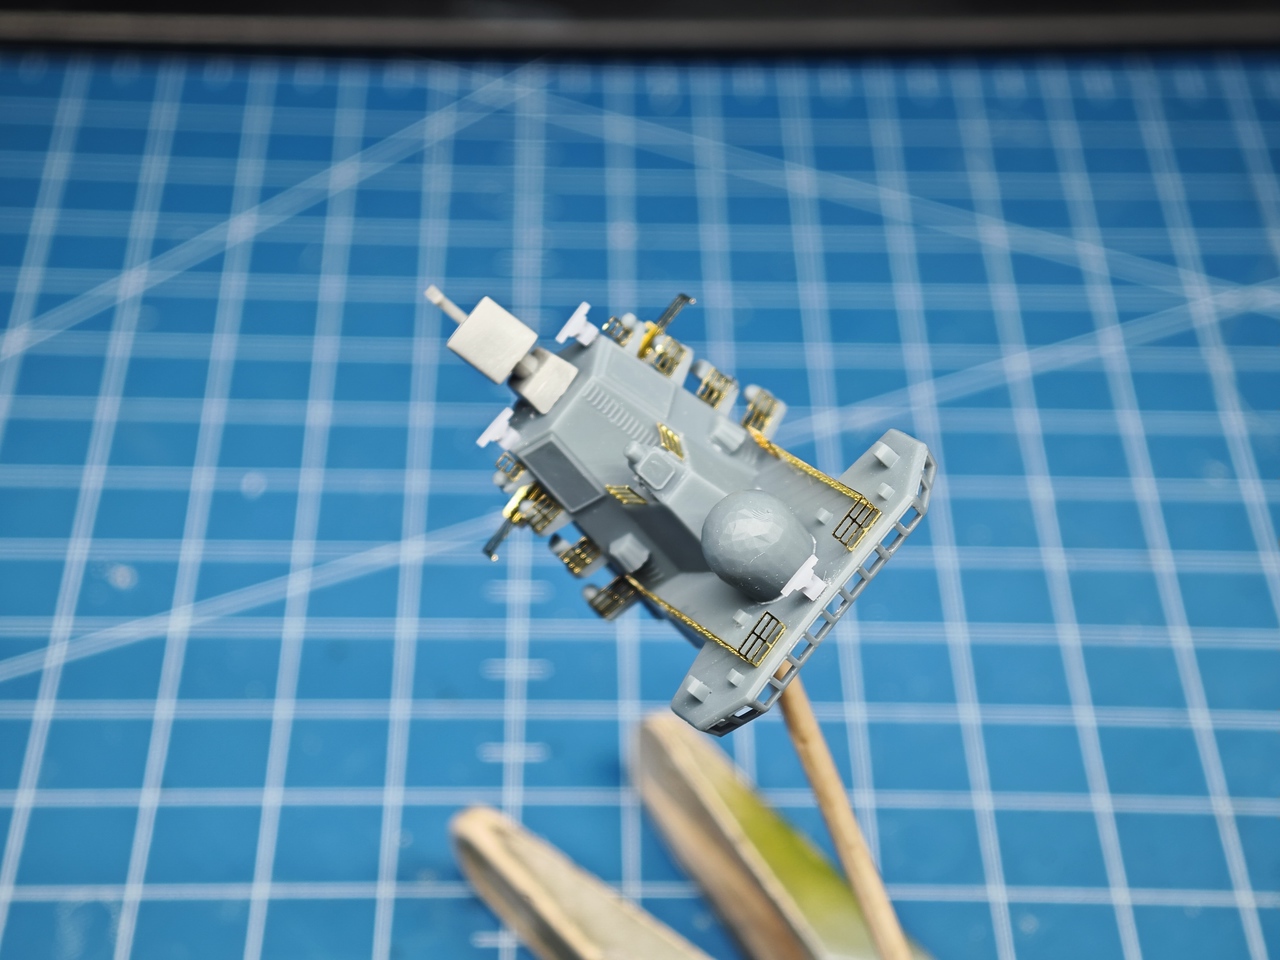
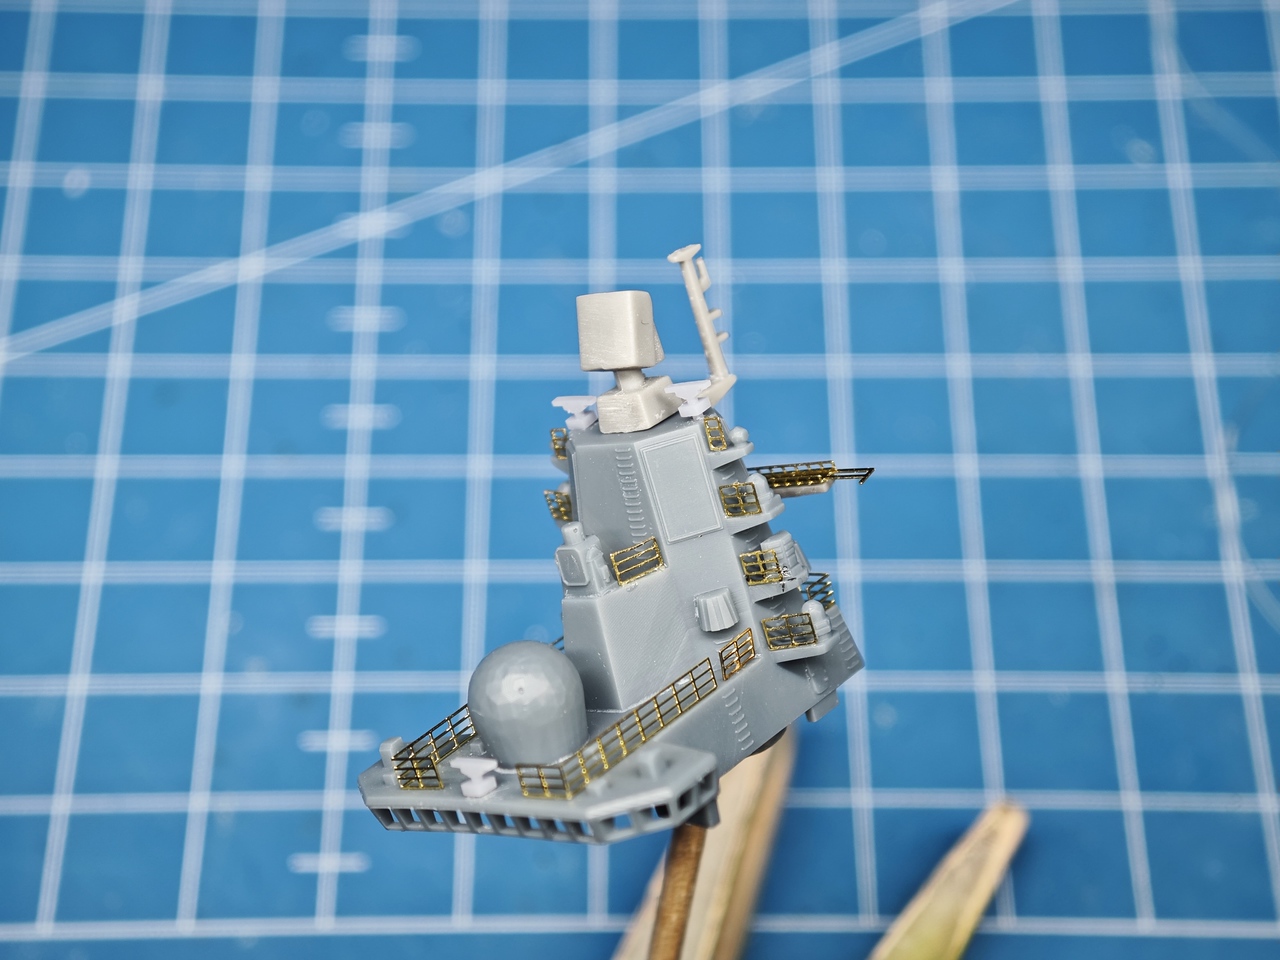
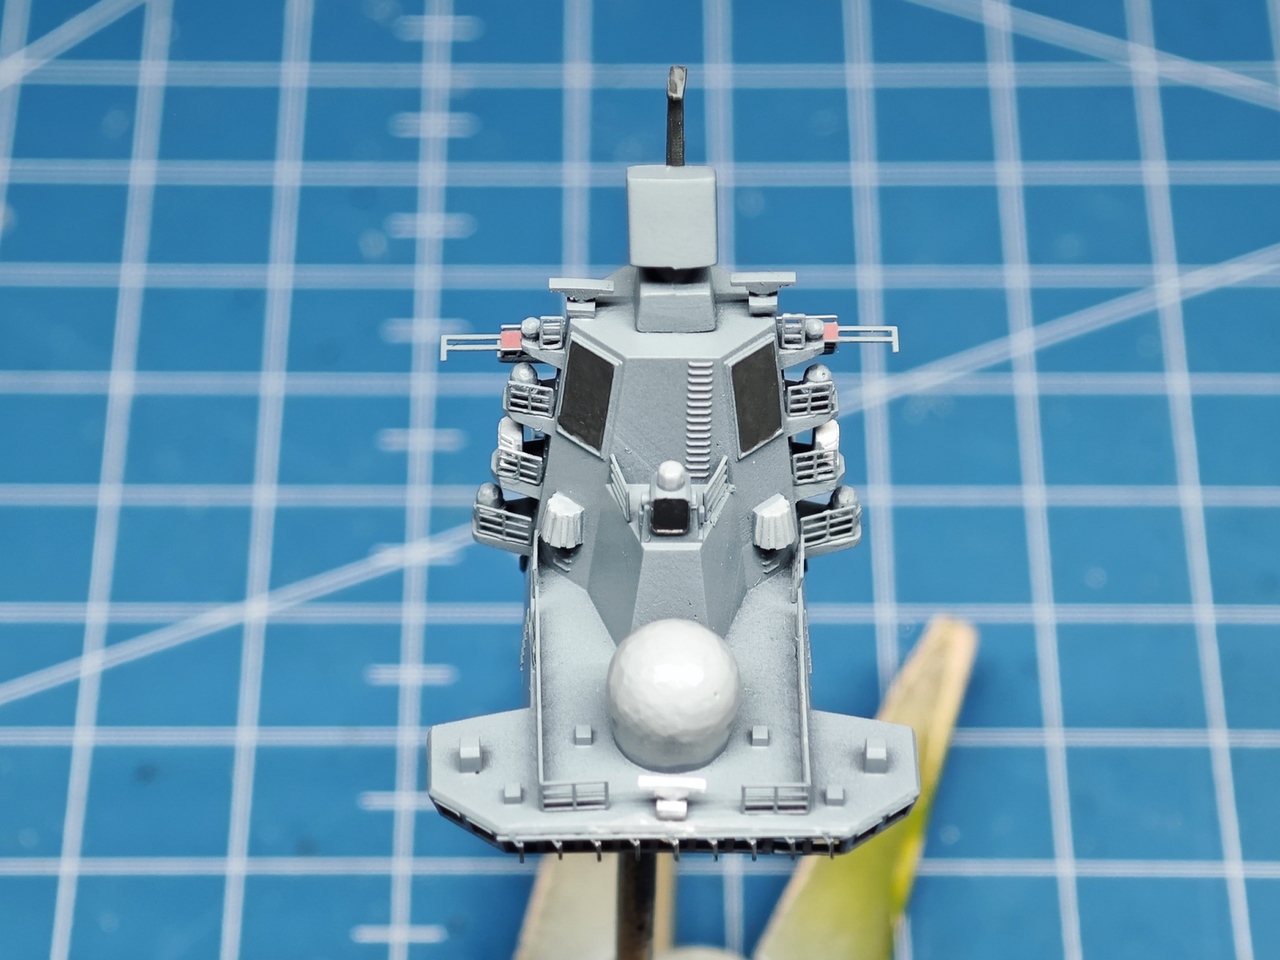
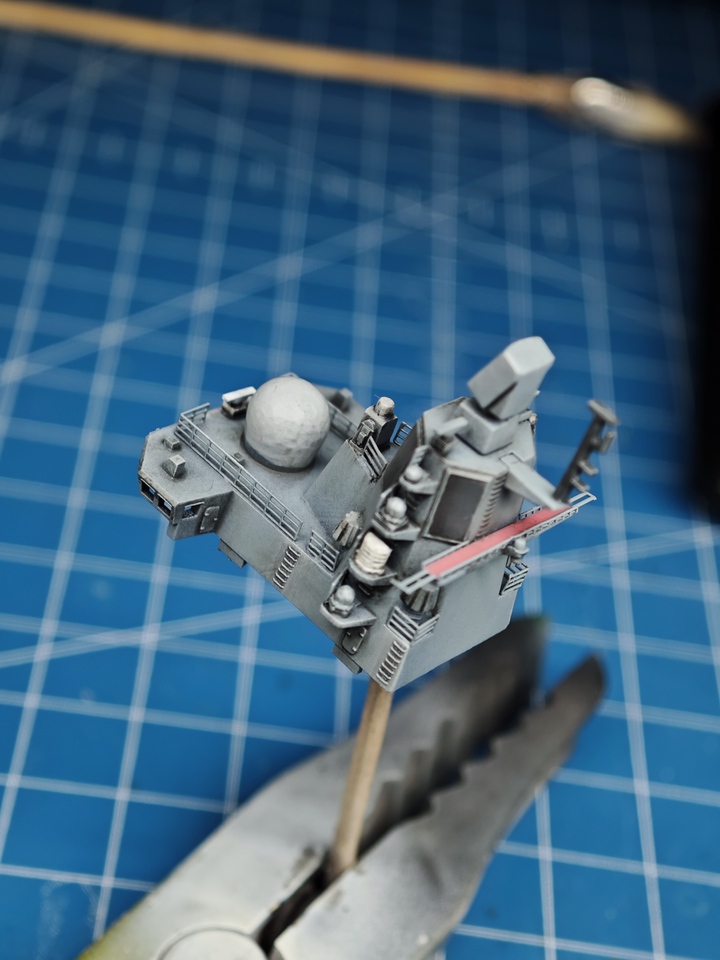
Further work included spicing up the superstructure, mainly the bridge and sensors tower with radars and other sensors.
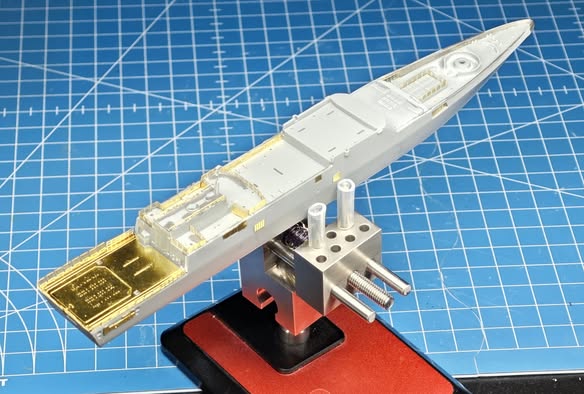

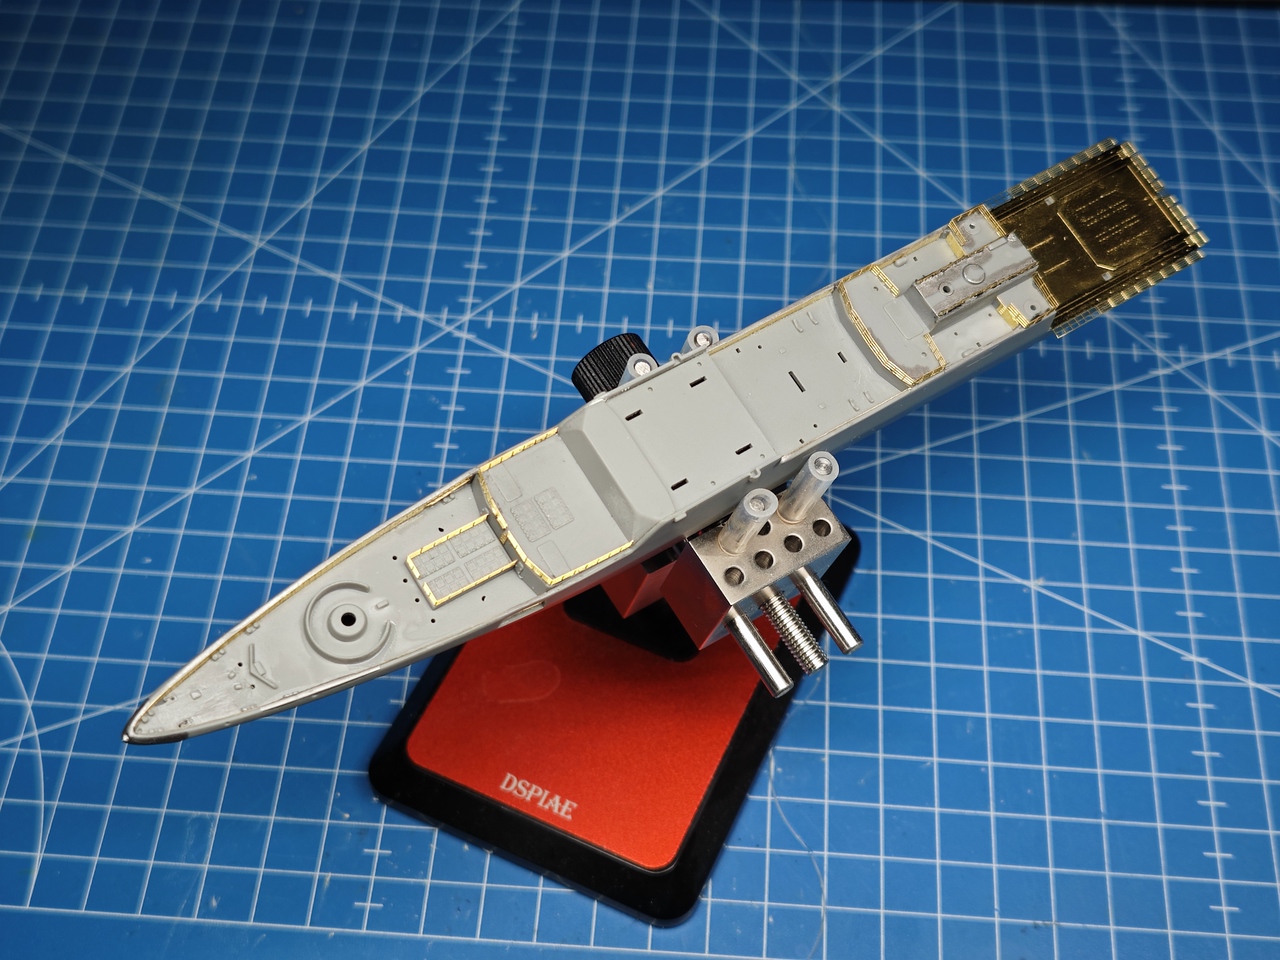
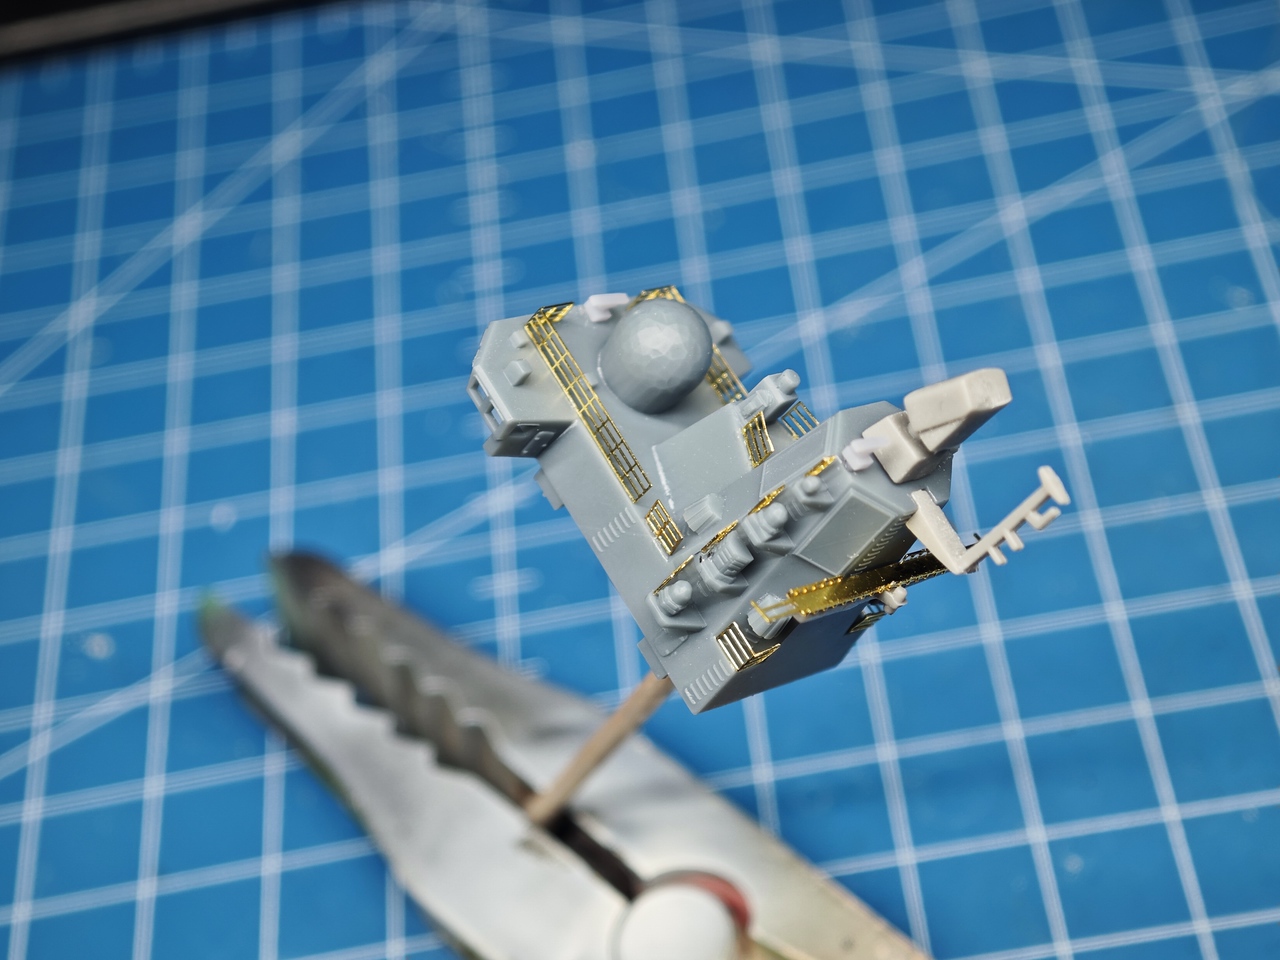
I have attached the remaining PE parts and also removed the railing on the mid-deck in front of the bridge as I have not fund any photos of railing in that part of the ship. Black Surfacer now drying…
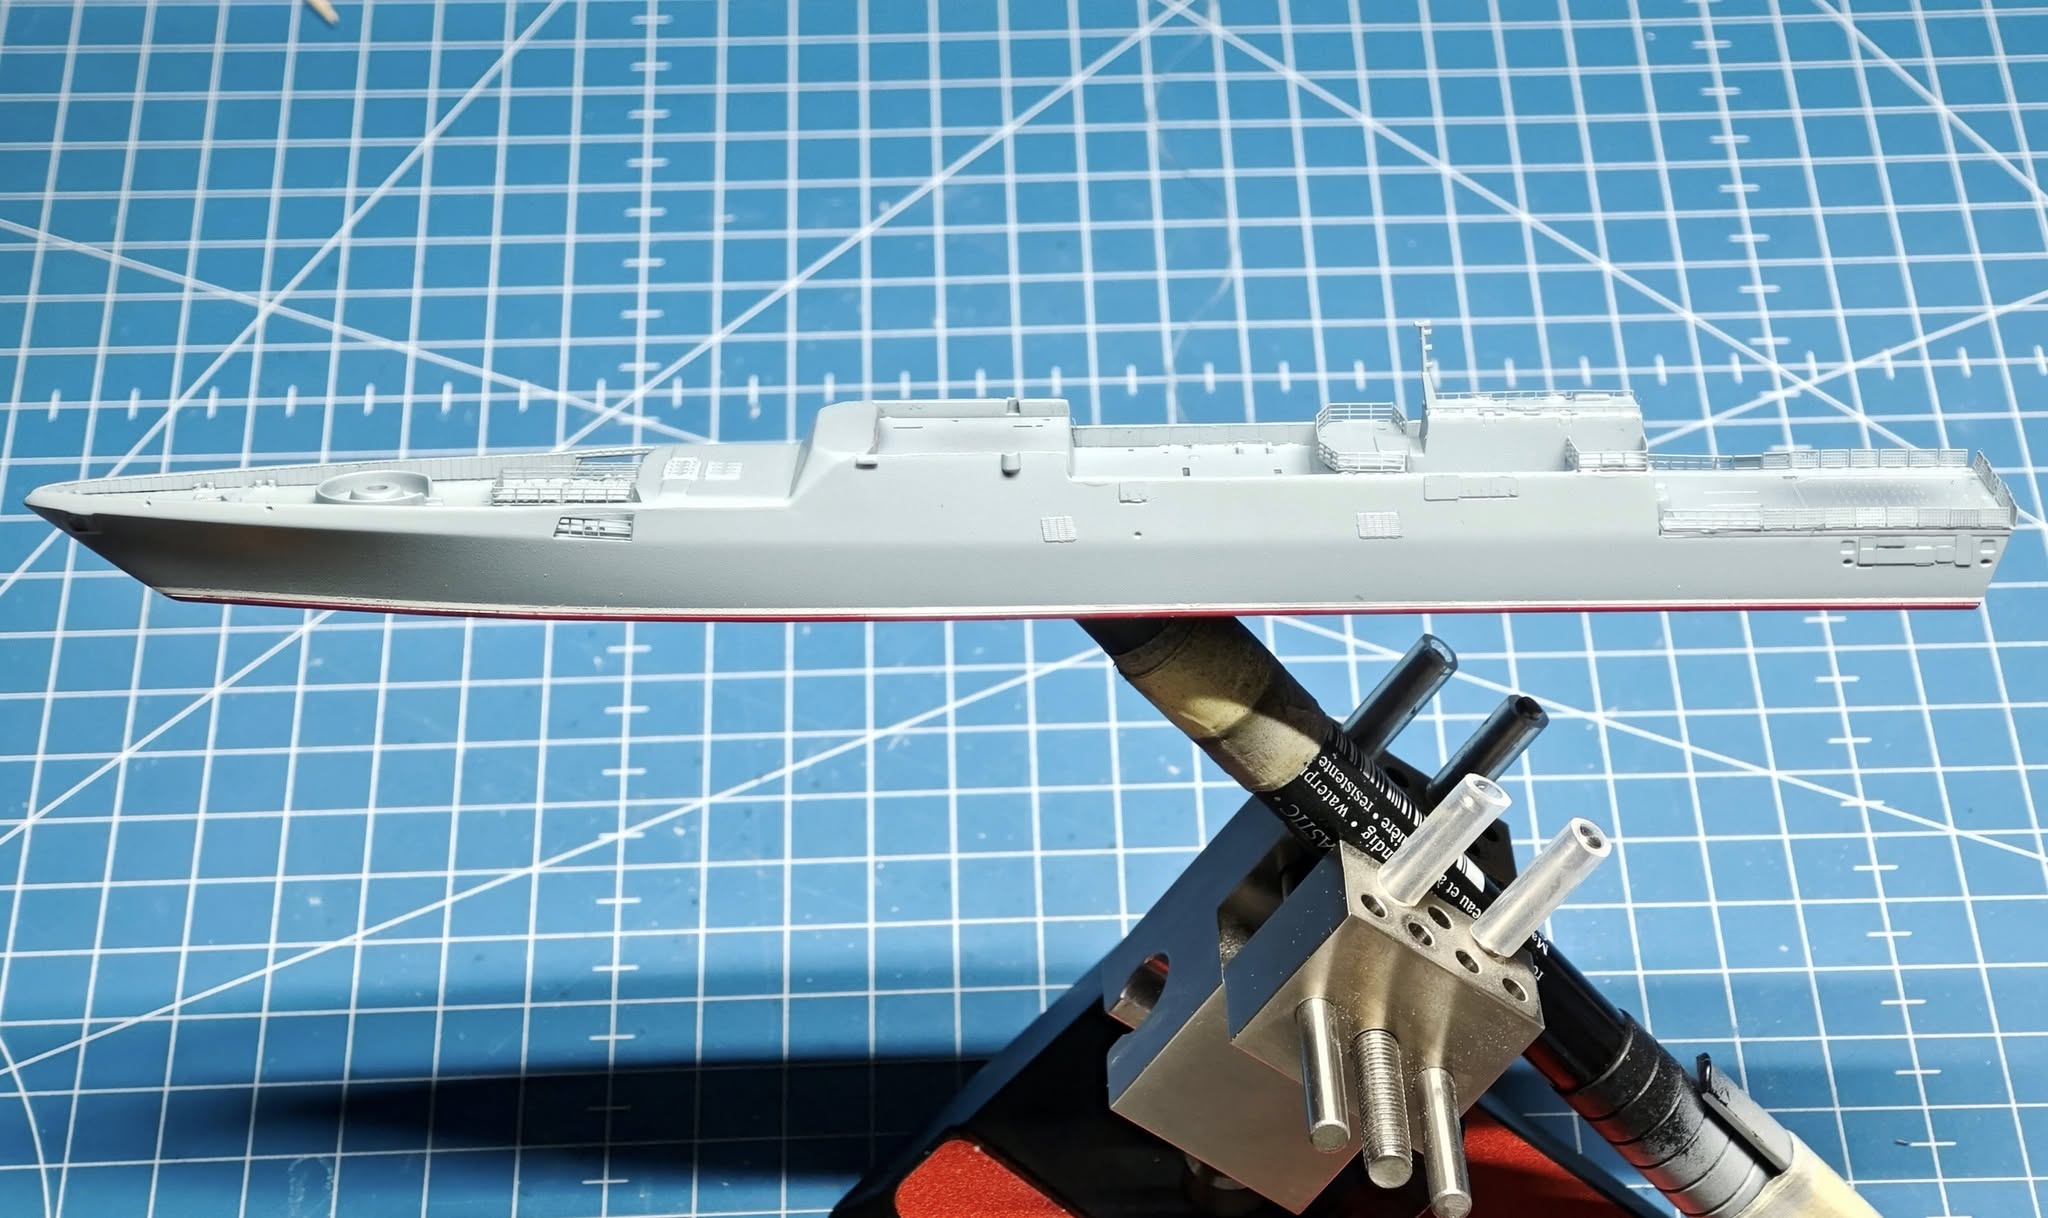
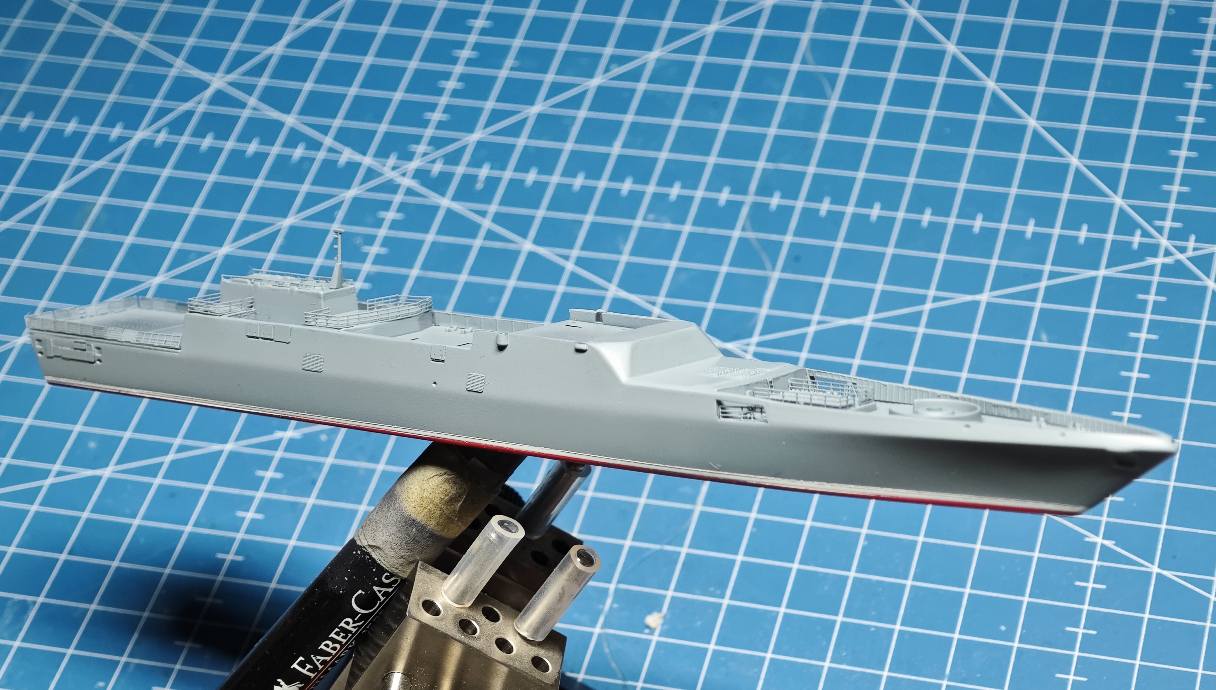
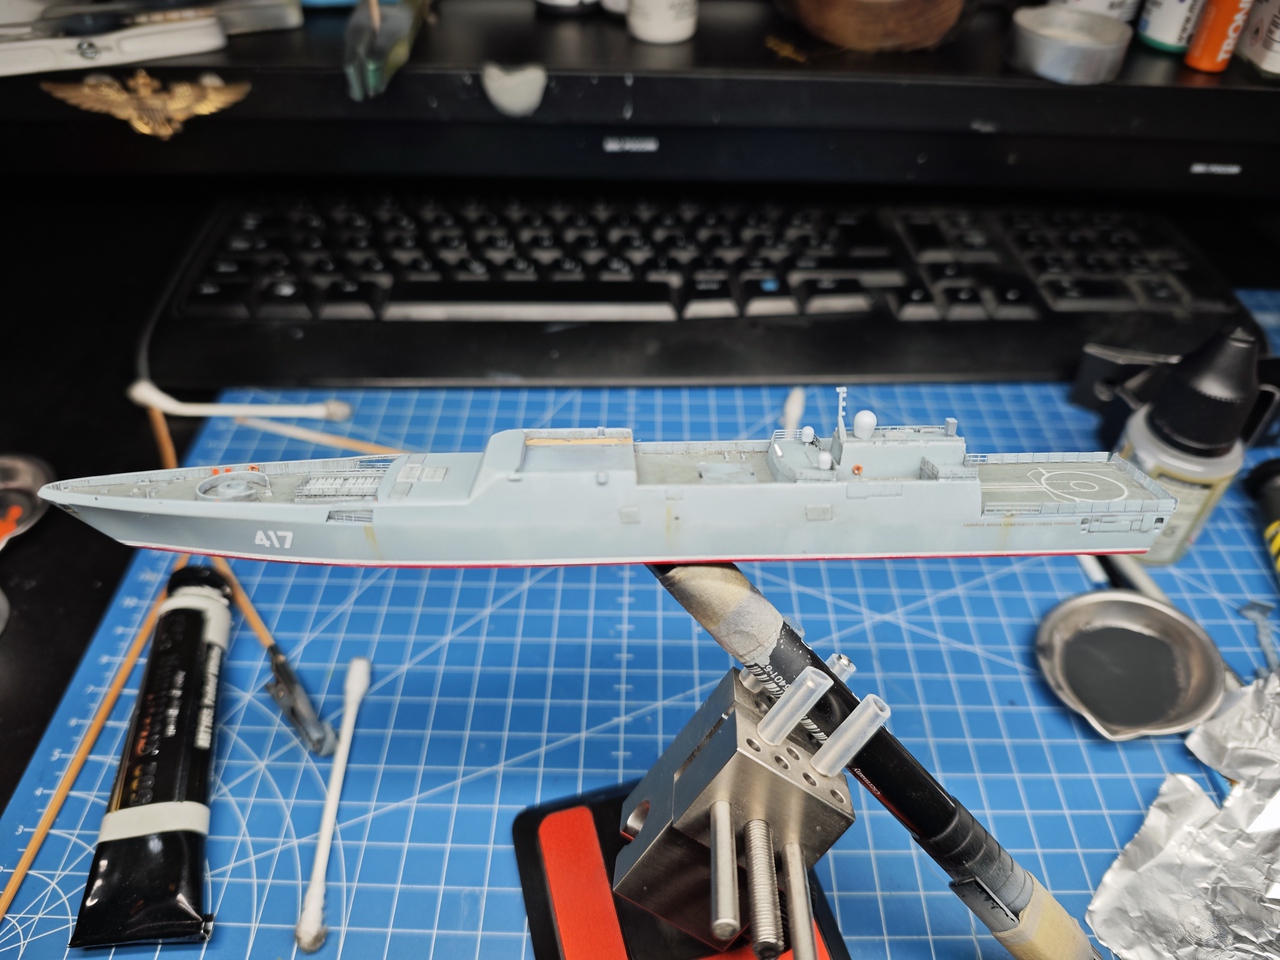
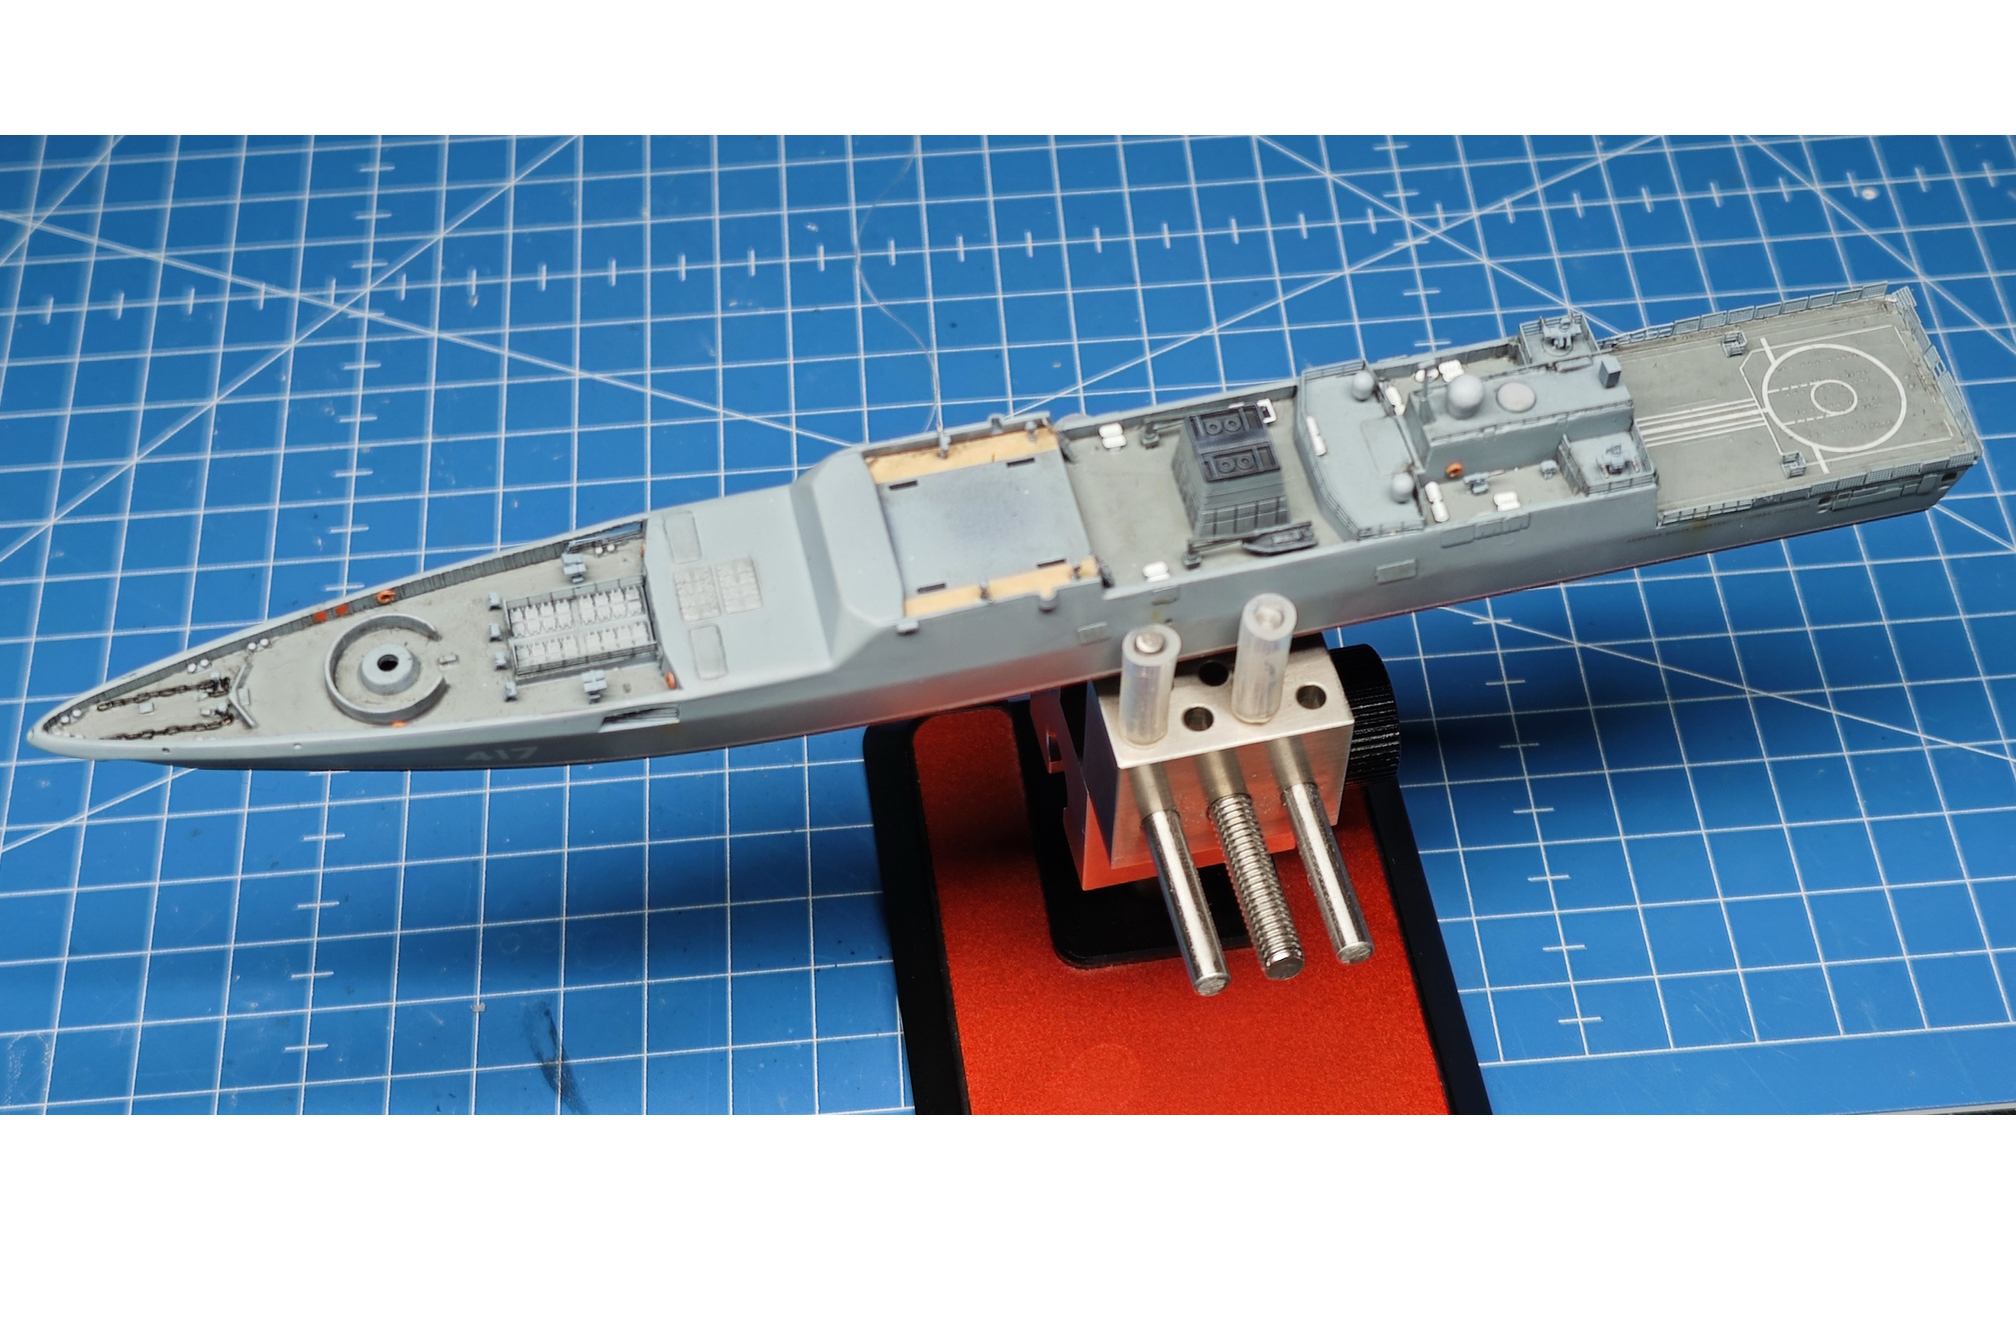
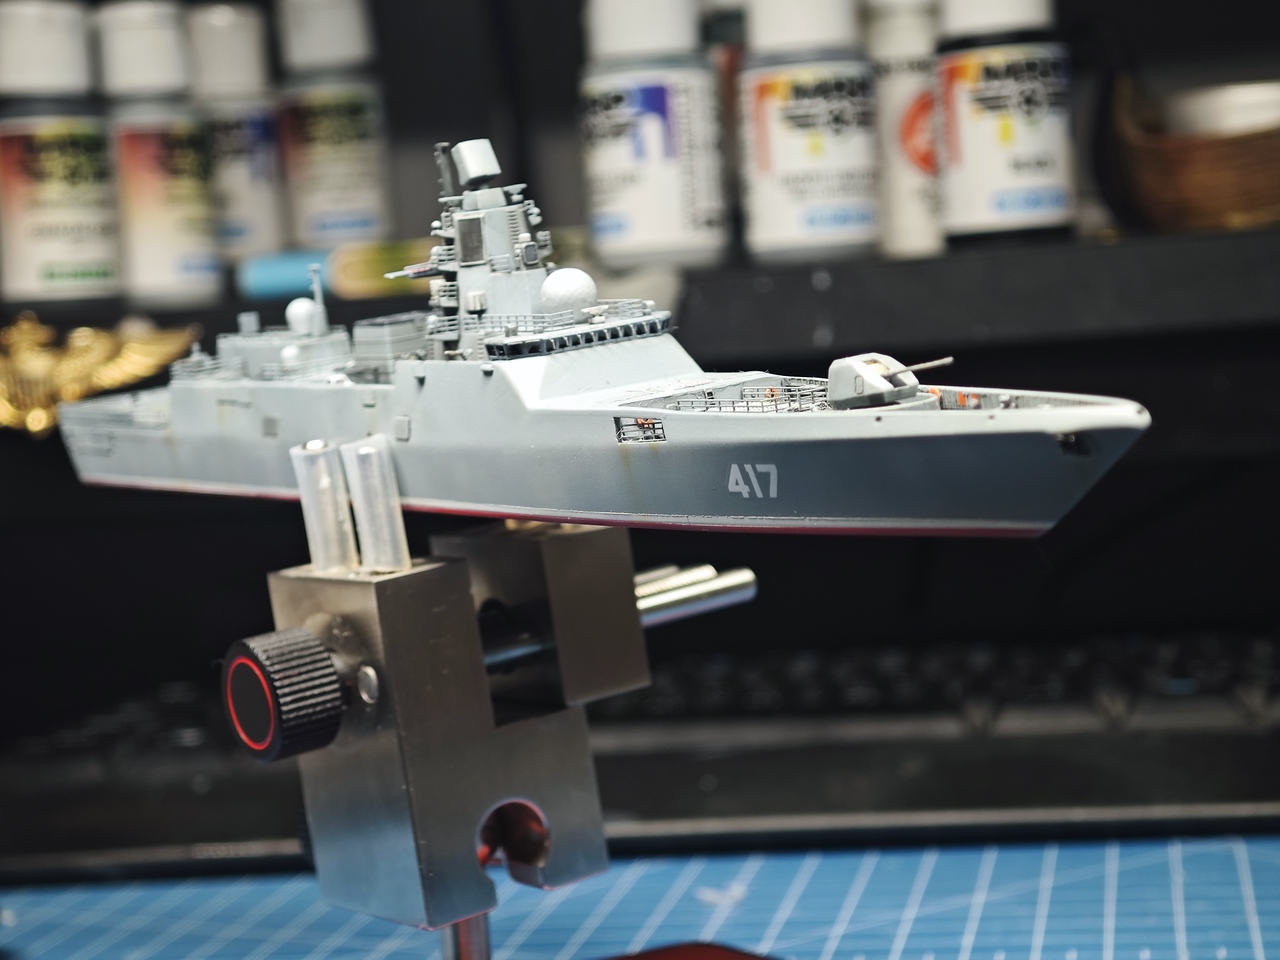
Main painting completed. As always, MRPs were used, FS36270 for the hull, White for the boot line and Cherry Red for the bottom hull. I wish it would be a full hull model, but beggars can’t be choosers.

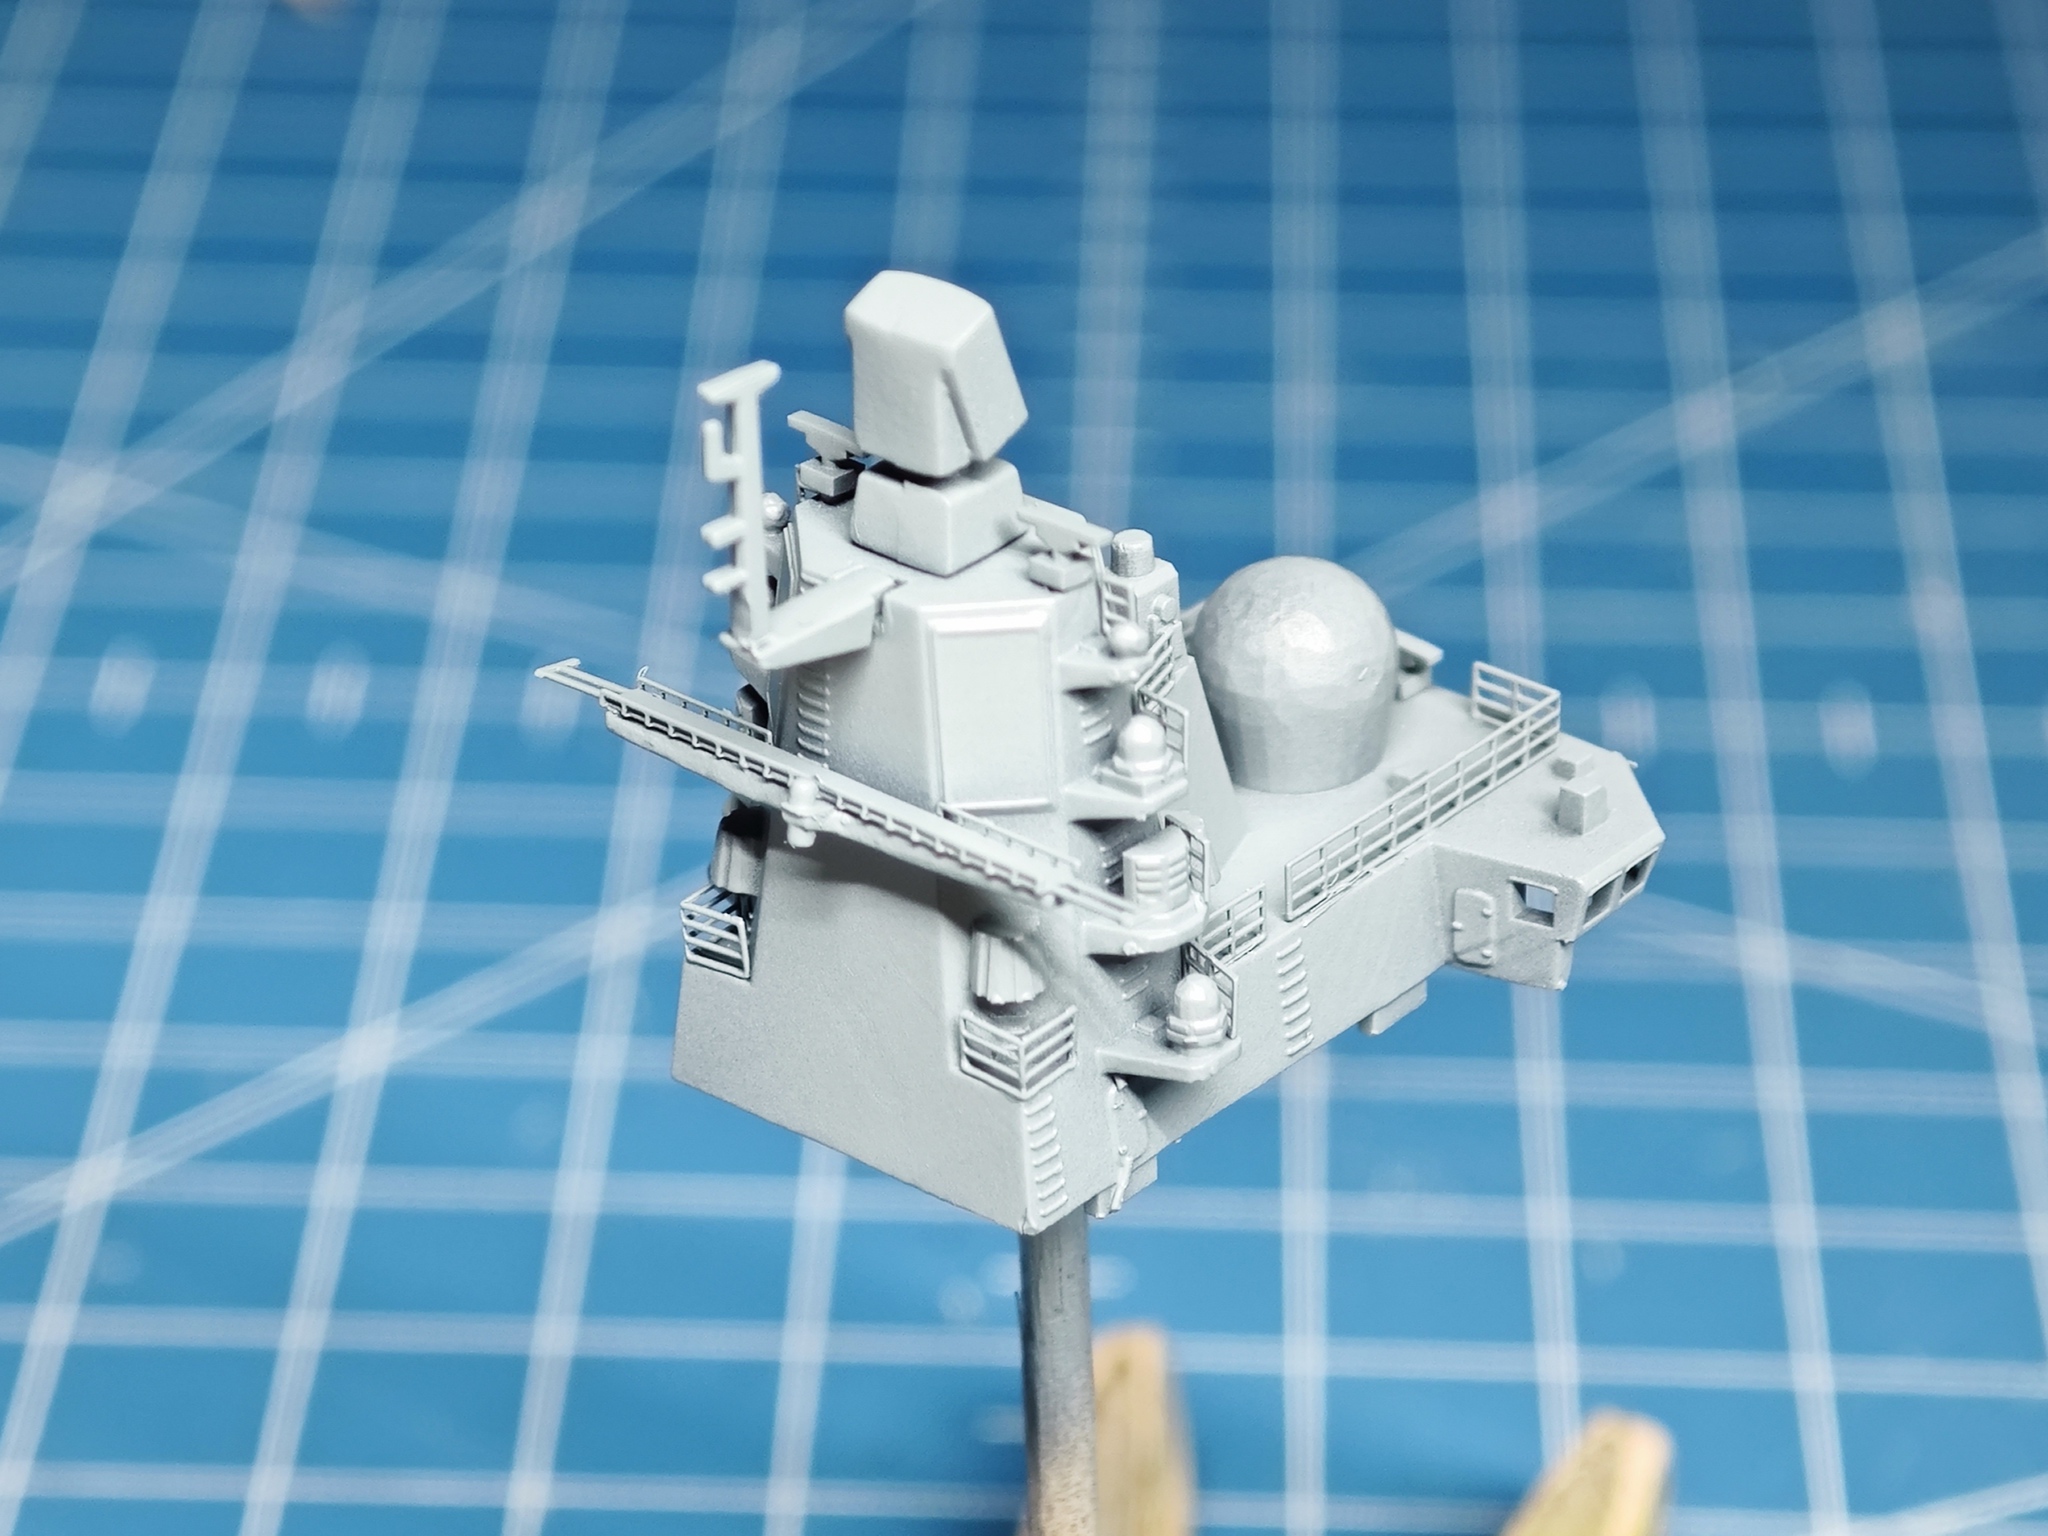
I really like the busy look of frigate’s bridge and main mast. Some layer lines are visible in the photos yet you can’t see them with naked eye. Oh and you gotta love the windshield wipers!
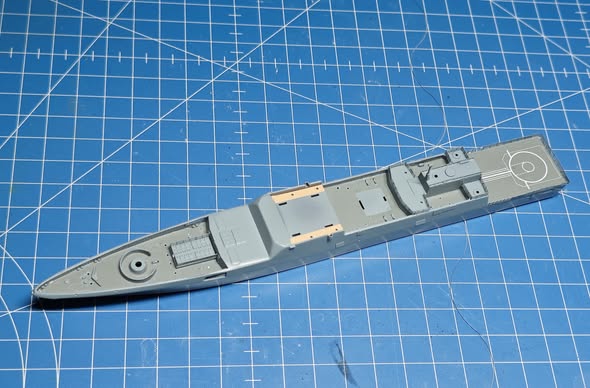
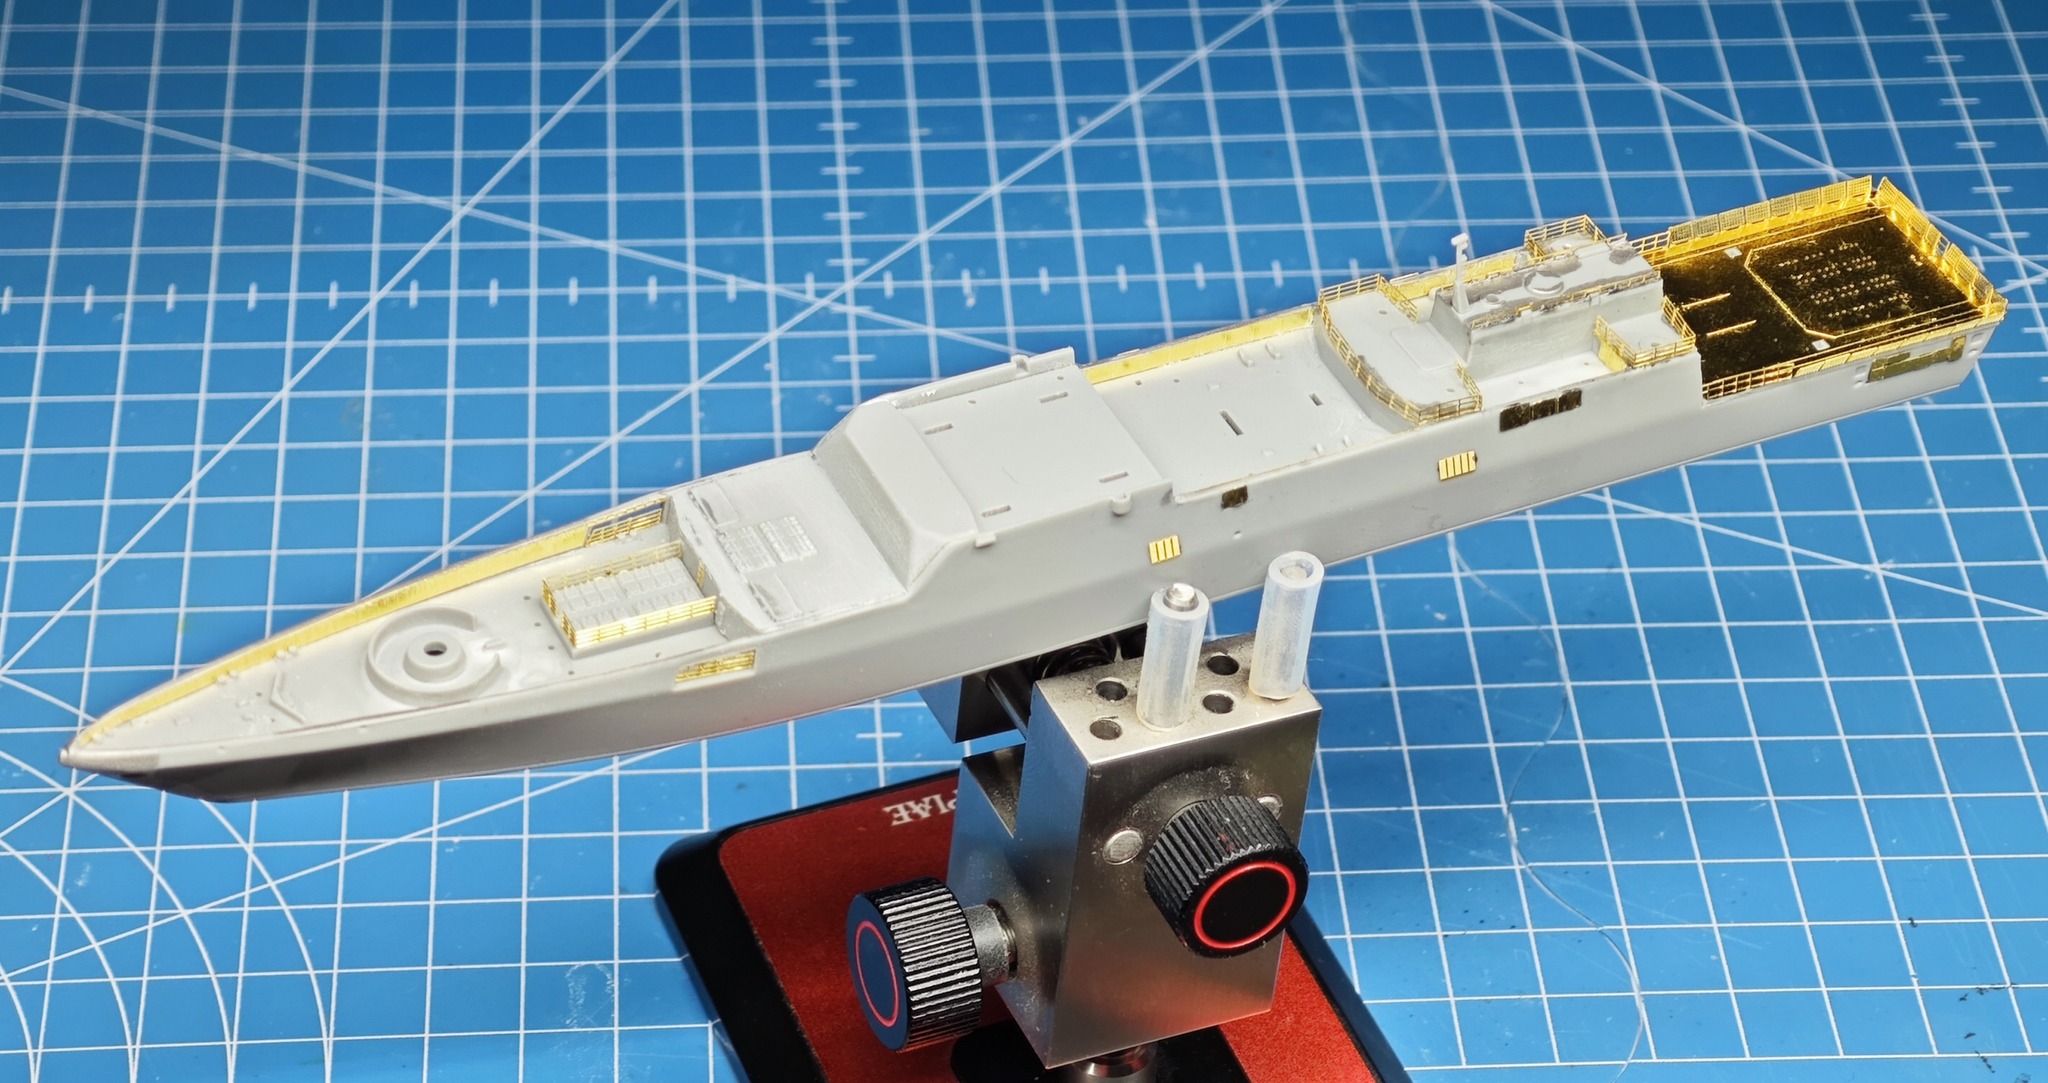
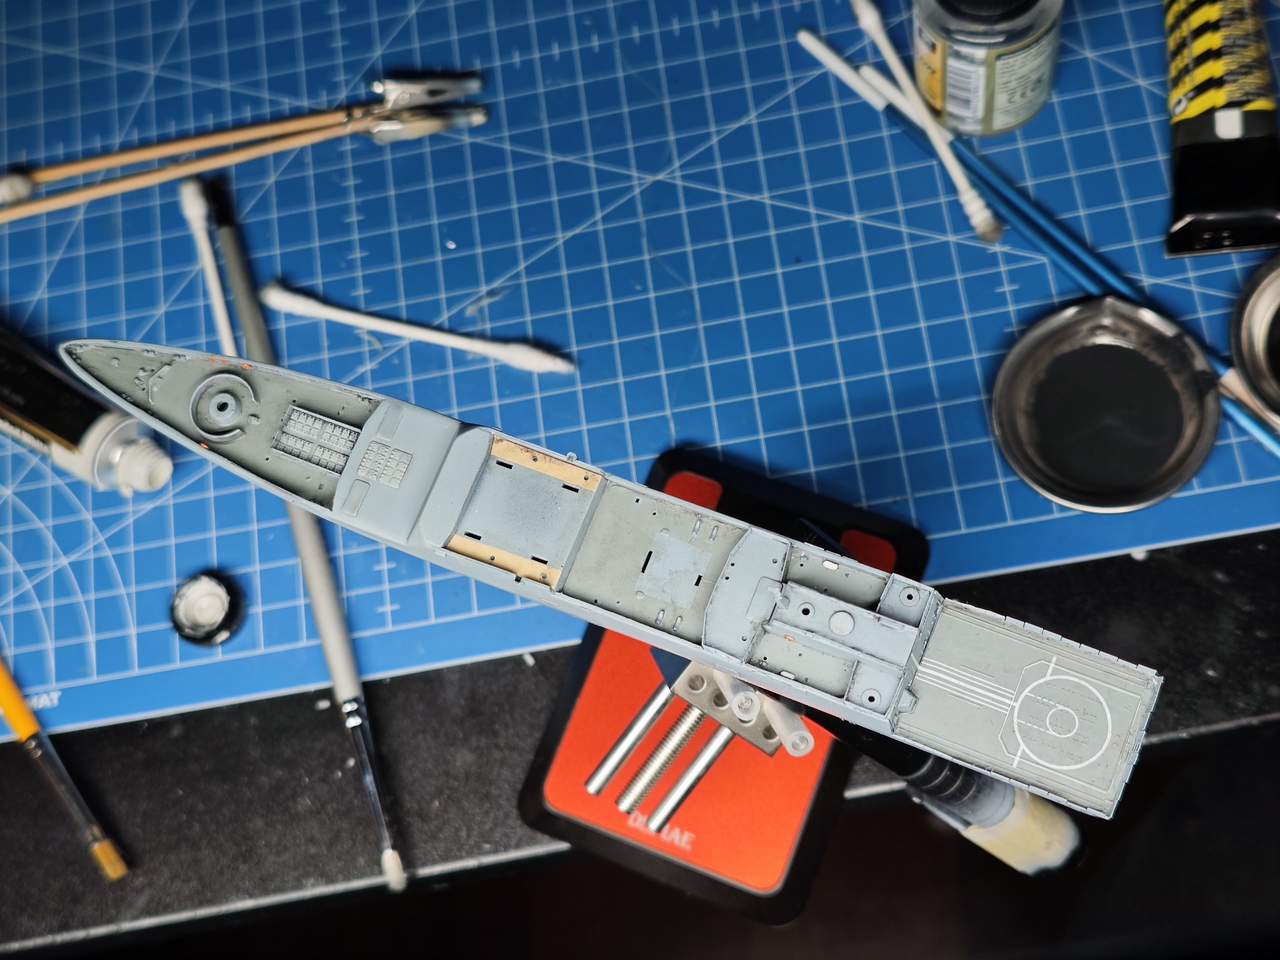
It is the first time I have seen this, but Dreammodel decided to give you an option to use decals instead of painting the decks, thus saving you lots of time on masking. I’ve decided to try this option and I have a mixed feeling about the results. It was quite challenging to put the decals down and the results aren’t 100% the best. I would advise trimming down the decals, not just to remove any trace of carrier film, but probably a fraction of a milimeter of the deck edge as well… which should be interesting in the circular gun area. I also have a feeling, the colour should be a tad darker than it is. But it is what it is and I am going on with it.
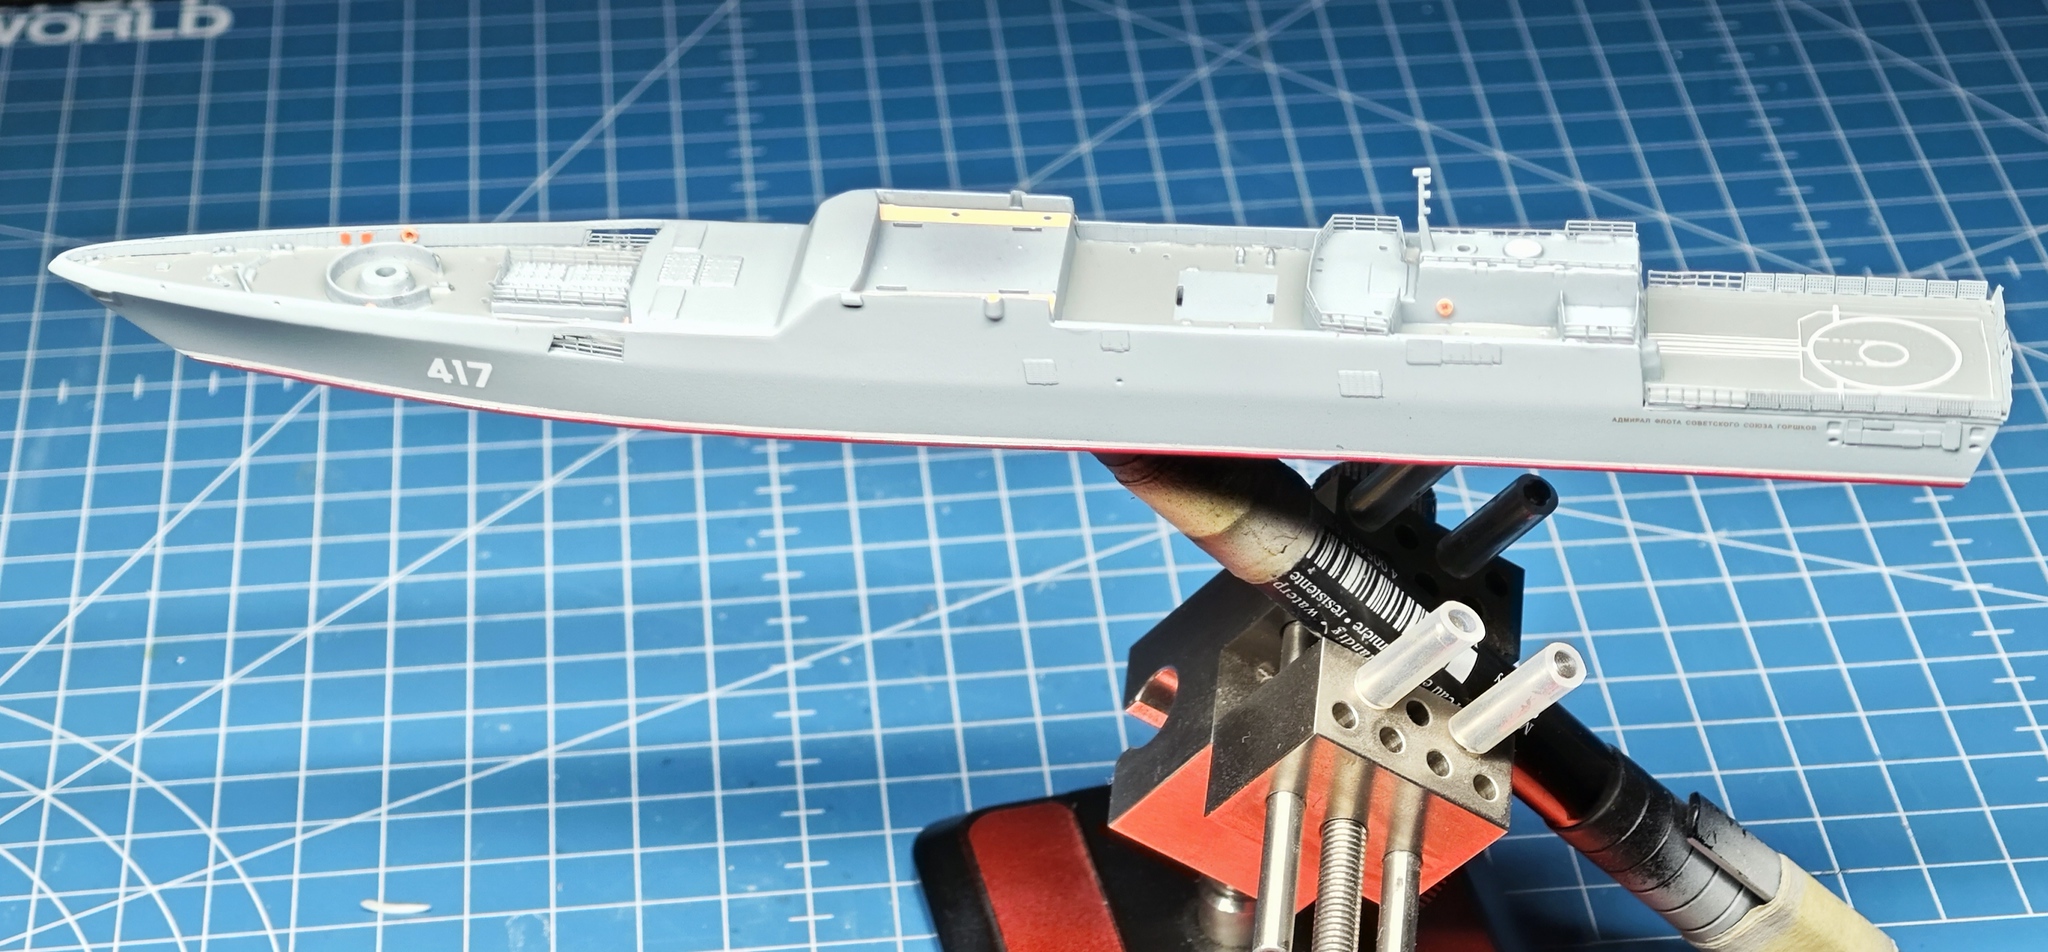
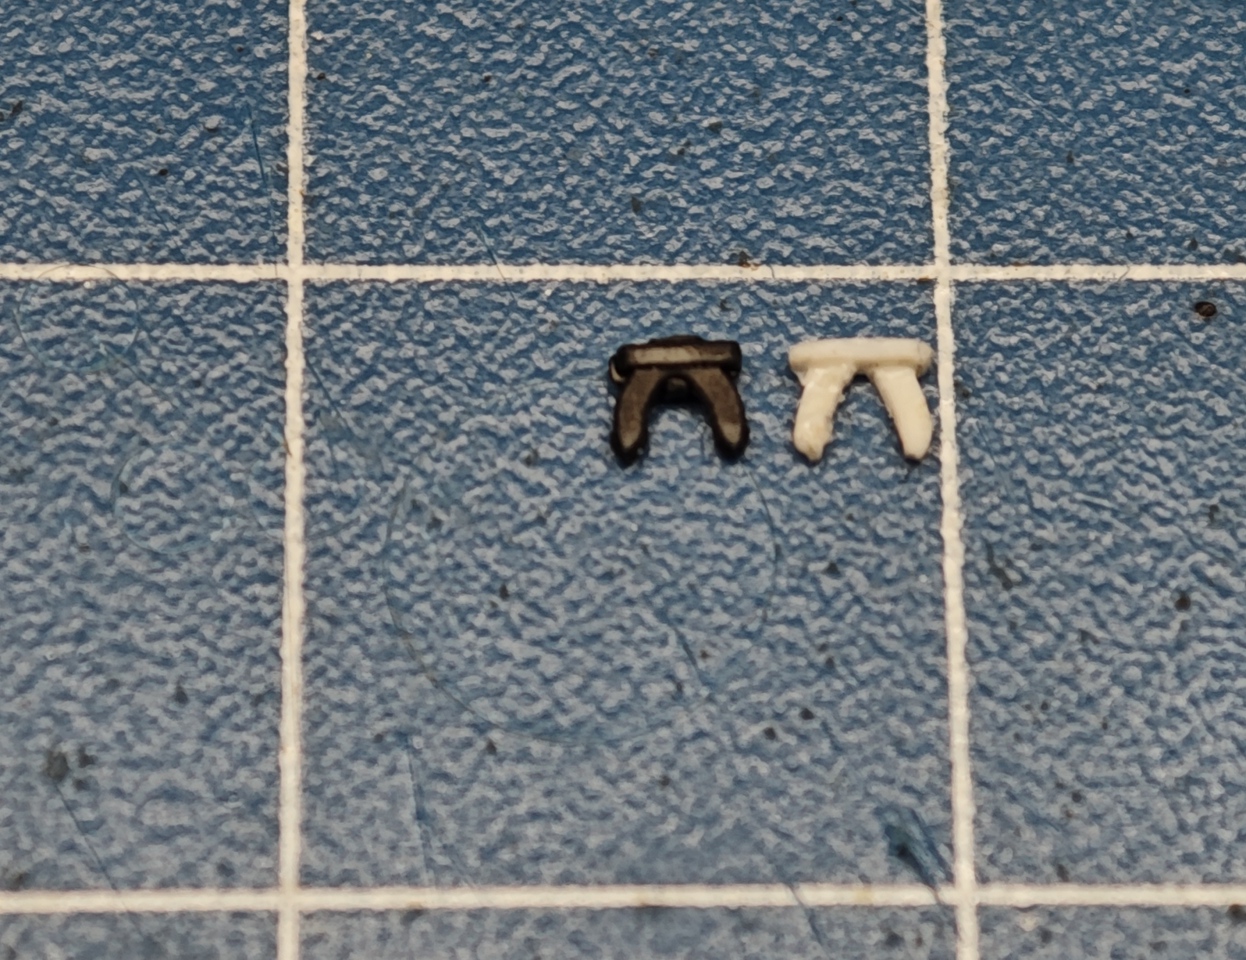
Looking at the reference photos, I noticed that there are several fluorescent orange lifesavers placed around the ship, that are not present in the kit. I’ve recreated them using styrene disks cut with punch’n’die and drilling a hole through center.
Instructions don’t mention any other than hull colours on the superstructure, but the reference photos clearly show different grey shades, mainly on sensors. I think this adds a nice touch and a subdued visual way to break up the components.
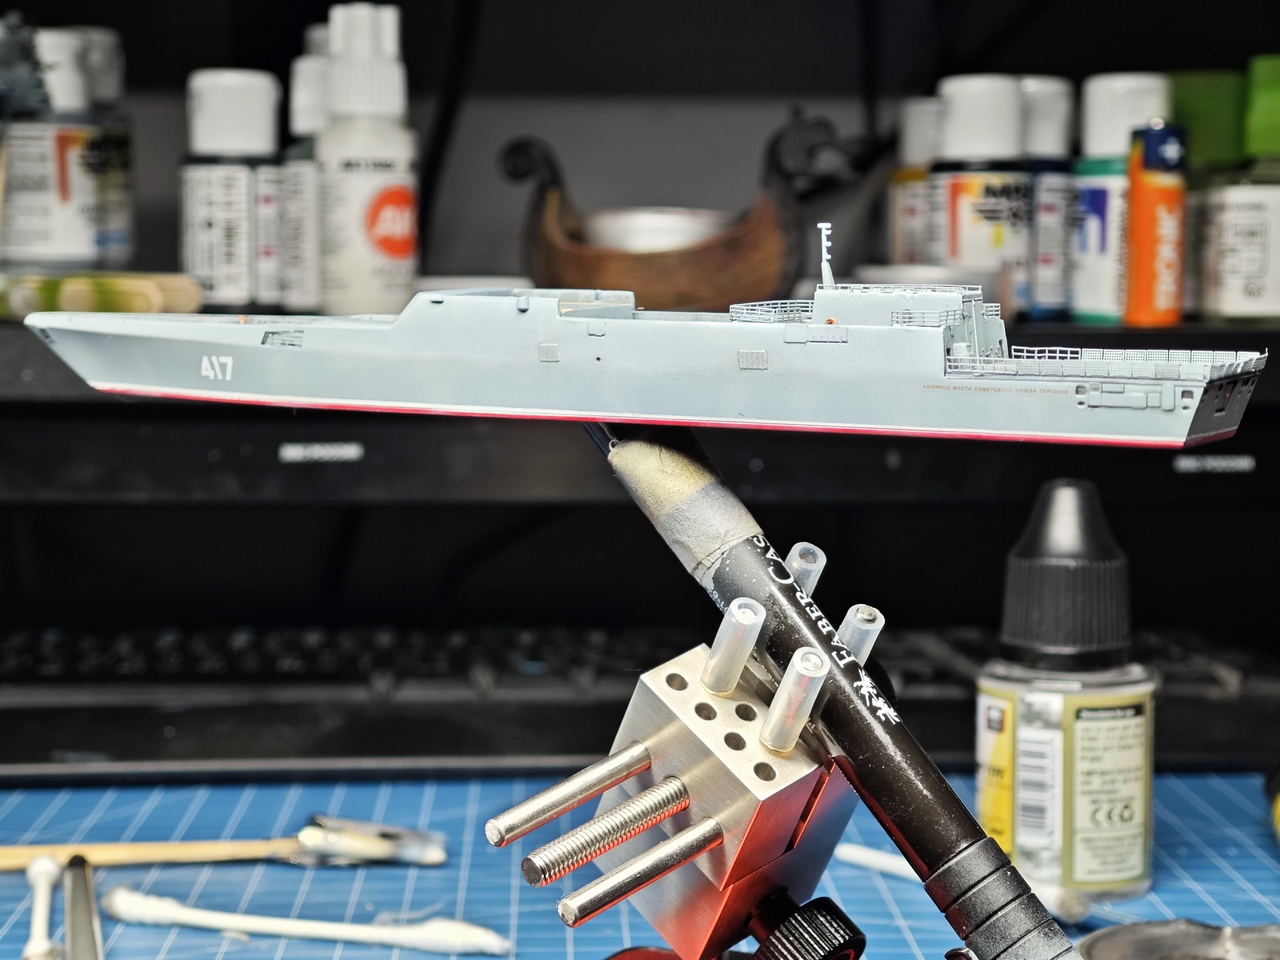
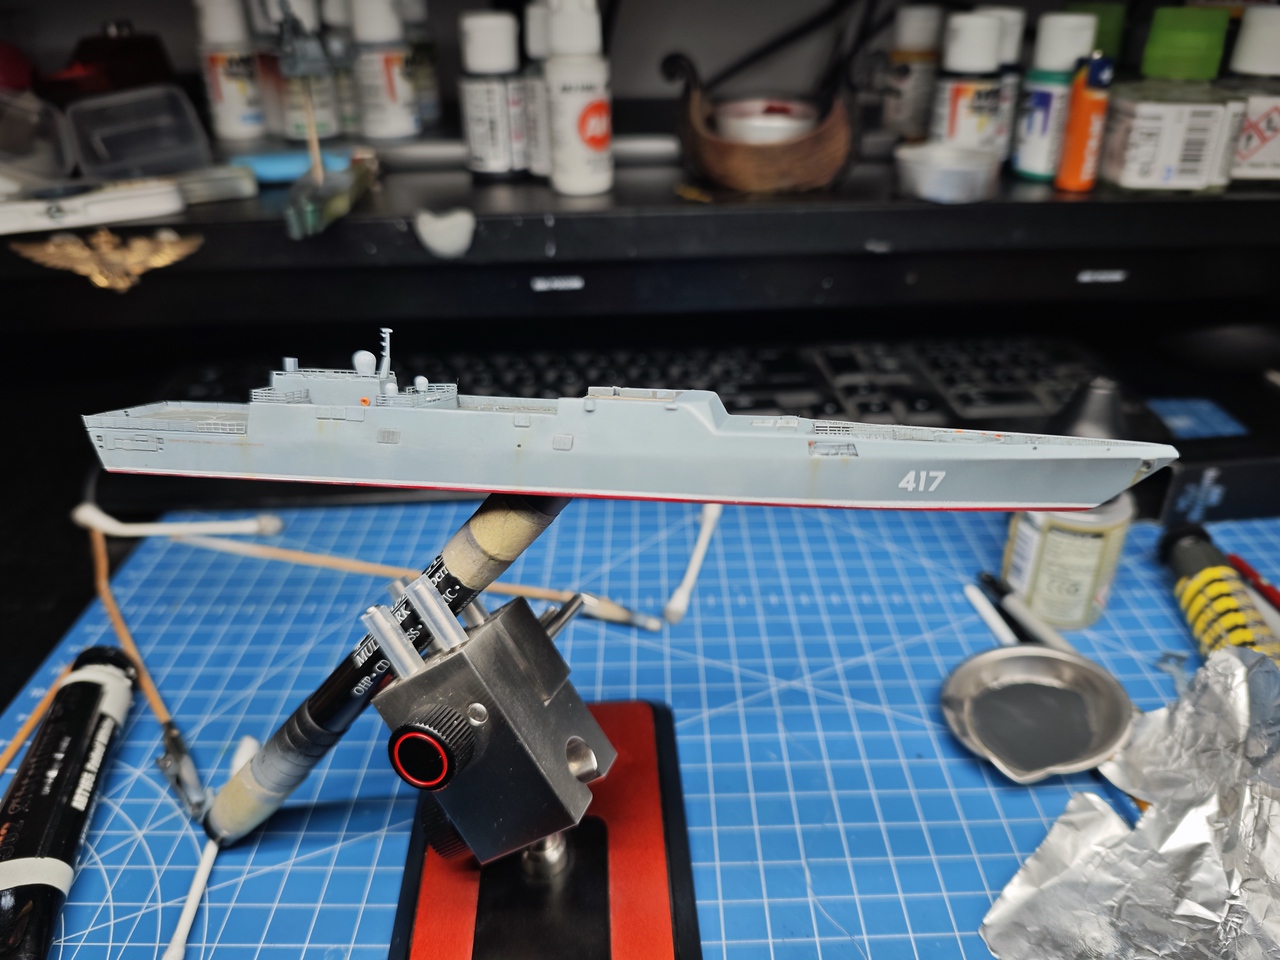
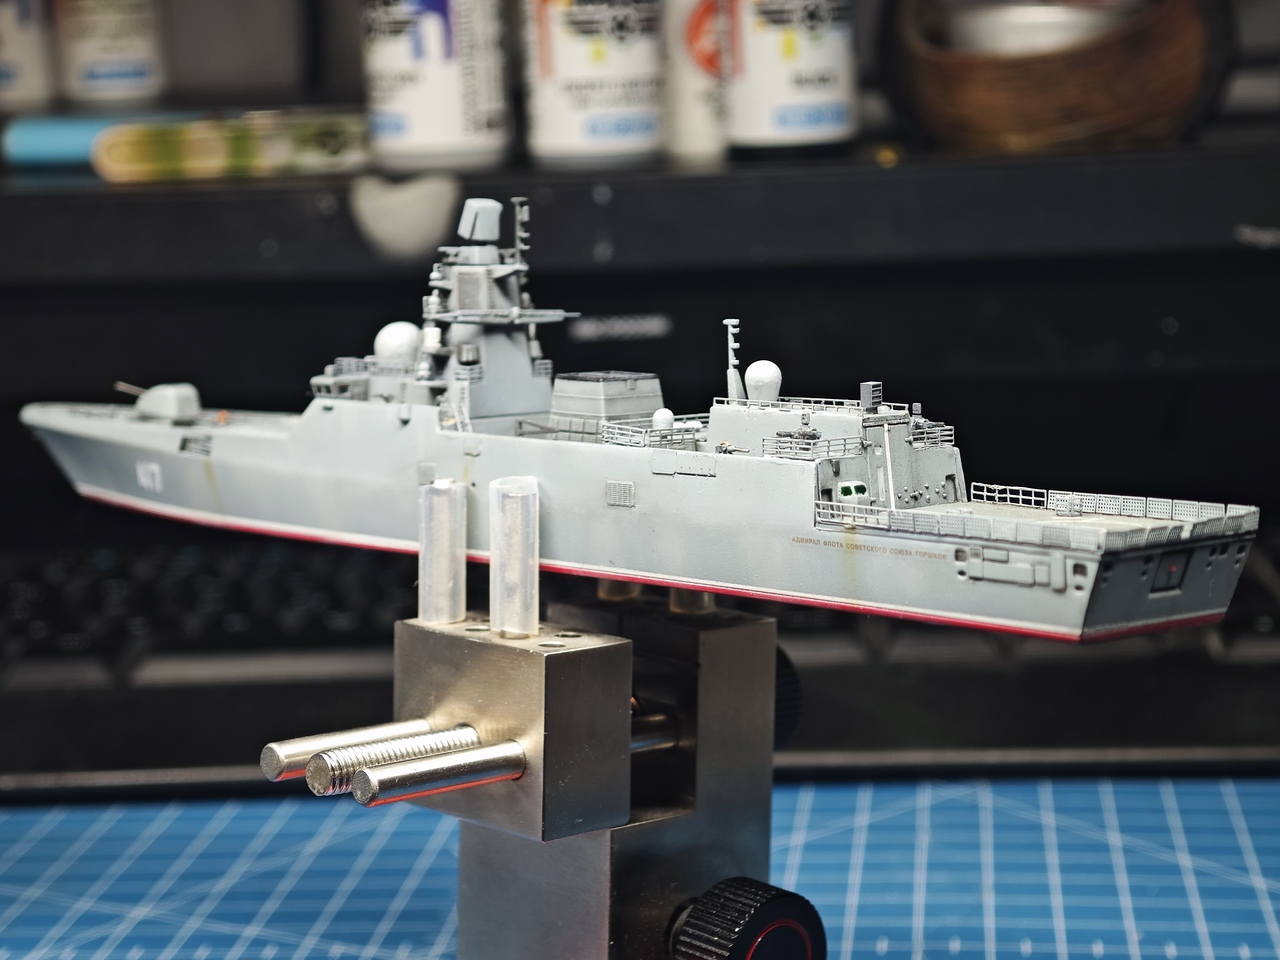
Oil paint weathering time of the hull. I first went with White and Off White oil paints to break the dull grey shape and accentuate certain edges and details. This was followed by adding rust effects. I don’t like the overdone rust on my models, but I do want them to appear worn. Gorshkov class is a new line of ships and I haven’t found any photos of overly rusty ones either, so I went with subtle tones according to reference photos. Decks were given a darker wash to accentuate shadows and a splash of grime.
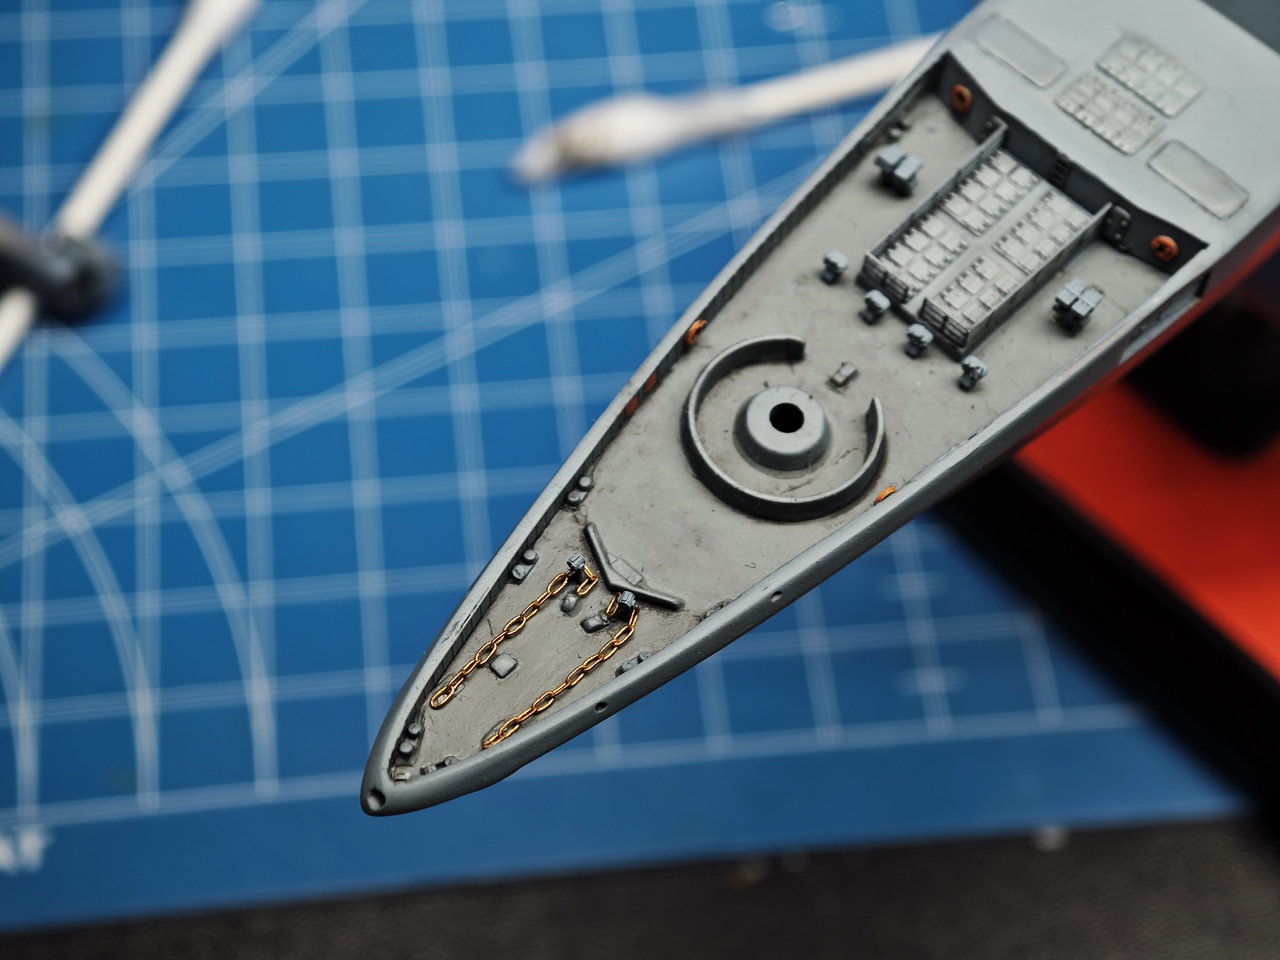

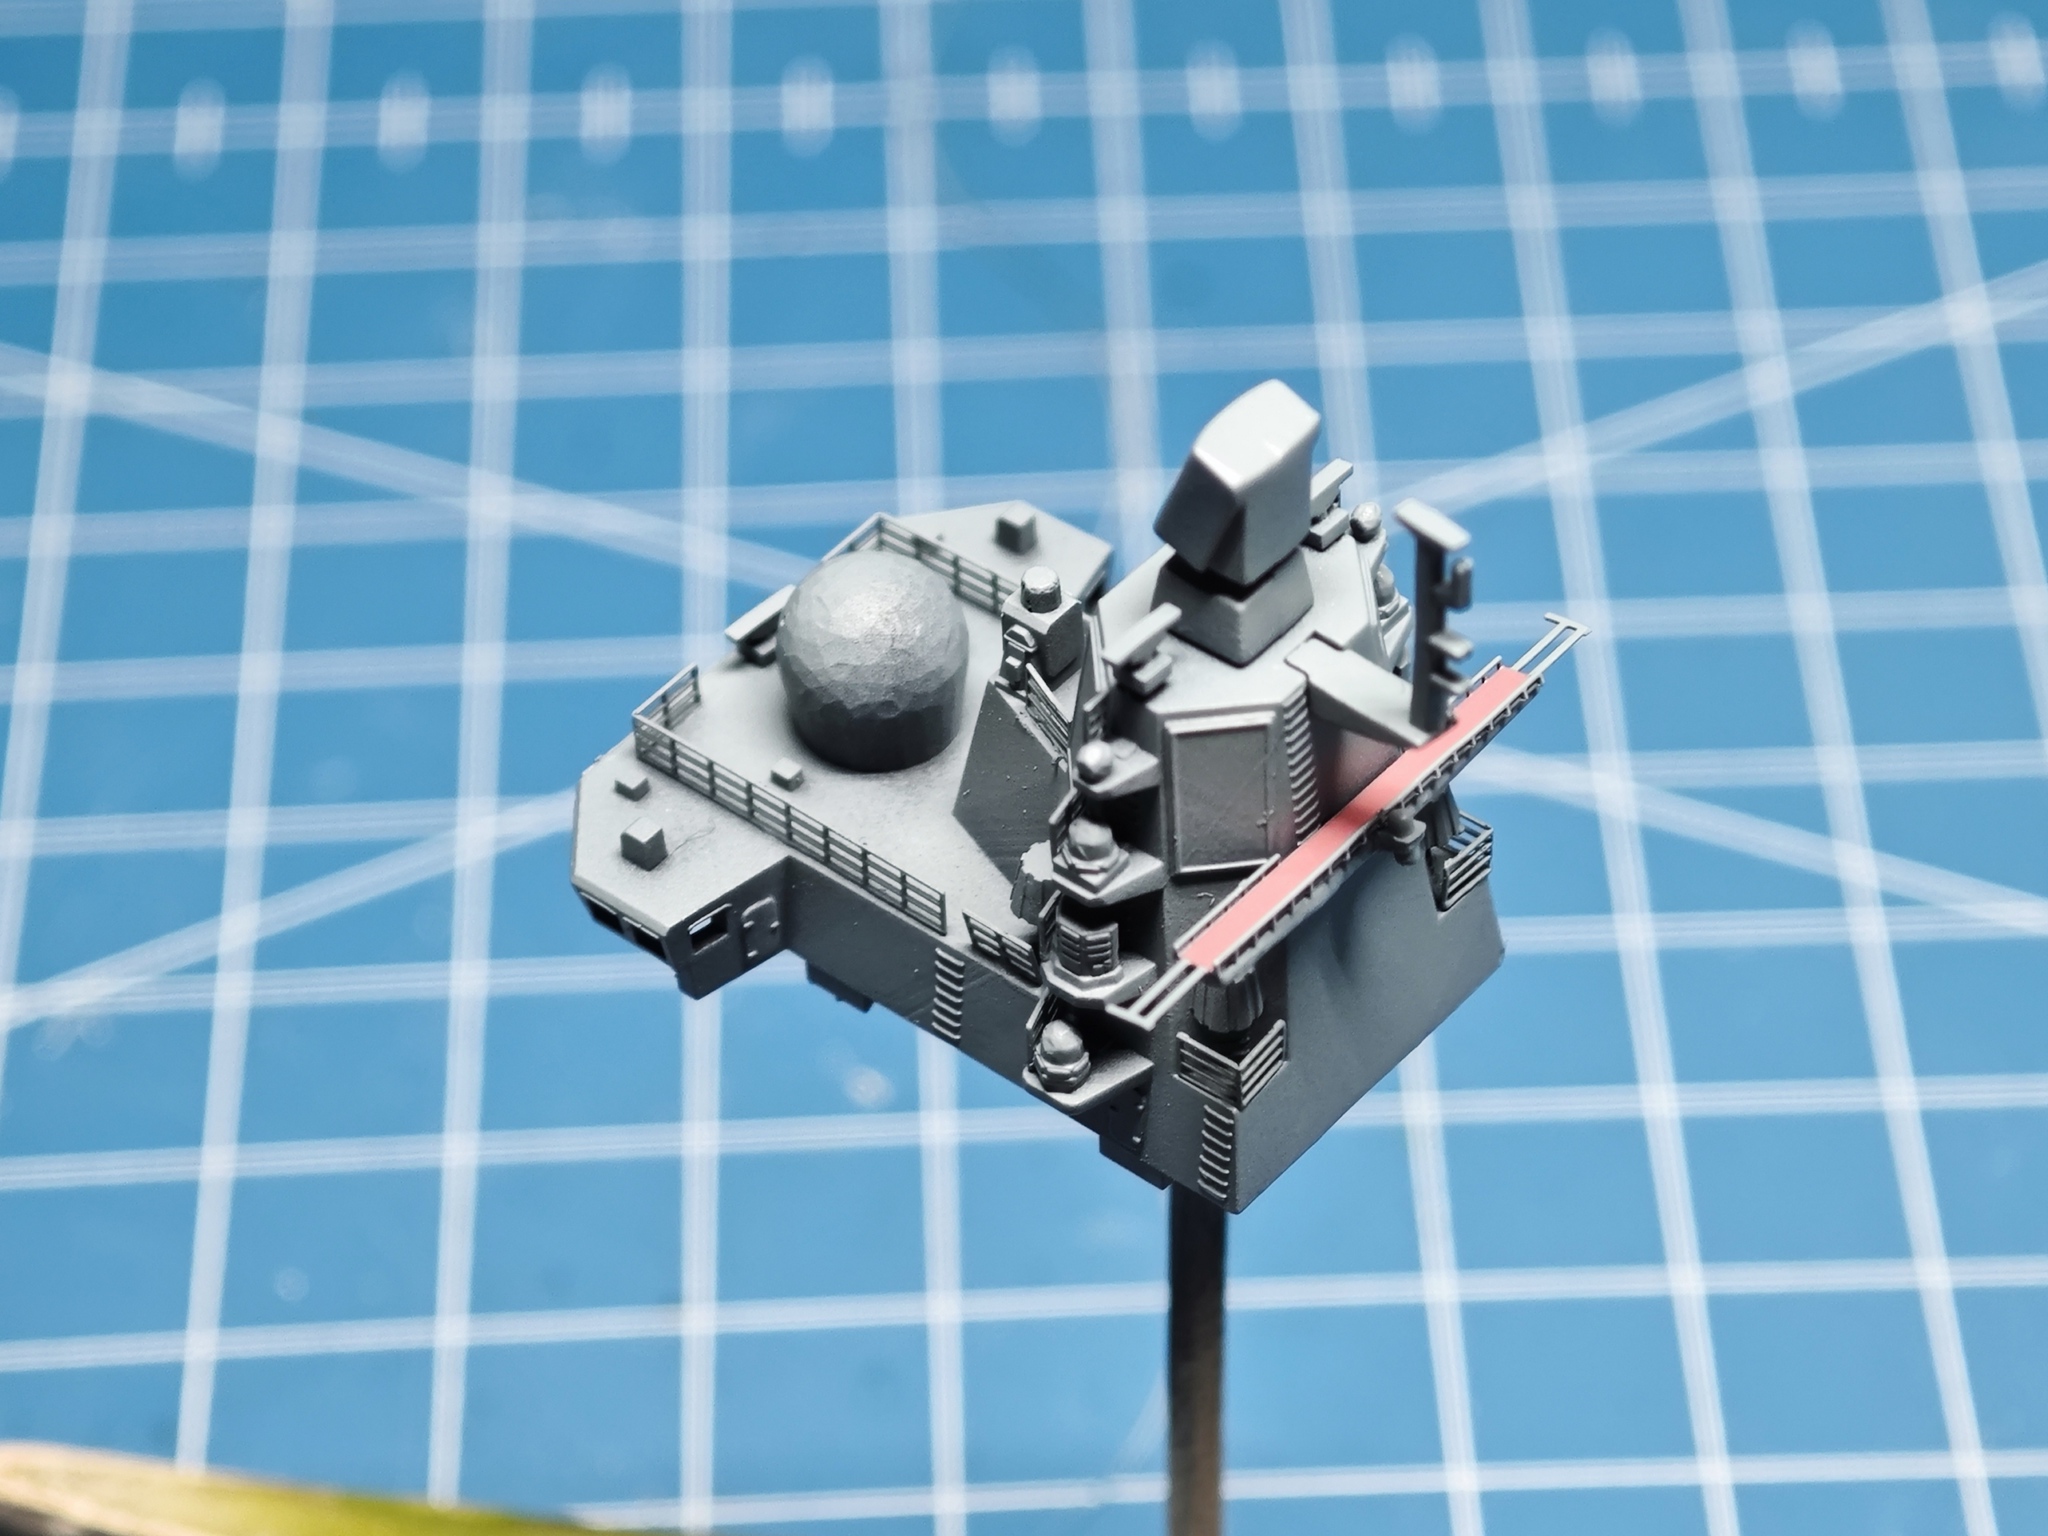
Not much time during the NY holidays but I managed to squeeze some modelling time in. I have scraped the moulded anchor chain off the deck before painting and now replaced it with much better looking metal chain (to be painted and weathered). Bridge part of the superstructure also received some gentle weathering to tie in with the rest of the boat.
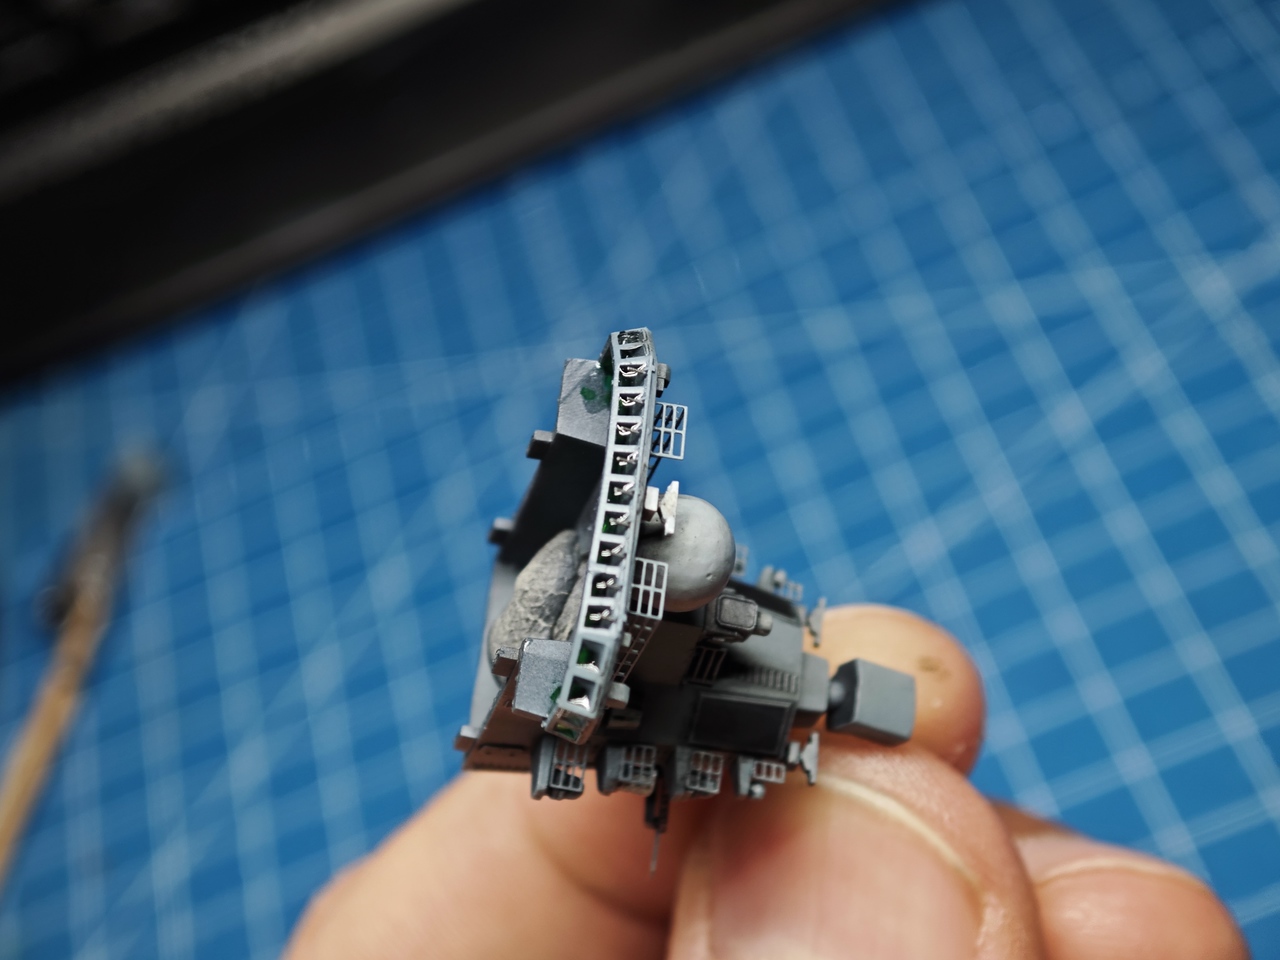
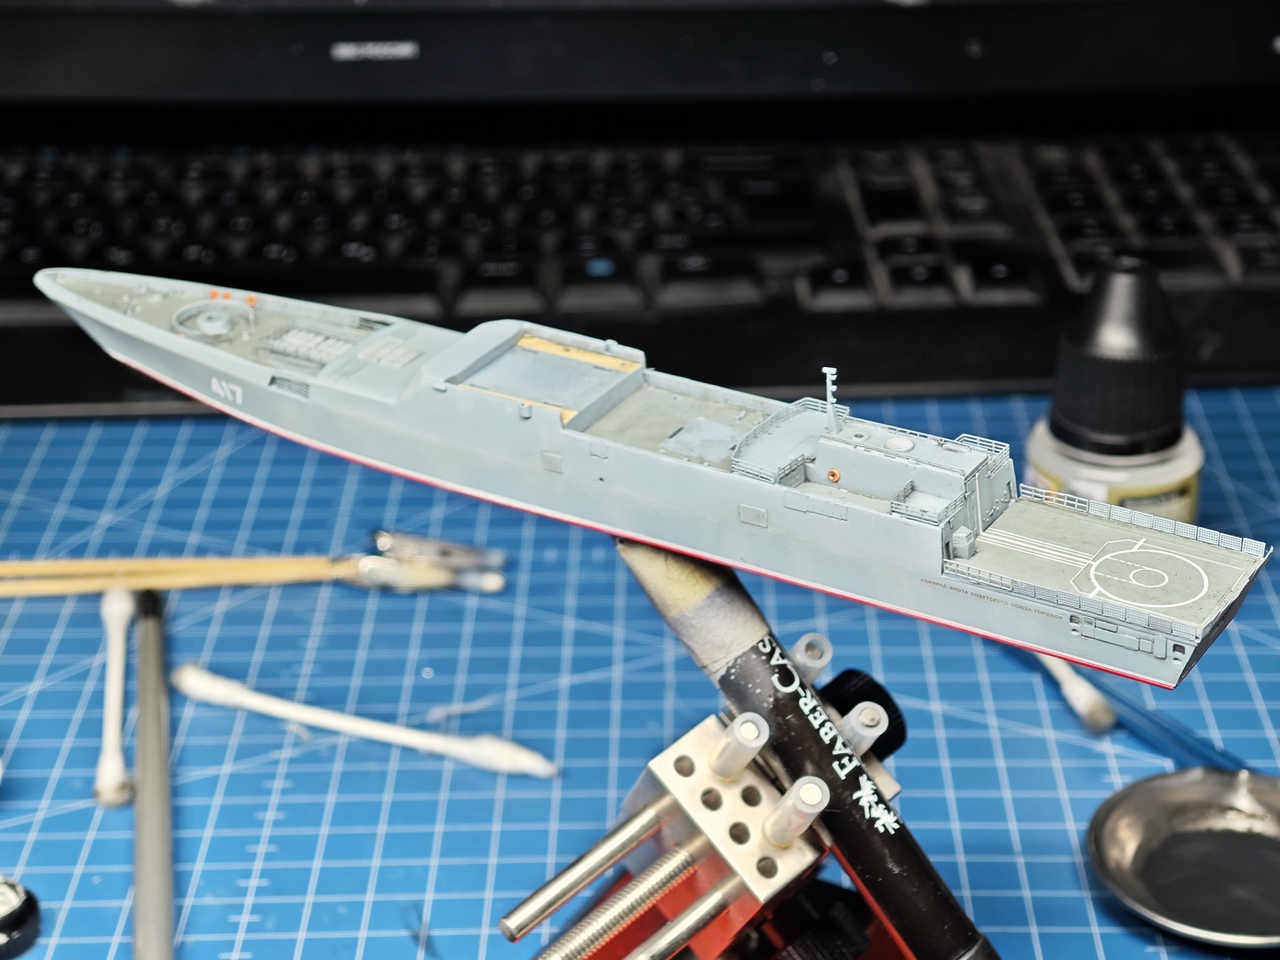
It is finally time to start putting all the little bits together. Assembling the superstructure ain’t difficult and all those little life raft canisters, boats, cranes, CIWS, 50.cals and other equipment really add interest to the overall model.
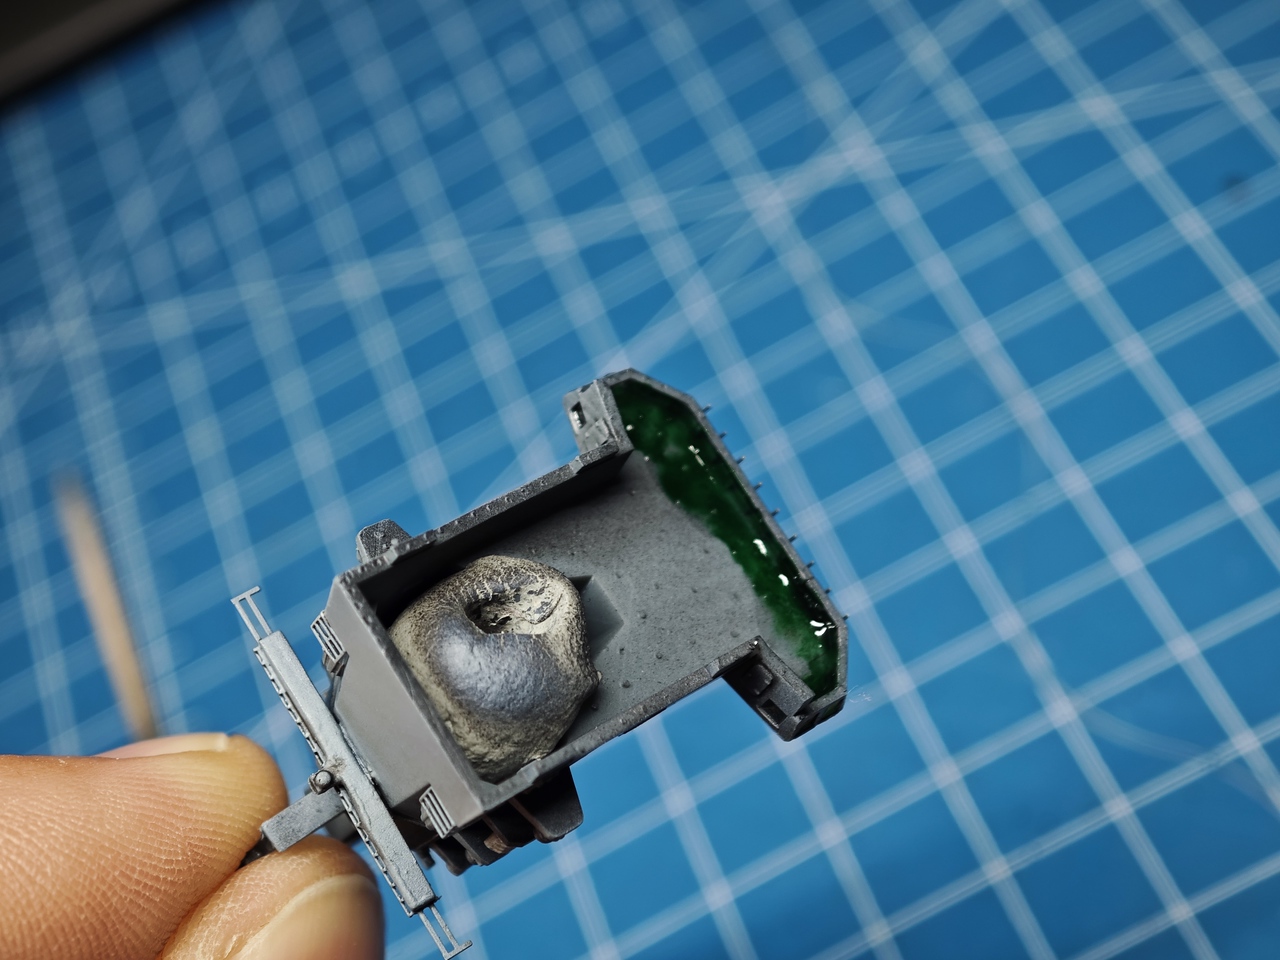
Since the kit has holes for the bridge windows, I filled them with clear UV resin from the inside, cured them and painted them with Tamiya clear green paint. They appear dark, as on most photos, but if the light hits them from the right aspect, they shine nicely green.
And last but not least, the anchor. I managed to loose one – one moment it was in my tweezers and the next, food for styrenosaurus rex. I recreated it from 0.2 styrene sheet – not a fun thing to do, but I think it looks the part!
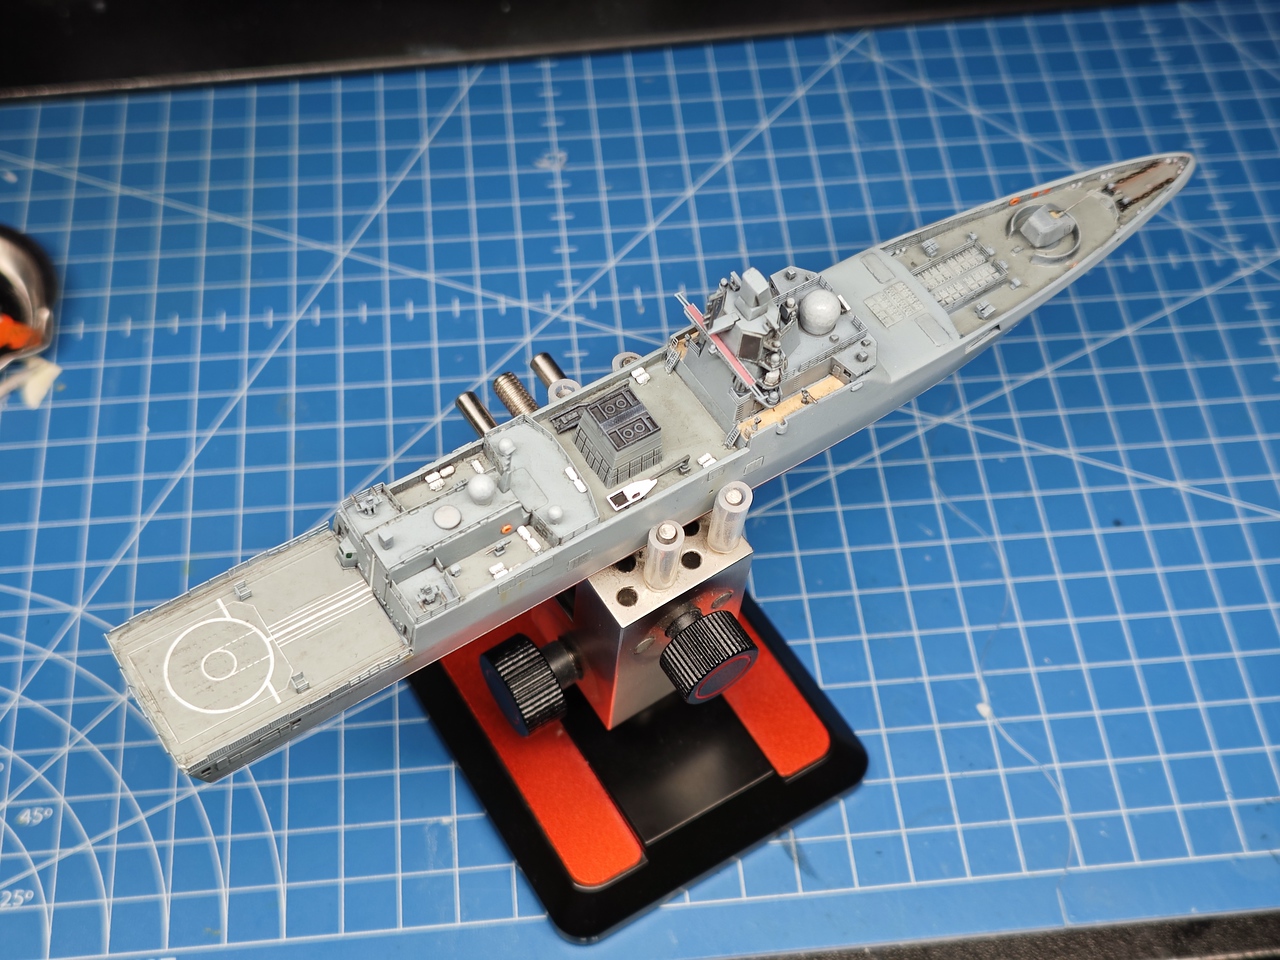
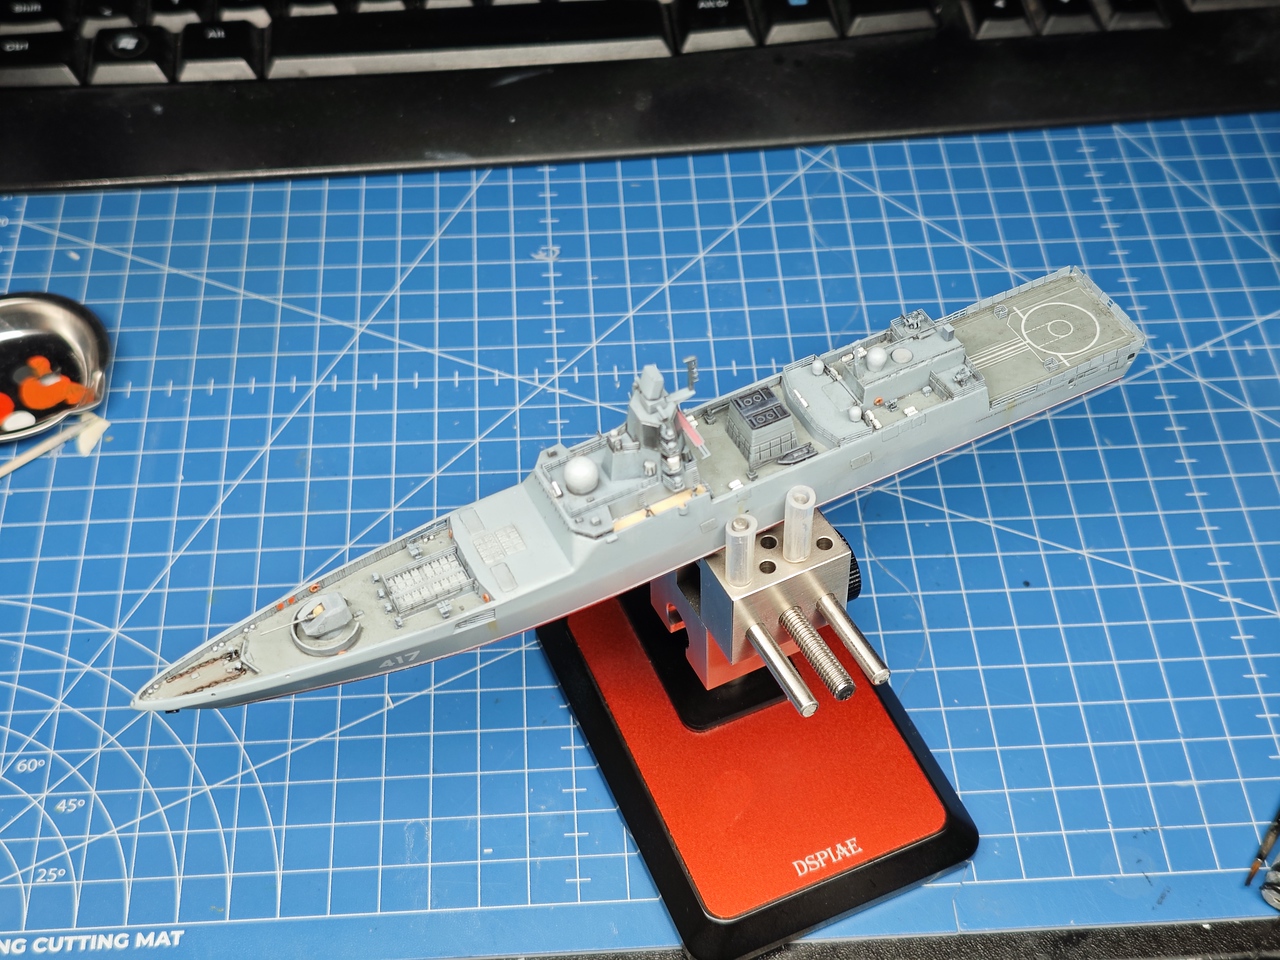
The ship at this stage looks more or less complete however there is some work ahead still. First the rigging, then the crew and last but not least, the seascape!
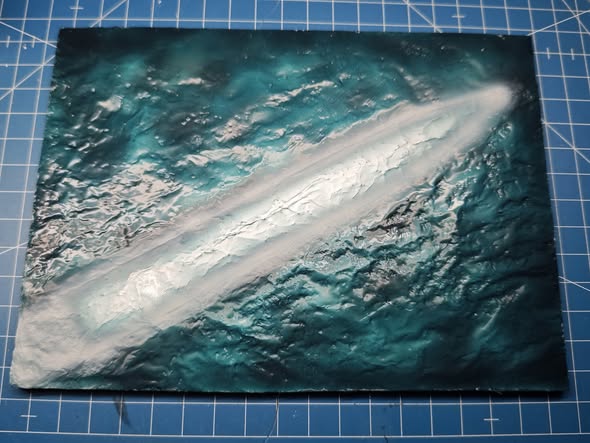
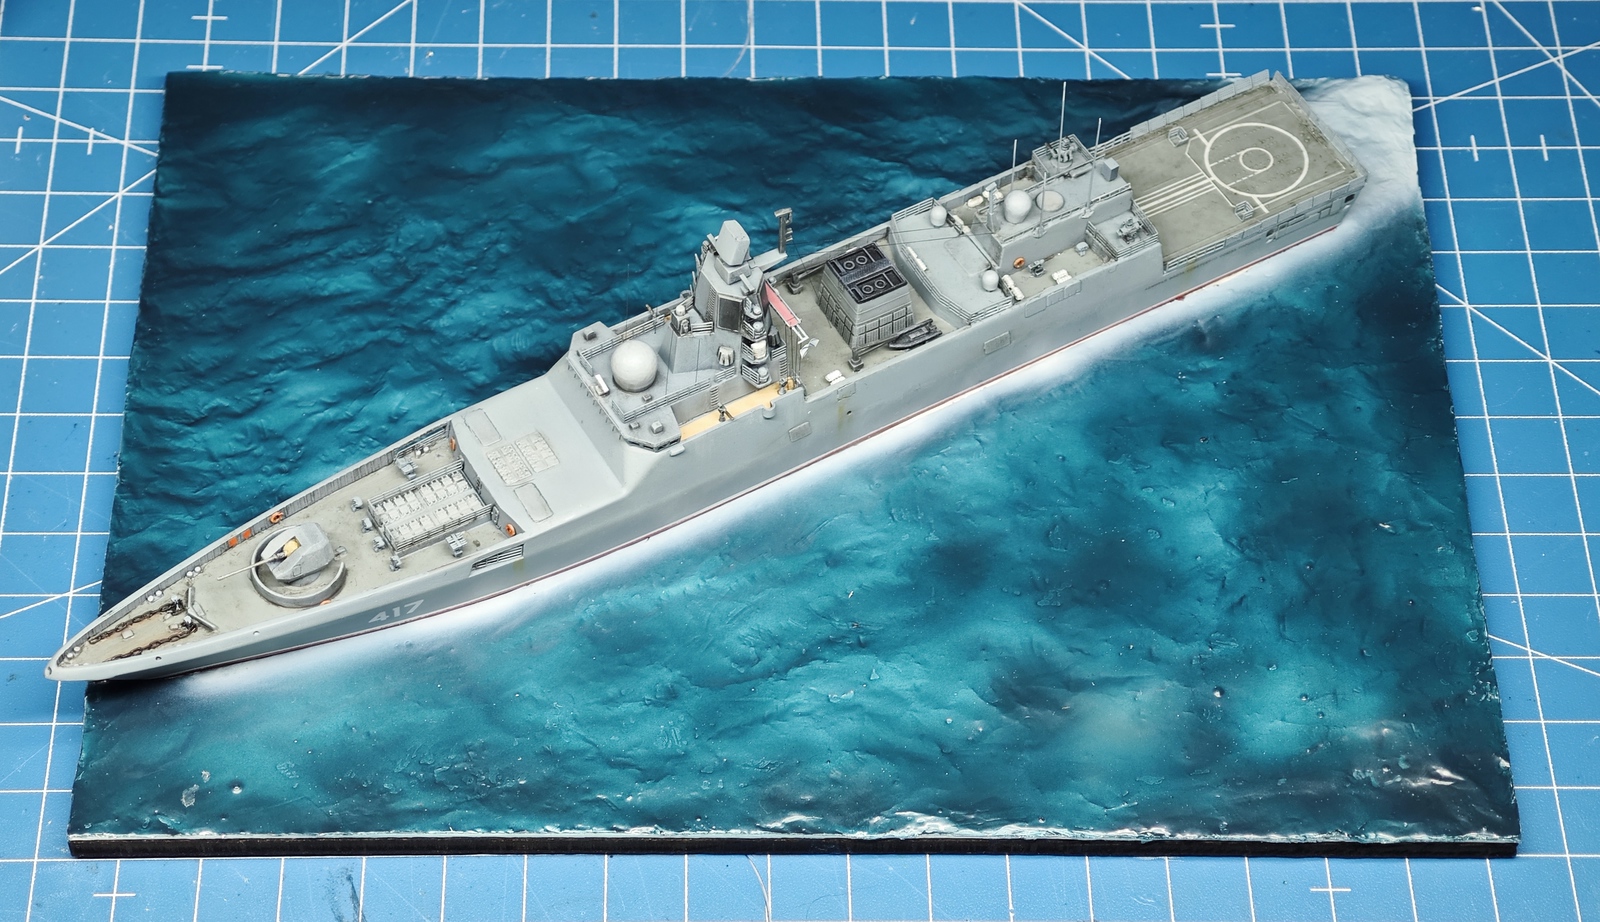
As I love posing ships on a seascape and with Gorshkov being more or less complete, it is time to create a base for her. I have used 18x13cm plywood as a base. First I’ve used a piece of drafting paper, marked the hull shape and cut it out, so I had somewhat like a base for the ship. Then brushing PVA glue over it, I crumpled kitchen aluminium foil and attaching it to the plywood. After it dried, I once again brushed the PVA glue over the aluminium foil and glued on a new piece of aluminium foil. The trick in the second layer is that it smooths out all the unnatural looking wrinkles of the first layer. After everything dried, I trimmed the foil edges as well as the inner edge of the ship hull and painted the foil with Sea Blue and White for the foam around the ship and its wake. Now it is time for applying gels and other effects to create a natural looking seascape.

Fantastic result, Seb! Your seascape turned out nice as well, interesting to see your technique there!
Thank you, Jeff! Finished pics are coming on Friday. I will be adjusting the seascape technique a little bit on my next ship, which is also underway at the moment. Got bitten by a naval bug it seems 😀
Ships are very tempting, with 3D printing there are so many options these days!
It looks fantastic! Wow!
Thank you! Stay tuned – finished gallery coming on Friday!