
People often ask me how to take photos of their models so that they would look great on the screen.
A key to good photography lies in several steps which I’ll try to explain along the way. Also be aware, that it doesn’t matter if you use compact camera, DSLR or even cell phone for taking photos – same rules apply here.
First the background. As I work for SAM, editor’s policy is to use white background for photos to help graphical editor with magazine design. Unless you know what you are doing, I would personally discourage you from using White as it is quite hard to get the right colours with it and sometimes, more often than not, people tend to wash out details because of uncalibrated monitors and light things, like canopies tend to disappear in the background. My advice is to use a neutral colours, Grey or Light Blue, while Black is perfect for Natural Metal Finish (NMF) models – it gives a certain depth to the metallic colours.
Lightning
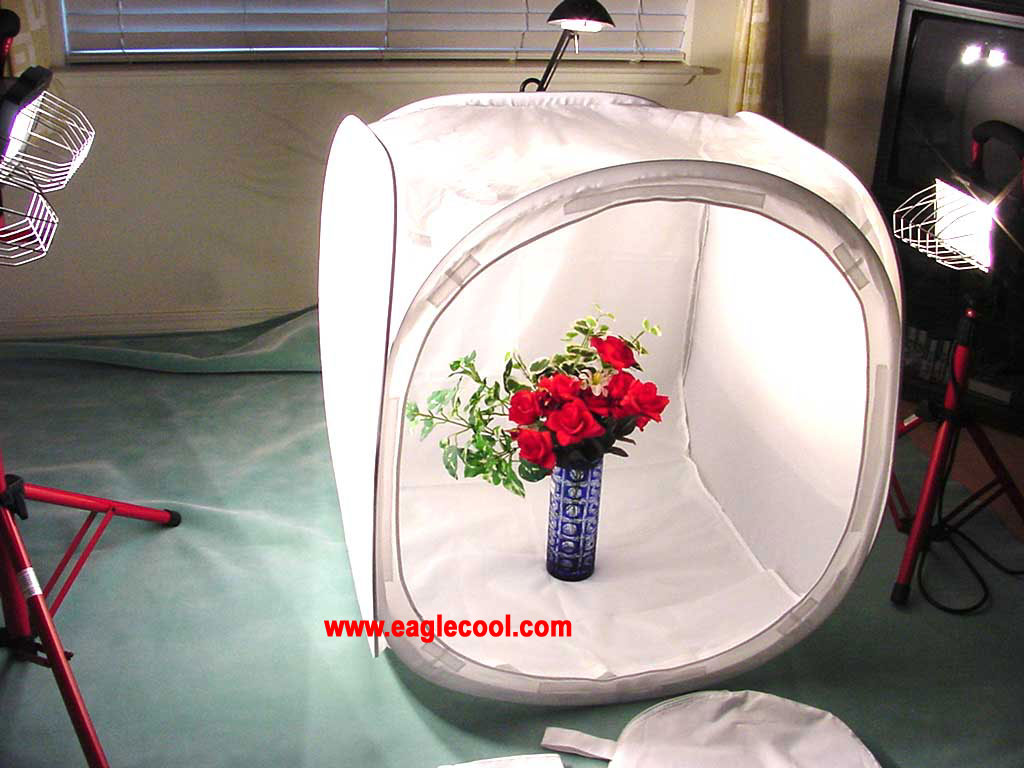
(photo copyright http://www.eaglecool.com)
The goal is to have a nice diffused lightning so the shadows on the model (and a photo of course) are few and soft. There are a few options – either you buy a so called “light-tent” as seen on the photo above (could be from the same retailer, but you can find a bargain price on Ebay as well) or create one by yourself.
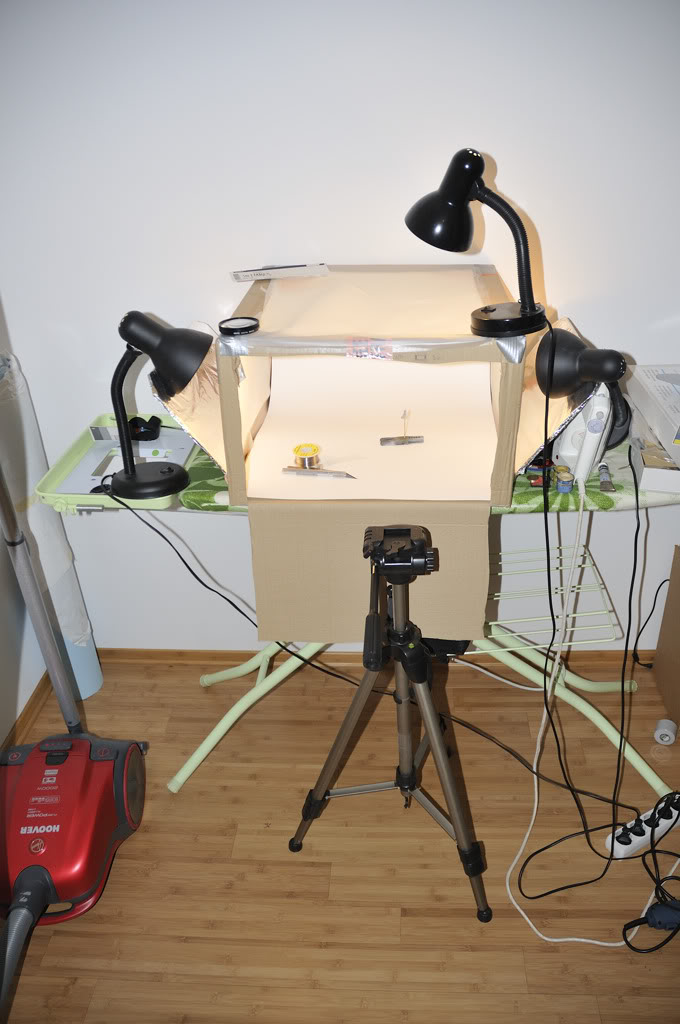
You can see my old “studio” at the above photo. I made it out of a cardboard TV box. I cut a whole at the top and cut out the downward opening flaps at the sides. All the openings were then covered with semi transparent tracing paper. Flaps were further wrapped in wrinkled aluminium kitchen foil to further diffuse the reflected light. Difussin a direct light is very important and even if you don’t want to use such a set-up, just use some tracing paper or even some baking paper you find in the kitchen, cut a piece of it and hold it over a model when taking photos.
As you can see, I am using 3 light reflectors for shooting – the contain 60W light bulbs, though recently I switched to more powerful 150W construction reflectors, similar as in the first photo above. I usually set one at the top, facing downwards and two on the sides. During each photoshoot I slightly adjust those, to achieve the best possible lightning on the model. Sometimes I use just the ceiling mounted lamp and the results are very good as well – just remember to diffuse the light (I’ve started repeating myself, haven’t I ;)) Oh and no matter how powerful the lights are, the exposure times will always be a bit long so the use of tripod is mandatory – the one you see on the photo is good enough for indoor photography and costs just around 10EUR but you can get even smaller ones for compact cameras in the same price range.
Camera settings
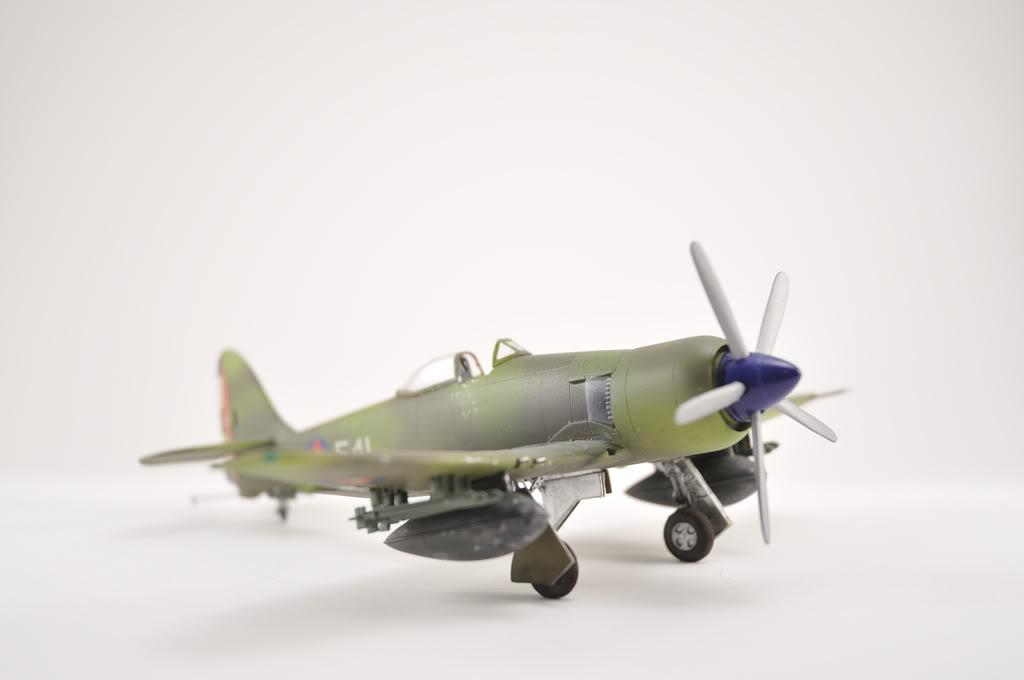
I will try to explain and show you the difference the settings made on an example. Test subject will be Sea Fury in 1:72 scale.
Automatic setting

Hard edged and pronounced shadows, overexposed parts of the model, strange colour of the background (supposed to be white), camouflage colours washed out. I don’t recommend ever using this setting. You achieve quite similar effect if you’re taking photos outside in the direct sun – if you do take an outside photos, then take them in the shadow or when cloudy – the results will be much better.
Automatic setting without flash

Colours are terrible but there are no overexposed areas on the model and the shadows are very soft.
Automatic mode with White Balance set

White Balance has to be a setting which most modellers forget to set yet it is one of the most important. Most if not all digital cameras have trouble auto-setting the correct WB values when used under artificial lightning. Set the WB on your camera to incadescent or similar (depending on the type of lights you use) and the result will be there. Even better is to manually set the white balance for specific condition which advanced cameras offer – check your camera manuals on how to do that.
setting, koji najvise maketara zaboravlja da nastavi – WHITE BALANCE. Kamere ne znaju da dobro avtomatski nastave WB, pa jim moramo mi pomoci. Jedna opcija je, da izaberete jednu od nastavitava za zarulje, koje sve kamere imaju. Jos bolja opcija pa je, da rucno nastavite white balance – procitajte malo manuale vasih kamera kako to napravit.
Automatic mode with White Balance set + Exposure Compensation
The settings are the same as before but I additionaly encreased Exposure Compensation to EV+1.0; When you’re taking photos on lighter background than the model, you have to compensate. If you will shoot a light model on a dark background, you’ll have to decrease the EV to minus values.
Aperture mode with White Balance set + Exposure Compensation

Automatic settings try to use the minimal time of exposure which leads to low f-stops and the model on your photo will be sharp only at the focus point. To improve that, switch to aperture priority mode on your camera (A for Nikon, Av for Canon) and set the f-stop as high as it can go (depends on the lens you are using). Compact cameras are usually limited to max. f8. Take the photo and you’ll see the model will be sharp from tail to nose. Also avoid wide angle shots as you’re gonna distort the shapes – I never shoot any closer than at least 50cm from the model, sometimes even more.
To summarize:
- tripod
- diffuse light
- Aperture priority – high f-stop
- Exposure compensation
- WHITE BALANCE!
If you have any additional questions, I am happy to answer to them.

I think this is pretty serious, actually all you are in to 🙂
I say thanks, for the look at your site..
Regards Jesper
Thank you very much! I try to do my best 🙂
Great tutorial Seb , very easy to follow and very useful for beginners like me ! cheers Tony (yak face)
You are welcome, mate!