
Progress shots
 Since the canopy will be closed, I’ve decided to go with the decals for cockpit. There’s also an option to paint the lovely alternate plastic parts, full of tiny details which look really really good.
 Simple trick for landing lights – use kitchen aluminum foil to cover the back of the light…
 …effect will be like the real thing and better than any paint.
 a few pieces of the exhaust waiting to be put together…
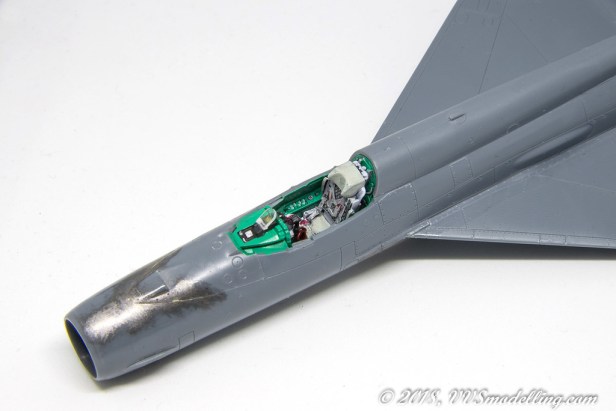
 Although some say decals look too flat, I don’t see quality made cockpit decals any worse than prepainted photo-etch parts. And they are perfectly acceptable for closed canopy build.
 The back of the pit is also nicely made and darker wash brings out all the lovely details. Unfortunately with the seat installed, there won’t be much to see.
 The narrow seam when joining fuselage and wings has been mentioned before. It is maybe 0.1mm wide so it shouldn’t be too tough to fix. I also experienced the seam on the front fuselage halves joints – Luckily, scraping some plastic off the not visible parts of cockpit tub and front wheel well remedied that.
 This upper part on the nose that comes wedged between fuselage halves didn’t want to sit properly – it fit in the windshield area, but not at the front – some puttying and sanding was required to fix it. It could have been my doing, but I remember I had some problem with the same part in 1:48 as well.
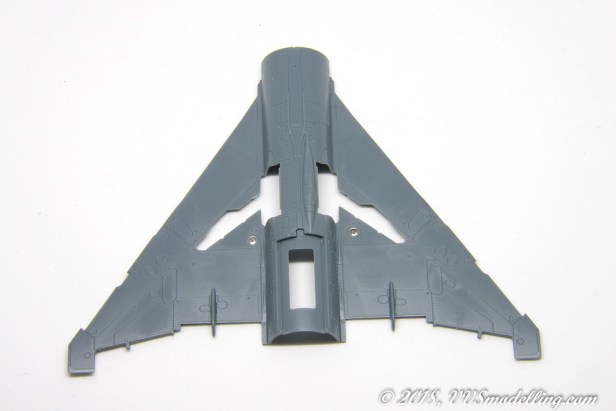
 That gap, that appeared on all builds so far didn’t require anything else but a little smear of putty at both ends near the wing joins. As you can see, after I applied some glue, it transformed into a normal looking panel line.
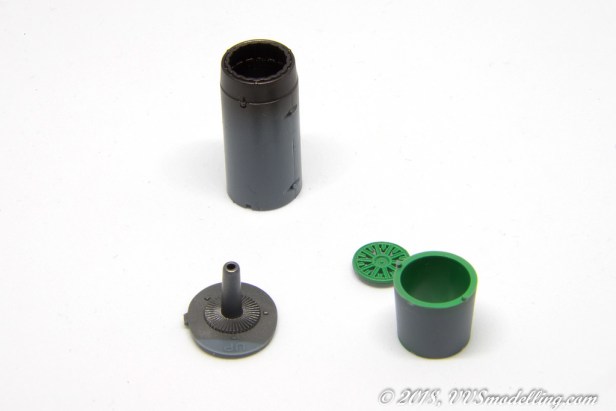
 Interesting solution for the exhaust – instead of usual two-halves approach which requires seam clean up, this 1:72 version comes with a single-piece exhaust… Maybe slightly thick but should it this time.
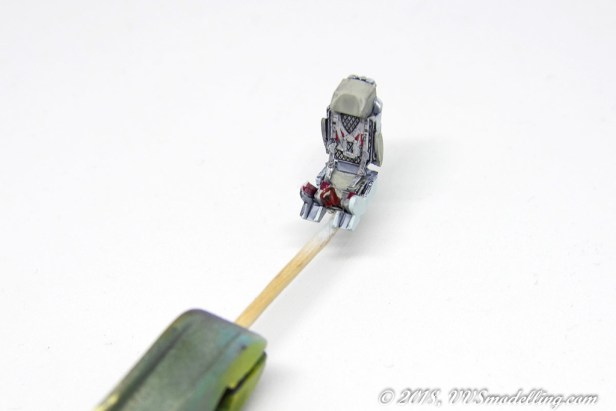 Ejection seat looks really nice out of the box, but lacks harnesses and ejection seat handles. Harnesses are provided as decals but since decals are way too thin to look good, I decided to cut out the decals and attached them to the seat with CA glue. Ejection seat handles were made out of soldering wire.
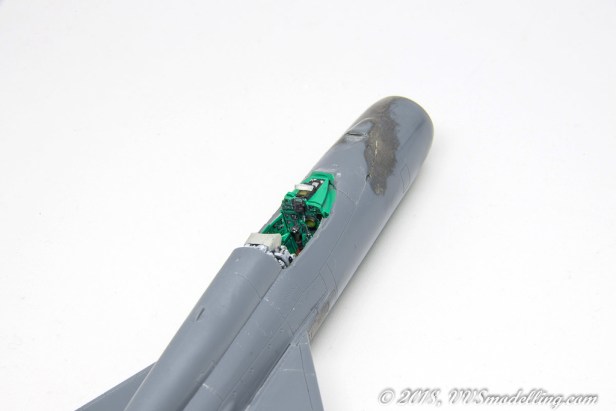
 Cockpit more or less finished. Just to add the gunsight recorder and that’s it.
 Model is now all built up and ready for some primer.
 I’ve heard so much good stuff about Stynlrez primer that I had to give it a go! Used the easily available Mig One Shot primer (rebranded Stynlerez) and was pretty pleased with the result.
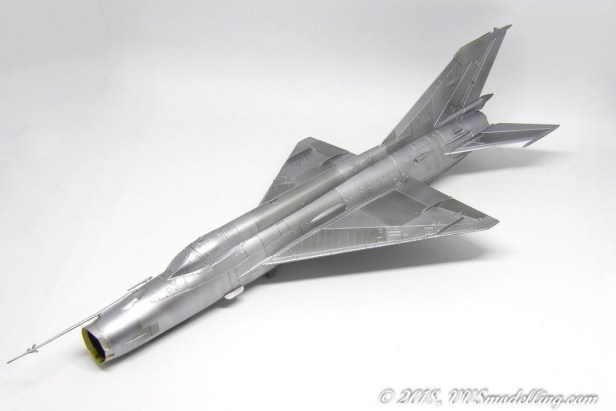
 Next came some detail painting like dielectrics and intake nose ring, followed by a coat of Alclad Aluminum.
 I hate masking so much but do it carefuly and patiently and you will be rewarded.
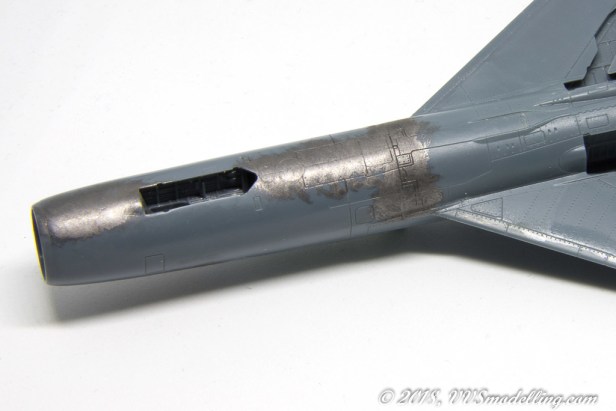
 And main paint job finished – I’ve used Magnesium for darker panels and some fuselage streaking and then blended it in with misting the Aluminum. The effect is very subtle on bright light and a lit more pronounced in low-light situation. I really love painting with Alclads.


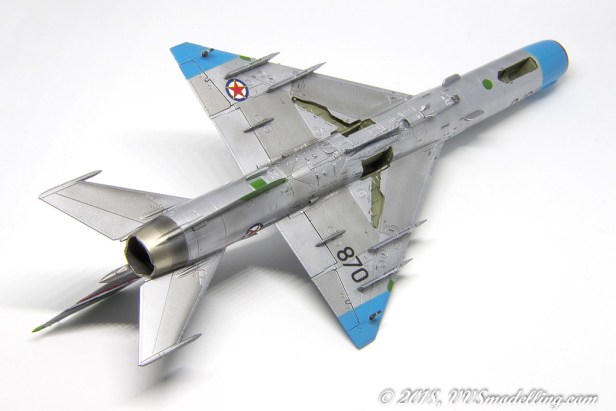
 Calling this paintjob finished!


 It may not show, but after many hours and several hundred (almost) invisible stencils later, the decalling is finished!
 Slowly moving towards the finish line! Washes done, landing gear attached, it’s time for a final coat of semi-matt and fixing some final details.

Yea, the 1st, almost completed, Eduard MF in a nice profile selection.
Dint expect those gaps on the fuselage oO.
I’m waiting the PF version since i have a lot of MFs from RV in stock.
Any idea if the nose has the same diameter with RV and if the front canopy fits the RV?
I’m thinking to improve RV with Eduard parts.
Well, those gaps actually mostly dissapear when you glue the fuselage together… but dryfit identified the problem first hand.
Unforuntately I cannot help you regarding the comparison of Eduard and RV dimensions. When I first saw RV’s nose and canopy, I’d decided to stay away from them as far as possible.
Mig has re-branded the Stynlrez primer?
Uk’s Ultimate Products had too!
oh, I didn’t know there’s two rebrands on Euro market… well, the more the merrier 😀