
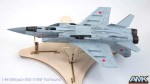
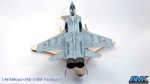
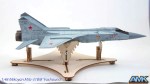
After a marathon 7 day sessions, all or at least most of the decals have been applied. I have to say I was really impressed with Begemot decals. They are very thin, much thinner than AMK ones, as mentioned in my review, the print is thinner too and they really look great on the model. They literally suck into panel lines by themselves and no decal softener was needed. I will have at least one more decal session when I’ll finish the weapons, but the main thing is done! The only criticism in practical application of Begemot decals was, that there were errors in the instructions – I’ve hit a few mislabeled stencil decals. On the other hand, placement instructions are clear, so you can figure the correct decal just by comparing the shape of decal to the instructions and if there are L/R side opposite decals, they are labeled as, for example, 89 for the left and 90 for the right side. Decals being done, it’s time to dirty her up a bit 😉

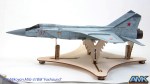
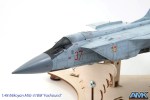

Really nice build. I also like the holder -pretty cool idea.
Thank you! That was the best model investment of 2015 for me!
Such awesome. Those stencils really make a difference!
thanks Nicholas… it was a core to apply them, but indeed it looks great.
Looks great Sebastijan. The kit looks superb , the begemot decals adds to it and your weathering is very nice. It must be a piece of cake for you , an 1/72 modeller. Aris
Thanks. Well, larger scale has its benefits, but details also take longer time to finish properly.