
One of the main challenges building any Flanker variant has to be natural metal finish on the engine areas as well as tail planes on Su-35S. I guess there is as many methods as there are modellers, but if you are struggling with this part of the build, I hope my step by step guide will be helpful to you. All paints used are Alclad II unless otherwise stated.

Interior of exhaust cans was painted White and weathered using Brown, Black and Sand pigments and dry pastels.

Afterburner (forsazh) chamber was painted with Jet Exhaust and then drybrushed with ModelMaster Stainless Steel.

Drybrushing effect can be seen through the exhaust apertures.

In preparation for the metallic treatment, surface was primed with Grey primer with microfiller.

The whole area was then given a coat of Jet Exhaust.
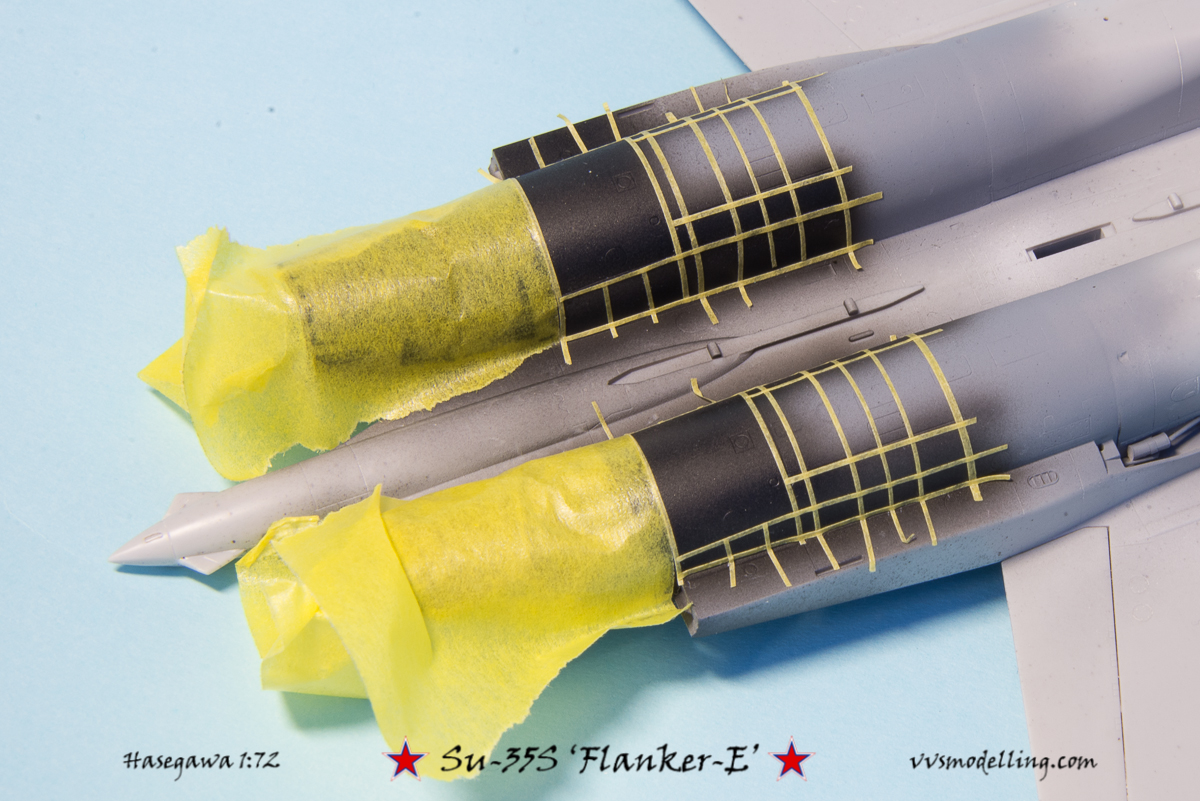

Using reference photos, the tiny grids were masked using thinly cut Tamiya masking tape.
Next step was applying White Aluminium to the lighter shaded areas.
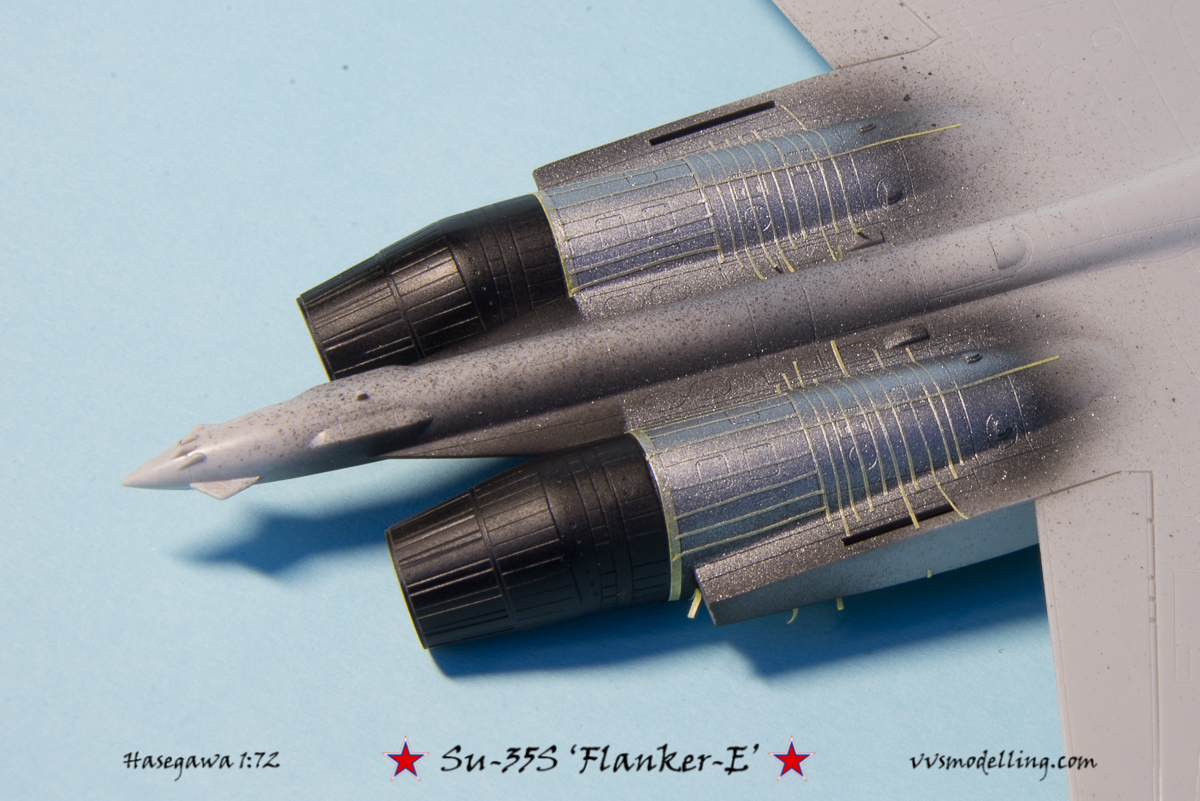
Copper was applied next in thin coats.

Notice how darker the bottom side appears because of the darker background paint (Jet Exhaust vs. White Alu on top).
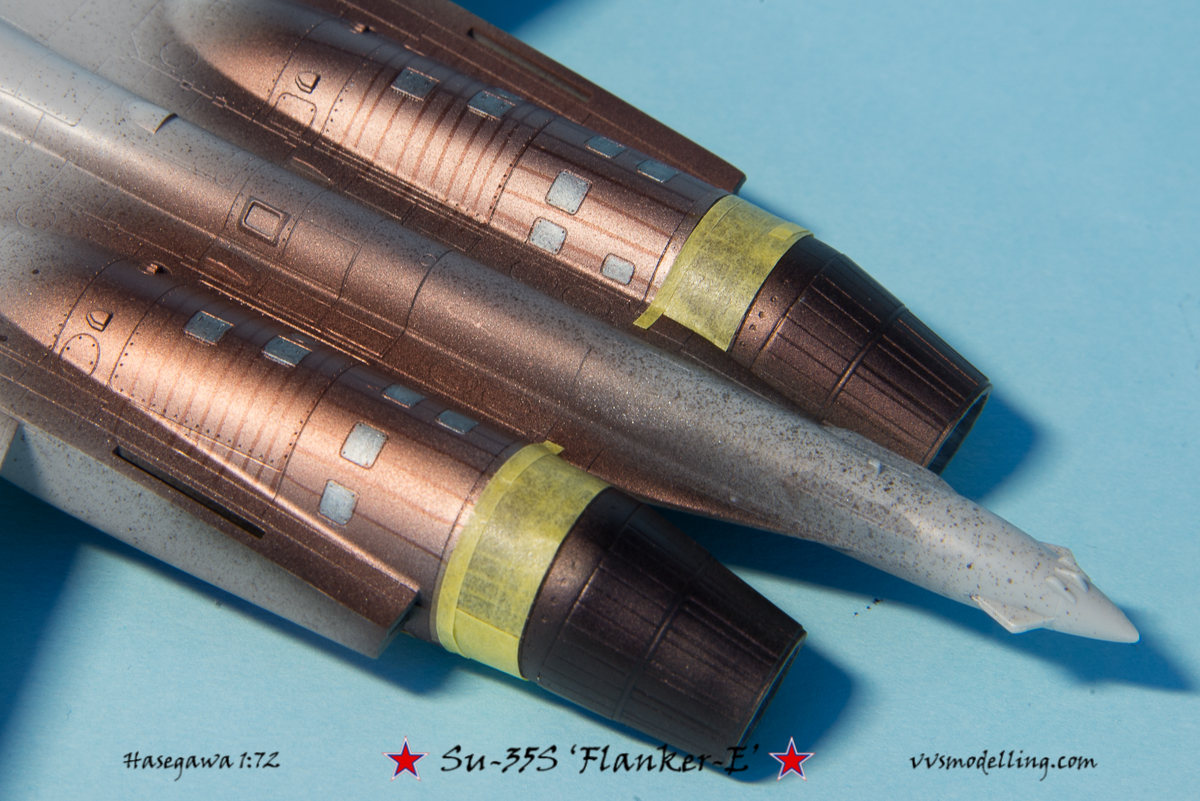
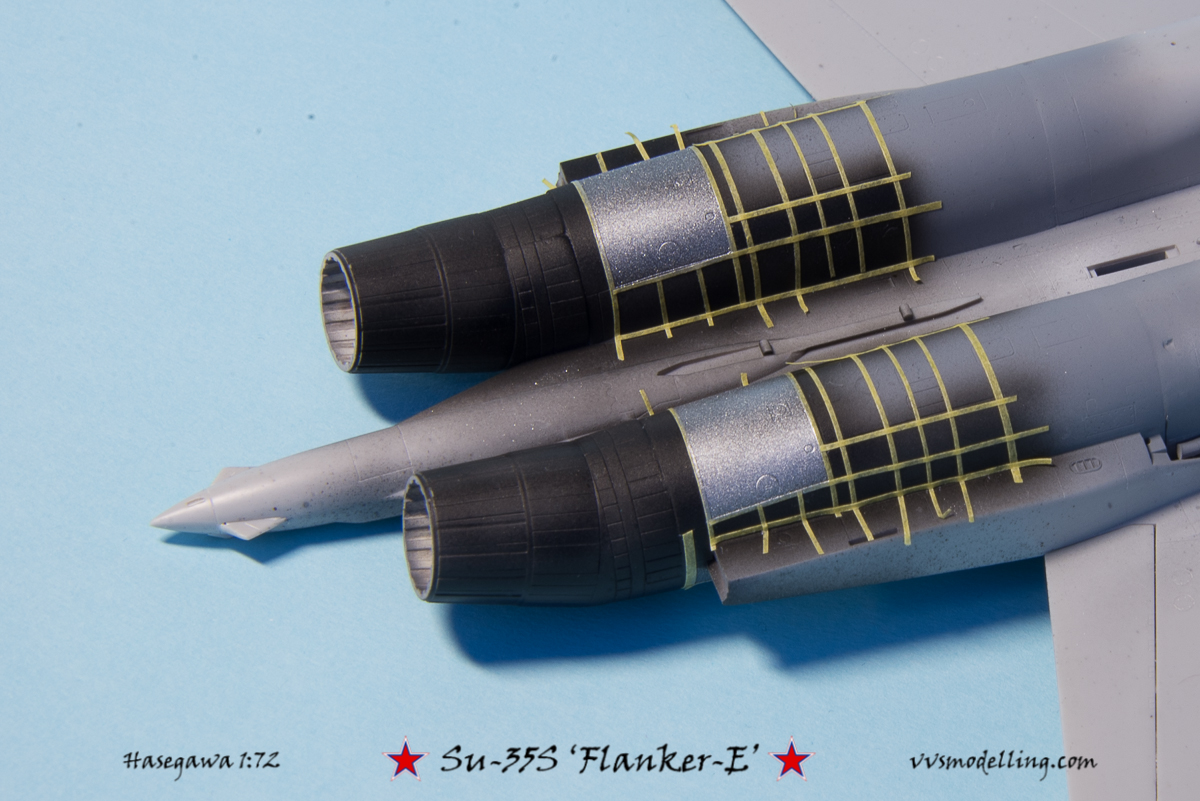
All the engine servicing panels were picked up next using a thin brush and ModelMaster Stainless Steel.

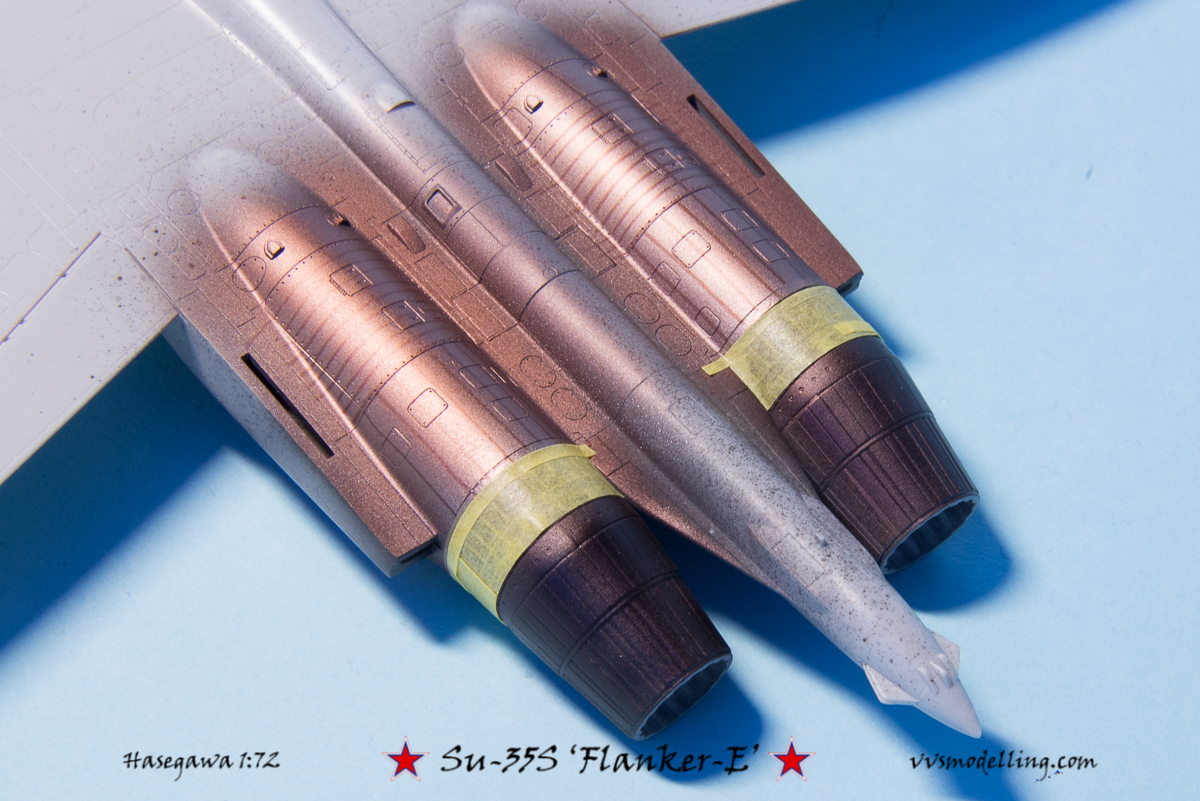
Using Pale Burnt Metal was the next step, blending everything together and giving the area that yellowish tint.

And finished result. In the end, some Exhaust manifold was applied to the exhaust petals. Notice that the grid effect can barely be seen, just like on the real deal. This however is not a finished deal yet. The bare metal areas will be masked next and when all the painting is finished, they will be unmasked and Tamiya weathering set used for those blue metal effects.

Tail planes also went through similar treatment – Jet Exhaust base and a lot of masking…
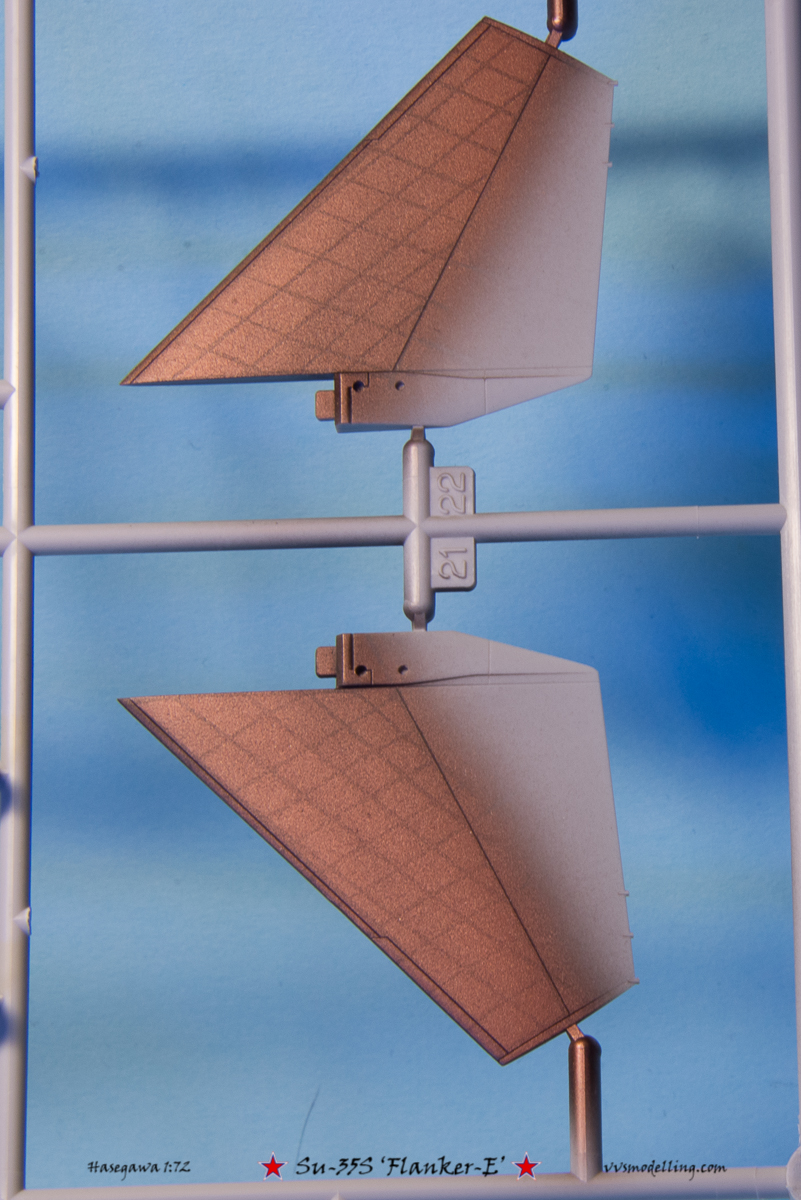
… followed by Copper…

…and finished using Pale Burn Metal. Note that all the surfaces reflect light differently so the effects are depending on the source of light and view angle – just the same as on real aircraft.

Fantastic build, I’ve enjoyed looking through your site!
Thank you!